Saturday, January 28, 2012

It's Pizza Night!

Garden veggie pizzas are another recipe worth making.  Pizza cravings get out of control some days, but it's expensive, full of stuff that's bad for us, and lacks any nutritional value (my kids are straight up pepperoni eaters so don't even get veggies with their pizza).
To make pizzas throughout the year you need to plan during the vegetable season.  Make up some batches of spaghetti sauce, and blanch, chop/slice, and freeze some veggies in small portions.  Or you can get crazy and make tons of pizzas up in one day and freeze them in gallon bags for frozen pizzas ready to bake.
Blurry, but this one day's harvest is enough tomatoes to make a whole batch of sauce.

Garden topping options include:
-spinach
-kale
-tomatoes
-mushrooms (trade with your neighbor who grows shiitakes in a closet)
-sweet peppers
-jalapenos or other spicy peppers
-onions
-fresh basil
-fresh herbs in general
-artichoke
-garlic
-zucchini

I wouldn't necessarily build a pizza with all of these toppings, but you could pick 3 or 4 for each pizza you make.  Some ideas: artichoke, zucchini, mushroom, and chicken with pesto sauce;  mozzarella, kale, tomato, fresh basil on tomato sauce;  barbecue sauce, jalapeno, sweet pepper, onion, hot Italian sausage.  That one's for the spicy fans.

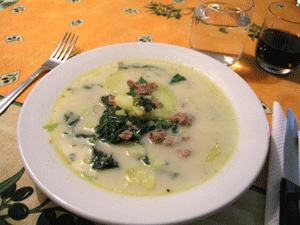
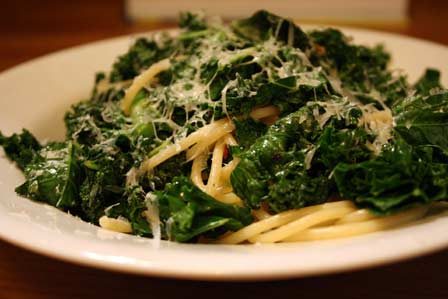
Not all veggies work out well for toppings, the ones that don't you save for your sauce.  While pizza sauce is primarily tomatoes, it won't hurt it to work in some other veggies to give it character and nutrition.  Basil, oregano, onion, garlic, tomatoes, mushrooms, and bell peppers (any color) are pretty much expected to be in a good spaghetti or pizza sauce.  Some you might not think of though are: eggplant, this mild flavored vegetable thickens sauces and is decidedly an acceptable addition to many Italian foods; carrots/sweet potatoes, these orange veggies add beta carotene and can help to sweeten a too-acid sauce without adding sugar, they also won't change the color of your sauce noticeably; summer squash, my stepmom believes these belong in everything, cooked into tomato sauces they add nutrition without making a drastic change in flavor; kale/spinach/chard, unlike some greens, these have decent cooked properties, they are full of nutrition and pizza may be your only chance to get your kids to eat them (use sparingly to avoid the obvious color change).

Pizza crust is easy, any bread machine comes with some kind of pizza crust recipe, or you can pick up a Boboli or refrigerated tube of crust.  I prefer to make my own in the bread maker or by hand from scratch.  Recipes are all over the internet for pizza crust, just pick one and give it a shot.

Sauce recipes are much more challenging.  You have a few options in sauce, you can do home canned pizza sauce, or a spicy version of home canned, or a pesto sauce, or a white (alfredo) sauce.  If your goal is to use up your garden produce choose one of the first three.  If your goal is to keep the nutrition content high and fat and calorie content low for your pizzas, also choose one of the first three.  Alfredo sauce has it's place, but on top of a pile of empty calories, topped with a pile of saturated fat... it probably isn't worth it.  It would be delicious over homemade whole wheat linguine with fresh spring vegetables though!  I am a foodie, but I am not a chef.  Sadly my mouth's idea of delicious and my hand's ability to cook often end up on separate sides of a cookbook.  So we keep it simple around here.

To make a basic tomato sauce:

Get together enough tomatoes to fill a glass baking dish about 8x11, use primarily saucing tomatoes.  Saucing tomatoes are meatier than slicers or cherries, they tend to have smaller seed pockets and less juice to them.  Heat a small pan of water to boiling, with a slotted spoon dip each tomato in the boiling water for a few seconds then drop in a bowl of cold water.  This is totally a two person job and having a helper makes it go much faster.  Once each tomato has cooled you can easily cut off the stem and core, then slip the skin off the tomato.  Chop each tomato into large chunks and toss into the roasting pan.  Don't worry about all the juice and seeds on the cutting board, in fact squeeze the juice out of some of the bigger tomatoes before chopping.  All of the juice and seeds will just make it take longer to thicken your sauce.  If you want to add red pepper to your sauce it's a good idea to core and quickly chop them as well to roast with the tomatoes.  Set your oven to about 350F,  roast the tomatoes for an hour or so.  When they are done they will be tender and have developed that fabulous roasted vegetable smell.  Nearly all of the vegetables can be roasted like this before being added to a saucepan for simmering, I don't recommend it for greens, mushrooms or herbs though.

When the pan of tomatoes is roasted, pour off some of the liquid at the bottom of the pan.  Chop some onion and garlic.  Get a large stock pot or 6-8 quart pot and heat a few tablespoons of olive oil in it.  Sweat the garlic and onion in oil until it is soft, and gently browned.  Taking the time to do this will give these aromatics a sweeter flavor.  Pour in your roasted tomatoes, roasted red peppers, and any other veggies.  Give this mix a quick twirl with a stick blender (or blend briefly in a regular blender before adding to the pot).  Cover and let simmer about 20 minutes.
Homemade spaghetti sauce on the stove


After the 20 minutes is up, blend to a nice smooth puree.  Your sauce still won't have much flavor, but it should smell great.  Add in dried herbs: bay leaves, Italian seasoning, and salt (lots of salt!).  Remember this is a big batch of sauce so add quite a bit of seasoning to give it the flavor you want.  Allow the sauce to simmer for another 10 minutes, then taste and add more seasoning as needed.  Lastly, add about a cup of red wine (capestrano, zinfandel, or anything that isn't sweet is fine), and throw in some fresh basil.  If your sauce still tastes too acidic, add a couple tablespoons of sugar.  Uncover and turn the heat down to a low simmer, let the sauce cook down to the desired consistency.  Double check that it tastes right and salt, sugar or season until the flavor is right.  Remove the bay leaves.  This sauce is pretty basic and can be jazzed up when you are ready to use it for lasagnas, spaghetti, pizza, or in a meat ragu or whatever other recipe you have.  Italian seasonings can be skipped over also to make an even more adaptable tomato sauce.

You are then able to can your tomato sauce using a water bath method, but be sure to add a tablespoon of lemon juice to the bottom of each pint jar to ensure the acidity and prevent botulism.**  Or you can scoop the sauce into freezer safe containers the appropriate size for one meal and freeze up to a year.

**Disclaimer: AnywhereEden shall not be responsible for any illness or loss due to home canning and preserving.  If you plan to do home canning get the Ball Complete Book of Home Preserving for full instructions on safe home preserving.  I am not a pro at canning, please be advised that tomatoes border on low acid and it is always safer to pressure can or freeze them.  Adding acid will help prevent botulism but is never a guarantee, and always follow canning safety measures.  Keep jars, lids, and rings clean; throw away any jars with broken seals, visible mold, bulging lids, or strange smells.  If it doesn't look right... throw it away! Don't take the risk of eating spoiled foods. Learn about botulism here.


Save some time and freeze sauce in meal-sized containers.
Pesto Sauce:

Pesto is an easy sauce to make, it's delicious and recipes for basil pesto can be adapted to make other herb pestos, if you've made pesto in the past and been saddened to see it oxidize (turn brown), you can prevent this by adding some lemon juice to the pesto and also by not allowing it to get too hot.  Tossing fresh pesto into hot pasta is guaranteed to make it change color, instead let the pasta cool a bit before adding the pesto and it shouldn't brown as much.  Some grocery stores' canning aisles carry oxidation prevention agents that may work to improve this but I have never tried one so can't advise regarding their effectiveness.

2  cups firmly packed fresh basil leaves
3/4  cup grated Parmesan cheese
3/4  cup olive or vegetable oil
3  cloves garlic
1/4  cup pine nuts
1 Tbsp. lemon juice

   1. In blender or food processor, place all ingredients.
   2. Cover; blend on medium speed about 3 minutes, stopping occasionally to scrape sides, until smooth.
   3. Spoon into 8 oz. or smaller freezer containers and freeze up to one year.


After a long day of making sauce, the perfect way to end your day is to throw together your pizza crusts, toppings, and sauce into a garden pizza feast.

Enjoy!

Thursday, January 26, 2012

Issues With Comments

It seems Blogger is having some issues with comments for many blogs, until it is fixed your comments may not show up for me to see.  I appreciate them though, and once it is fixed you will be able to comment and I will be able to make responses.  Sorry about this!

AnywhereEden

UPDATE: Comments seem to be available and functioning properly again, thanks for your patience.

Wednesday, January 25, 2012

Deadheading Doesn't Mean Following Jerry Garcia Around

So say you bought a cute little pansy plant, it's brimming with blossoms, looking healthy and beautiful.  You bring it home from the nursery and gently plant it into a nice roomy pot hoping to have a large pansy plant pouring blooms over the sides of the pot in no time.

You water it daily, you add a little fertilizer when the blooms start to fade, and wait patiently for new blooms to follow in their wake.  Nothing happens.  The plant is healthy, it continues to grow, but there are very few new flowers coming and it's starting to look like a foliage plant instead of a flowering plant. 

Deadheading is the process of removing the dying blooms to encourage new flower growth.  Most gardeners already know this, and practice deadheading regularly.  More important than simply understanding that you need to deadhead your flowers is knowing why you need to, what happens if you don't, and what that translates to in other parts of the garden.

Plants are working with a limited amount of nutrients, sunlight, and water with which to grow.  Annuals have to do all of their growth, flowering, and seeding in one year.  So think about it this way, if you put a pansy seed in the ground the first thing it does is grow roots, stems and leaves; this is like a baby learning to eat before learning to walk or talk, the stems support the leaves which in turn reach to the nearest light source to feed the plant while the roots dig deep to support the growth and pull in nutrients from the soil.  So your little plant has learned to feed itself, next it will try to reproduce (luckily babies don't get a jump start on this one). Most plants reproduce by exchanging pollen between flowers, so the pretty pansy flowers you select are actually the plants sexual organs.  What lovely ovaries you have, little pansy!  Your plant develops these sexual organs in an attempt to achieve pollination (or fertilization), once a flower has been pollinated the petals will die off as they are no longer necessary to attract bees and other pollinators, and the plant must redirect it's limited energies to growing seed from the ovaries at the base of the flower.  Grow, fertilize, reproduce.  This is the basic life cycle of a plant. 

Where does the benefit of deadheading come in?  Your plant grows, puts out flowers to reproduce, then... you pluck the flowers and soon to develop seeds with them.  You have stopped the cycle, so the plant responds by trying again: reproduce! You pluck again before seed development. The flowers just keep coming as the plant struggles to meet the deadline of fall frost to have fully developed seed to grow the next season.

Apple and hazelnut trees grown out of control, pruning helps keep trees healthy.
A lot of new gardeners struggle with the concepts of deadheading, pruning, and pinching off new growth.  It's hard to accept that you need to remove healthy (and unhealthy) growth from a plant to improve it.  Even seasoned gardeners have difficulty pruning a fruit tree if they imagine all the fruits that branch might produce.  Keep in mind that growth is good, but some growth is not.  Overgrowth in a tree can cut down air flow through branches leading to mold and fungus growth, dead flowers left to seed on a annual will make it leggy and bare, and too many flowers in a tomato plant can lead to an overabundance of poor fruits. 

Remember that a plant is working with a limited nutrient supply.  Your apple tree or tomato may put on tons of flowers, but if they aren't able to pull up adequate nutrition from the soil and sun, the fruits that develop may be tasteless, small, or susceptible to pests and diseases.  Far better to trim down excess branches or flowers and ensure that the crop that reaches maturity is of the best quality.

My dad's property has an apple tree that has probably been there for eighty years, it is beautiful in full bloom.  Dad never pruned it, and insisted the fruits on it were not worth eating, several years ago one of the largest branches broke off and I helped him to remove it.  I told him it needed to be pruned, by at least 1/3 of the branches.  He was uncertain at first and was afraid it would harm the tree beyond recovery.  Finally I convinced him and we took out all but the 3 largest branches, and a few smaller ones.  The tree is still alive and I'm happy to report that the apples that year were some of the best he'd ever gotten from that tree.  Deadheading, pruning and pinching plants are methods of removing growth that impairs the plant's ability to produce the very best that it can.  Keep this in mind as you cringe and fret with pruning shears in hand.

The Square Foot Method

Cover of All New Square Foot Gardening

I've mentioned the Square Foot Garden or SFG Method several times so far.  This method was developed by a man named Mel Bartholomew who realized that the standard row method of gardening was wasteful and produced poor results, so he developed a different (and in some ways better) method.
Mr. Bartholomew's Square Foot Method of gardening has some advantages, less water, less space needed, more produce grown.  It is adaptable, easy to understand, and lends itself well to the backyard gardener.  The method stems from the idea that plants need a particular spacing to do well and rather than fill widely spaced rows with carrots 3" apart, you build a small raised bed that you can reach all the way around, divide it into one foot squares and plant a different crop in each square, spaced according to recommendations.  With this method a 4 foot by 4 foot bed will have a total of 16 square feet, each of which is planted with a different crop; one tomato, 4 lettuce, 16 carrots, 8 peas, 2 cucumbers, etc.  Each square contains the appropriate number of that crop based on seed spacing guidelines.  So a 12 inch by 12 inch square can support 16 carrots, evenly spaced in 4 rows of 4 seeds, each 3" apart.

Mel also realized that his garden beds only needed to be 6" deep, very few plants required more than that depth for root growth.  Originally he used 1 foot deep beds, but discovered that the extra depth was wasted and eliminated it.  He filled his beds with "Mel's Mix" a blend of compost, peat moss and vermiculite or perlite that he discovered was perfectly suited for growing vegetables, while staying soft and fluffy, rather than compacting or developing a crust like many soils.

With Mel's Mix he could fill a bed with the perfect soil for far less cost than repeatedly improving the soil in the ground.

Mel's books cover everything needed for a SFG garden, most of the information is very useful, some of it is just a reflection of Mel's own tendencies to be precise and linear.  \

In general I think the book is worth reading, which is why I list it in my Recommended Reading links.  Mel suggests laying out a permanent grid over the top of the bed to show the squares though, while he is right that this is a way to save time during planting, I dislike the straight lines of the grid showing amidst the wild tangle of plants.  It's just too structured for my taste.  Instead I go out each spring and lay tape over top of the beds to show my grid, do all my planting and then remove the tape.  Also, Mel suggests mixing things up to confuse pests, and while I think the idea is sound, I find I still end up with a straight row of peas; I can't fit them all mixed in with other plants because they require trellising.

Not all of Mr. Bartholomew's advice is useful to everyone.  The primary things I got from his books were:  bed size --make beds small enough to be able to reach every square easily; soil --Mel's Mix is relatively inexpensive and gives more bang for your buck; plant spacing --a small space can easily grow far more than you'd expect.

Last summer was the first time I tried using the SFG method, and I have to say it worked remarkably well. I was very happy with the production of my garden.  This year I plan to try pushing the limits of the SFG method by planting my larger plants by the square, then small root crops like green onion, carrots, radishes and garlic will be planted in rows between each square.  I am hoping that a few small root veggies won't crowd the larger fruiting veggies too much and will save me a few squares of planting space that can be used for larger plants.

In conclusion, buy or borrow from the library Mel Bartholomew's book.  Look it over, see what you can find in it that may prove useful.  I can attest that his methods have proven themselves in my garden and would love to hear about other successes (or failures!), and what has been helpful to other gardeners.

Tuesday, January 24, 2012

Pea Recipes

Obviously peas can be tossed into just about anything to brighten it up and add some vegetable goodness.  I prefer to eat snow and snap peas fresh.  I also toss fresh snow peas into stir fry at the last minute, just enough to warm them through.  Peas can easily be blanched for 1-2 minutes, drained, and frozen in bags to store them for up to a year.  But if you have a bumper crop and no idea what to do with them, here are some recipes specifically for peas. 

From The Kitchen Garden Cookbook (a.k.a. Allotment Cookbook) edited by Caroline Bretherton:*

Pea Soup with Mint Gremolata

For the soup:
1 onion finely chopped
2 tbsp butter
1 potato coarsely chopped
1 lb. peas in their pods coarsely cut up
5 cups chicken or vegetable stock
1 tsp. superfine sugar
1 sprig fresh mint
Salt and pepper
Small amount half and half

For the gremolata:
2 tbsp finely chopped flat leaf parsley
2 tbsp finely chopped fresh mint
2 tsp finely grated lemon zest
1 garlic clove finely chopped

Gently cook onion in butter about 7-10 minutes, until soft.  Add remaining ingredients for soup, except half and half.  Bring to a boil, cover, reduce heat and simmer about 20 minutes.  Until vegetables are very soft.  Remove and discard mint sprig.  Puree soup with stick blender or standard blender, strain through sieve to remove any strings or pod pieces, adjust seasoning to taste.  Can be served hot or cold, or frozen for later eating.
Mix together gremolata ingredients.  To serve, ladle soup into bowls, top with a swirl of half and half and a sprinkle of gremolata mixture.

*This is an excellent cookbook full of recipes for garden vegetables.

From Too Many Tomatoes, Squash, Beans, and other Good Things: A Cookbook For When Your Garden Explodes by Lois M. Landau and Laura G. Myers:*

Shrimp Risotto Salad

In large bowl combine:
1 cup peas, cooked
2 1/2 cups cold, cooked rice
1 cup diced celery
2 green onions, minced
2 tomatoes, quartered
1/2-1 lb. fresh, cooked shrimp
6 ozs. marinated artichoke hearts

Mix together and pour over salad:
Oil from artichoke hearts
2 Tbsps. white wine
1 tsp. anchovy paste
1 tsp. sharp prepared mustard
1/2 tsp. ground dried sage

Toss salad and dressing together and chill at least one hour.
Top with 2 quartered hard-boiled eggs and a little minced fresh parsley.

For some other ideas check out these websites:

Martha Stewart's pea recipes


Yes Peas! recipe pages


Eating Well Healthy Pea Recipes


My mom also has a recipe that she has made for many years with shelling peas, called Creamed Peas and Mushrooms, I will have to call her and get the recipe so that I can share it here.

Pea Culture

Hopefully I can get a few posts about the culture of different veggies up before spring comes along, to help out gardeners trying new things; on that note, this post is all about peas.

Pea plant in full fruit.


Peas originated in the Mediterranean and Middle East regions, they are eaten fresh or cooked.  They can be frozen, canned (pressure can method), or dried.  Peas are harvestable between 50 and 75 days depending on variety.  There are three primary types of pea; the snow pea, snap pea, and shelling pea.  Shelling peas are removed from the pod and only the pea seeds are eaten as the pods are tough and tasteless.  Snow peas are the variety most often seen in stir fries, whole pods with smaller undeveloped seeds inside.  Snap peas are eaten in the pod as well, but are even sweeter than snow peas and have a crisp, thick pod that is nearly stringless.  Depending on which way you prefer to eat your peas you could plant one, two or all three types of pea in your garden.

Peas are one of the first things planted in the spring, they can germinate in soils that are only 40 degrees F.  So long as the risk of hard frost has passed they can go directly into the garden.  Peas should be sown in the ground, rather than started indoors.  They are long and slim vining plants and don't always cope well with transplanting, they are also such fast growers, and have such large seeds that it's just much simpler to put them in the garden.  If they fail to germinate in a week or so, plant another round and keep waiting.  Pea seeds should be planted fairly deep, about an inch underground.  They take up little room and require little nutrition, they can be planted as close as 1-2 inches apart.  Or in SFG style, 8 plants to a square.  Pea seeds will only be viable for about 2 years, so despite their inexpensive price don't be tempted to stock up too much.  Peas are very easy to save seed from, simply leave the end-of-season crop on the vine until they brown and become dry, then harvest, dry further inside, then shell and store seeds in paper bags. (Avoid plastic bags as they can trap any remaining moisture and rot your seeds).  Peas also self-pollinate, they don't require pollinators, and generally each flower will pollinate itself.  This means that to accidentally cross two pea plants you pretty much have to rub them together.  Pea seed will fairly reliably produce seed that grows the same plants as the previous generation.

A cool season crop, peas prefer temperatures below 70 degrees.  Peas that mature in temperatures over 85 degrees can develop tough pods.  Also, peas stop putting on flowers once temperatures get over about 85 degrees.  Harvest continually to ensure continued production of fruits.  You can increase your harvest by using a pea innoculant, but innoculant in no way guarantees a great harvest. 

The greatest risk to peas is the enation virus, and you should watch for enation resistant varieties when selecting peas for your garden.  Peas actually build nitrogen stores in the soil they are planted in, so are a great winter crop or rotation crop to keep in the organic garden.  Move them around each year, or start an early spring crop in the space of later heavy feeders.  By the time the peas are finishing their growth the heavy feeding summer plants should be ready to put outside.

As vining crops peas will need a trellis of some type, which also helps to keep the fruits up off the ground and in easy picking reach.  Peas are an inexpensive, simple to germinate, delicious crop to grow and are perfect for gardens that have small children around.  Kids can pick them easily, eat them straight from the vine, watch how they grow and twine around each other and the trellis.  In general peas are a great crop for anyone.

Snow peas, purple beans, and zucchini: one day's harvest.
I prefer to grow the snow or snap peas, shelling peas are so easy and inexpensive at the store it just doesn't make sense to use up garden space on them, snow and snap peas are expensive though.  Plus, I don't look forward to all that shelling.  Snow peas are delicious eaten fresh, they can also be blanched and frozen for eating throughout the year.  Snap peas are also delicious fresh; sweet, crunchy, and very low in calories; snap peas do not store nearly as well though and can become mushy if frozen or canned.  I suggest growing primarily shelling or snow peas, with a small bunch of snap peas just to eat fresh.  Last year I planted 6 squares of peas, each square holding 8 plants and I was overwhelmed with the quantity of produce I harvested from them.  It may not seem like it at first, but over time, as round after round of peas is ready to pick you will find that each plant is actually very productive.  How many peas (in the pod) will you eat each day?  However many you think that is, that's probably about how many plants you need.  I will happily eat my way through 20-40 pea pods in a day, and my husband and kids rarely eat them.  So I need 20-40 plants to produce that amount, if I plan to freeze them I will have to plant more.  This year I am putting in more than last year because I only ended up with 2 quarts of frozen peas and would like to have more than that for next winter. 


Next time: Pea Recipes, My Own and links to others.

Monday, January 23, 2012

Slugs and Snails and Puppy Dog Tails

Just a quick post to address some of the most likely pests you'll have issue with in the garden.  Most garden pests are particular, tomato hornworms won't eat your lettuce, aphids may just stay centrally located on your rose buds, cabbage moths will lay their eggs primarily on the brassicas.  There are a few very common, very indiscriminate ravagers that you may come in contact with though: slugs and snails and pets.

Non-gardeners don't tend to think about pets as being garden pests, but take the word of someone with three cats: they can be the most destructive pests of all.  Nothing taunts a cat into tearing up tiny baby transplants like the soft, freshly turned dirt in a garden.  It calls to them to be turned into their own private toilet.  One of my cats even enjoys nibbling on the plants themselves.  Dogs can be a problem too, if your garden is in an area where your dog runs free it looks like no more than the perfect place to dig, poop, and roll around.  There are many suggested ways to keep pets out of the garden beds.  They range from motion detecting sprinklers, to hot pepper sprinkles, to sticking skewers point-up throughout the bed.  I've tried a few of these options, the sprinkler didn't make sense since my garden is so small and the cats enjoy the patio without causing any damage.  The skewers did work but I stabbed myself with them while weeding more often than I liked.  I was not willing to possibly do real harm to the kitties with hot peppers though.  This year I will go with what seems to me to be the most practical solution, it won't hurt them, or the plants, and isn't terribly expensive either.
This year I will build 4'x4' frames of 2"x2" wood posts, and wrap chicken wire around them in a small dome.  These covers will let light and water through to the plants, but keep out the destructive cats and as a bonus any other critters larger than a mouse.  They also can work as handy frames to stretch plastic or floating row cover over if needed.

Slugs and snails are a huge menace to new transplants as well, and are most prolific just when plants are put into the ground in the springtime.  Again, there are probably about half a million suggested ways to deal with these menaces.  I prefer to bait for them with organic-approved slug bait to keep the population in check.  You can also use beer traps, boards, and copper to manage them.  Beer traps are one of the best known ways to rid yourself of slugs, they are shallow dishes buried to soil level and filled with beer.  Apparently slugs have a real taste for beer and will drown themselves trying to drink it.  For a more hands on approach, and one that won't leave your garden full of beer dishes, you can lay a board across the soil and leave it overnight.  Each morning lift the board up and pick off the slugs that have taken shelter under its shade, then squish them or move them somewhere far away from your plants.  The one other method I've heard of to keep slugs and snails out of the garden is to surround plants with copper, which supposedly gives them a little shock if they slide over it.  I have yet to try this one out, so can't guarantee its effectiveness.  However, you don't have to go buy special copper tape for this method, you can lay down a circle of pennies that touch each other around each plant.  Some combination of any or all of these methods should keep even the sluggiest garden safe.  I plan to give the pennies a try this year; I'll bait like usual and then surround a few plants with pennies to see if it makes a difference in the amount of damage done.

Happy Gardening!

Kale, Kale, Rock N Roll!

One of the few things that you can still be harvesting in January is kale.  Kale is a relative of broccoli and cabbage, a brassica.  In moderate climates you can grow kale nearly year round.  It has few, if any, issues with pests and disease.  Kale is incredibly high in nutritional value as well, being a dark leafy green.  So why isn't kale grown in every garden all year?  Many people don't know much about it, or have no idea what to make with all of that kale.  Like the rutabaga, kale has gotten a bit of a bad rep.

Since kale really does grow so easily I really don't need to go into much detail on kale culture, just give it dirt, water and sunshine.  It should start easily from seed and can be grown almost any time of year; obviously not during a heavy freeze, or major drought.  Since kale doesn't need much detail regarding care, the more important question to answer is "what do I do with all that kale?".

One option is lizard food.  Anyone who has a vegetarian reptile, such as an iguana, knows they require dark leafy greens in their diets to stay healthy.  So feel free to donate your bumper kale crop to a friend with an iguana.

Kale is not like lettuce, it has a much tougher texture and is not as good fresh eating.  Instead it should be cooked and added to foods.  It can be added to soups, casseroles, colcannon (a great vegetable and mashed potato dish), or wilted and served as a side dish.  It will wilt quickly and should be kept in the coldest part of your refrigerator.  When grow in colder weather it is sweeter, if grown during the summer heat it will become bitter.  The one thing to watch out for is to wash it really well, the deep ruffles in kale leaves often collect dust and grit.  Wash well and enjoy.

Here are some of my favorite uses for kale:

Olive Garden's Zuppa Toscana Soup


Colcannon


Bobby Flay's Sauteed Kale

Spaghetti With Kale and Sun-Dried Tomatoes


Vegetable Barley Soup


Kale is a great way to add some nutrition and color to just about any cooked dish.  Good luck with your kale cuisine!

Got Shade?

So far shade gardening has not been my forte.  Many homes are situated in a manner that at lest some part of the yard is shady and visible to everyone passing by.  You can either fill these areas with gravel or mulch or let them turn into weeds, or use them as a place to keep your compost and empty pots; or you can try to make them a part of your gardening experience by creating a shade garden.  Vegetables? Fruits? Herbs? Forget it. It's just not going to happen so don't go getting any ideas about try to grow these things in the shade.  Some more useful options are moss, hosta, or rhodies.  Rhododendrons are native to my area and it's obvious why.  The dark moist richness of the forest floor is all a rhody really needs.  They grow quite well in the gaps between the tall firs and strain outward to catch a passing ray or two of sunlight.  While rhodies will tolerate full shade, they prefer to glimpse some sunlight at least a few hours of the day.  Moss likes moist shady areas, and there are many varieties in different colors and textures that can fill a small area and at least make it look green.

The best way to plan for a shade garden is to visualize what plants grow in the forested areas near you.  Here in western Oregon we have fir stands, and growing below the treetops are rhododendrons, ferns, Oregon grape, mushrooms, huckleberries, bleeding hearts and Dutchman's britches (common names for the different colored flowers of the Dicentra genus), and columbine.   In shady cultivated gardens you can spot acanthus, begonia, hellebore, impatiens, fuschia, and hosta.  Some blend of the wild-growing and cultivated, the foliage and the flowering can offer the best contrasts for a shade garden.

If you have the room put in a rhododendron, surround it with a few types of fern, and fill in the small spaces around these with lower growing hosta, then tuck flowers like begonia, impatiens, bleeding hearts and columbine in around each.  The bonus of a shade garden is that you don't have to water nearly as much, in some cases not at all.  Many shade plants are also perennial, like hosta and fern, columbine and bleeding heart.  One year spent putting together your shade garden and an annual trimming of dead branches and leaves and pruning of shrubs can be all it takes to have a beautiful space where previously there was a muddy pit, or a tangle of weeds.

When choosing plants look carefully at the tags or the descriptions in catalogs, watch for a little half-black sun symbol, or completely black sun.  These mean partial or full shade.

Catalog entry for shade or partial shade plant.

If you are truly at a loss on how best to plant in a shady space, you can always resort to a rock garden, or a water feature (which will benefit from the lack of sun and grow less algae).

Perennial Herb Culture

Perennial herbs are generally the herbs with woody stalks that survive year after year.  In milder climates some soft herbs can survive for more than a year, such as chives.  Primarily the perennial herbs people think of are rosemary, lavender, thyme, oregano, sage, the mint family, and marjoram.  There are others but the culture of these plants is pretty similar between species.  Personally I don't recommend starting these plants from seed, the seeds are incredibly tiny, and a bit finicky to get started.  Plus they are available as starts everywhere and aren't terribly expensive.

Perennial herbs need a sunny spot that won't be a swamp during the wet season.  They manage pretty well in my area which is basically a temperate rain forest, but if they are in a depression and get too much water with too little drainage they can die.  I have never had a pest problem or disease problem with these plants.  In fact they have strongly scented oils that can act as repellents to some pests, and at the same time most produce a flush of flowers in spring or summer that attract many pollinators.  These herbs are a great addition to any garden, attracting bees and butterflies, smelling fabulous, keeping out pests.  They don't require any fertilization so long as they are in moderately fertile soil to begin with.  Adding nutrients early in the spring can improve the abundance of fresh growth in the springtime; but don't add more after June since they are finished with most of their growth at that point.

You can plant them in pots or in the ground around your garden, I wouldn't plant them in among your annuals though as planting new annuals each year could damage the roots of the perennials, and the perennials will spread quite a bit over time leaving your no room for the annuals after a few years.  If you put them in pots make sure to move them to a warmer spot during the winter.  I have never lost a perennial herb to frost when they're in the ground, but pots are not as insulating and I often have to replace potted herbs the next spring.
Pots of perennial herbs between vegetable beds.

Rosemary, thyme, sage, oregano and marjoram are all Mediterranean herbs; they are comfortable in hot, cool, dry or moist conditions; they will appreciate both thick clay soils and sandier soils.  In fact, I don't think I've met a soil they wouldn't grow in.  Mints on the other hand prefer a cooler spot with more moisture, sandy soil doesn't suit them well.  Different varieties of these herbs will grow in different ways also.  If you're looking for a ground cover an option to consider is a creeping or spreading version of rosemary or thyme, or a standard version of oregano.  All of these will stay low growing and spread over an area, they smell lovely and produce a sprinkling of tiny purple flowers in spring and summer.  Choosing variegated, or odd colored varieties can add some excitement as well, like lemon thyme with it's yellow and green splashed leaves, or purple sage.  For culinary use smell or taste the leaves of the plants before buying them to ensure they have the flavors you want as well as the look, woolly thyme for example is a spreading attractive ground cover but it is not as flavorful and therefore does not make a quality culinary herb.  No one will mock you for nibbling the plants at the nursery, I promise.
If you are looking for more upright growth in your herbs (for use as a back row with a fronting of bulbs or annuals, or something similar) chives grow a lively bunch of bright green onion-like tops, sage comes in a variety of colors and has a silvery fuzz to it's leaves, a standard (non-spreading) rosemary can reach 4 feet tall and act as a hedge, lavender stays fairly small and makes a great perennial border, and most varieties of mint spread by underground runner and stand up to 18 inches high.

All of these herbs can be cut fresh with a pair of scissors and added to foods, teas, or used as fragrance.  They can also be dried.  To dry herbs hold a bunch of stems in your hand no bigger than you can wrap your index finger and thumb around (if your bunch is too large the center may not get adequate air flow and can mold), tie the ends together with a string, hang in a cool, dry place where they will get ventilation.  Under the eaves of your porch, on a clothesline strung across your laundry room, wherever you can find the space.  I hang my bunches from my pot rack over the island, if my stove were underneath it I wouldn't hang them there because the heat and moisture coming off the stove could ruin the herbs.  Let them dry like that for a week or more, until the leaves are crisp and crumble under your fingers.  If in doubt about whether they are dry enough, just let them hang longer until there is no doubt.  Once they are totally dry you'll want to store them in airtight containers; either plastic bags stored in the freezer or in spice jars in the cabinet.  Either way you will save a lot of space by stemming the herbs and giving them a quick grind with a mortar and pestle or spice grinder. you can continue to hang your herbs in their bunches but they will lose flavor faster and can get a build up of dust on them if left for long.

My favorite way to deal with my dried herbs is to throw together some Italian seasoning, one of the spice mixes I use most often.  First I get my herbs all prepped for putting in jars or the freezer, then just mix together  roughly equal parts rosemary, thyme, oregano, basil, and marjoram.  Then store in a glass spice jar labeled Italian Seasoning.  If this blend isn't to your taste you can also add in savory, or red pepper flakes if you prefer it a little spicy, some people also add garlic, onion, or parsley.  I prefer to keep it a simple blend and add those extras only for certain dishes, or if I have no fresh onion or garlic.

20 year old rosemary at Dad's, rhododendron behind.
Some other great ways to use these plants include: lavender sachets, dried catnip for pets, herbal soaps and lotions, potpourri, rosemary barbecue skewers, sage smudging, teas, mint sprigs in drinks, and medicinal tinctures and teas.

Easy Plants Are a Myth

People often say that a certain plant is easy to grow, or difficult to grow.  I say it's BS.  Supposedly a great easy to grow plant that even a kid can plant is sunflowers.  Well, I have planted mammoth sunflowers many many years and they've always either failed to sprout at all, or grown the saddest spindliest flowers I've ever seen.  Last summer however my 3 year old son was helping in the garden and I gave him a couple sunflower seeds to bury just so he could plant some seeds that were large and easy to manage.  His two sunflowers topped 12 feet in height, they also put out flower heads that were a good 12 inches in diameter.  Maybe it was just better soil? Nope, I put in a few sunflowers too. Planted them at the same time and they only grew to about 6 feet and had 6-8 inch flowers.  I have no idea why, but the sunflowers loved being planted by the small boy.

Among the so-called "easy to grow" plants most people list perennial herbs, tomatoes, pumpkins, summer squash, annual flowers, and hardy greens like kale and chard.  If you are just starting out with gardening give these plants a shot, but don't give up hope if they don't do well.  Sometimes it will just turn out that you have a knack for celery (known to be a very finicky plant), while tomatoes fiercely dislike you.

My brother built a massive greenhouse and garden last summer, on my parents' property.  The garden there has been producing piles of tomatoes and summer squash for nearly 20 years.  He saved the hot crops for the greenhouse, but continued the tradition of putting summer squash in the garden, he also planted peas, turnips, carrots, kale, broccoli, and chard.  While this was the first year he managed such a large garden he is an experienced gardener.  Guess what? Everything in the garden did great... except the squash, and the peas.  For some crazy reason last year the only things that would grow well in that garden were root veggies and brassicas. 

Some crops are considered easy because they have few known diseases or predators, or because they can withstand some drought or flooding.  Very few veggies should be considered easy to grow, nearly all of the vegetables people plant are so carefully bred that they are entirely dependent on human kindness for survival.  Kale is one of the few that could probably manage on it's own, and in hot climates it is challenging to grow outside of the winter months.

Often when you have difficulty with a certain plant it is not because the plant is difficult but because you don't yet have an understanding of what it takes to make that plant happy.  Since a pumpkin makes a very small root compared to the massive amount of aboveground space it takes up, it doesn't generally need a lot of well worked soil.  The pumpkins roots won't spread much, they can be put in a 6" pot in a hole full of rocks and be content so long as their 6" of dirt is highly nutritious.  Meanwhile, carrots sprout from very tiny seed that then sends down a tap root, while carrots don't actually bulb like an onion (so they can be spaced fairly close) they are rather delicate and need their soil loosened and fluffed to make growth straight down easier.  If you've got heavy soil and only loosen the top inch or so, your carrots will never do well.  I have never yet been able to grow carrots well.  This year I plan to try again in the "Mel's Mix" soil, in hopes that it is light and fluffy enough to keep carrots happy.


Once you get a handle on what the plant needs to be happy you will find it easier to provide those things and have a very "easy" plant to grow.  For me, one of the "easy" plants I struggled with was pumpkins.  I put them in the ground and they got powdery mildew, or didn't sprout, or didn't grow beyond a sprout, or grew long and happy and healthy but didn't produce any pumpkins.  Each year I learned a few things so that I got a little closer to pumpkin perfection.  Initially I had it in my head that pumpkins were colder weather plants, it seemed reasonable since they aren't harvested until fall, I planted them in March and my seeds didn't sprout.  The variety I was growing needed about 100 days to reach harvest, so I figured out that I needed to start them indoors to keep them warm until the weather improved, this also helped prevent the mildew that sets in during the wet months in spring.  Once I had a good start going and the weather improved I moved it into the garden bed, but that year I let them sprawl and only had room for one plant: it grew well but no pumpkins developed.  Finally I began trellising, it gave me enough room to grow three pumpkins in my small space and finally had the cross-pollination needed to produce some very healthy fruits. 

Gardening is a learning experience, each year you find that you get a little better at managing the plants you grow and get a little better fruit or flower in return.  It's a struggle at first for most people, but it does get better.  You may never be able to get the hang of sunflowers, but you may grow the best turnips in the county instead.  There is no such thing as an "easy" or "difficult" plant, it all depends on the gardener, the garden, the weather, and how many butterflies flap their wings in Taiwan.  Gardening is truly an experiment in chaos theory unlike any other.

Friday, January 20, 2012

Hooray for Tiny Black Alligators!

Thought I'd share a little snippet of information I learned last summer.

In early June my celery plants and a few others bolted and started to put out flowers, since I didn't plan to collect seed from these plants I decided to pull them out to let more light get to the plants around them.  When I brought the celery plants inside to rinse the remaining usable stalks and put them in the fridge I noticed lots of tiny black alligators crawling around on the plants.  After getting severely weirded out by the creepy crawlies and washing them down the sink I figured I should look them up to find out if I had a pest problem that needed dealing with.

Luckily for me there are lots of websites with information on insect identification.  As it turns out the tiny black alligators are ladybug nymphs, the scourge of aphids.  And I had washed them down the drain!  These were not pests, they were beneficials who's home I had uprooted, and then drowned.
  Here's a link with some great photos of what these little critters look like
Well, I learned my lesson, from now on I will identify any and all bugs I find before I kill them. :(

As it turns out, ladybugs like to lay their eggs on Umbrelliferae species.  These include carrots, celery, queen anne's lace, and most other flowers that bloom in flattened umbrella-like clusters of small flowers.  This year, I'll let the celery flower, even if I don't need the seed.  I also plan to sneak into the empty lot next door and disperse some Beneficial Bug flower mix, if it's going to be full of weeds, they may as well be habitat for helpful insects.

Learn about the habitat and food needs of beneficials to keep a healthy organic garden. If you provide homes, food, and water they will return the favor with pollination and pest management.

Plant Genetics and Hybrids

Punnett square showing pea cross
Ever seen one of these before?  It's called a Punnett square.  Do you remember high school biology? If so, you probably remember learning about Mendel and his peas.  Gregor Mendel used these little squares to determine certain laws about how genetics work, he used peas as one of the experiments to test these theories. 
in the Punnett square above you can see two pea parent plants.  One is yellow and has a dominant Y (yellow) gene and a recessive y (green) gene, the other is green and has 2 recessive y (green) genes.  When these two plants cross-pollinate the seed they produce will grow into 50% yellow peas and 50% green peas.  But what if you only like yellow peas? Well then, you'd better not grow any green ones nearby or cross-pollination could happen and you'd end up with some green in the mix.

So why talk about genetics on a garden blog? Because of hybrids (and I don't mean cars).  Hybrid seed is often listed as F1 or F1 hybrid.  Basically this is a first generation cross of two plants that show good qualities.  While hybrid seed has it's advantages; being consistent in phenotype, having the best qualities of both parents, and being widely available.  It also has disadvantages for the home gardener.  Primarily, the seed from two hybrid parents will likely produce a large amount of recessive seeds.  This means that two parents with great qualities will likely produce 75% recessive gene (bad quality) seeds.  Those seeds will then grow into plants that don't have the same color, flavor, heat tolerance, or disease resistance that the original hybrids did.  Or they will simply be sterile and not produce usable seed at all.

The alternative to hybrid seed is open pollinated seed.  This means that the plants that will grow are from a stable genetic background that has been bred over many generations to eliminate most recessive throwbacks.  Open pollinated plants will also cross together to create new strains with very similar qualities of the original plants.  The major advantages to OP seed is being able to save your own seed (saving you money), creating new strains, and each successive generation grown in the same area will show improved adaptation to that area.  If your garden seems to suffer from something unknown fairly regularly, after several generations an open pollinated plant will begin to build a resistance and you will see each new generation producing healthier and better producing plants.

There are some exceptions when buying OP seeds that need to be understood.  OP plants will cross-pollinate with ANY nearby plants that are genetically close enough to them.  For example, carrots are only sold as F1 hybrids in my area because a common weed here is too close a relative to them to make the resulting OP seed safe for eating.  Queen Anne's Lace is everywhere in this area, and is a close cousin to the carrot, but not edible.  If I were to collect any seed from carrots I grew, it would most likely produce Queen Anne's Lace, and some half-QAL half-carrot hybrids.  So in this instance I am forced to buy hybrid seed. 

Seed catalogs often list plants as hybrid or OP and a little research can help you to decide which is best for you.  There are many books on plant biology and genetics as well to help gardener's learn how best to breed plants.  One thing to be careful of when collecting seed from plants is the crossing of different species within the garden.  Pumpkins, butternut squashes, acorn squash... all of these are from the same plant family and it is possible to have them cross pollinate unintentionally.  If you are serious about your seed production you can limit this by either only planting one type of each family in your garden, planting the different species far from each other, or by selecting a newly opened flower, hand pollinating it with the correct pollen and then gently bagging it to keep other pollens out until it begins to fruit.

Bolting is Bogus

Have you ever planted lettuce, or spinach, or cilantro alongside tomatoes in excitement over the lovely salads and tasty Mexican dishes you plan to make when they are ready only to find the lettuce/spinach/cilantro bolts and begins setting seed in early June? While your lovely tomatoes are nothing more than tiny green marbles?

Bolting is what happens when a leafy plant shoots up a center stalk and blossoms in order to make seed.  If this is a common occurrence in your garden you can try a few things to prevent it. 
First, look for slow bolt or heat tolerant/heat resistant varieties of these plants. These varieties are less likely to begin bolting when temperatures jump up for a short time.  Second, try planting these crops in a partially shaded corner of your garden, or even fully shaded.  Diffuse light is enough for these plants and they can manage just fine getting the second hand light reflecting off neighboring sunny areas or through a cloud cover while being protected during the hottest part of the day.  Another option is to plant them to the East of a shrub, tall plant, or tree, they will have full sun early in the day, but be shaded after noon to keep them cooler.  Lastly, you can try covering them with a shade cloth during the hottest days; this is an option many garden books suggest, but I find it the least practical option since it requires much more attention on the gardener's part. 
In the event your leafy plants do bolt, don't panic too much.  Plant a few more, or grow some lettuce and cilantro on a window sill inside the air conditioned house.  Or just make the most of what you've got and harvest the dry seed for next year.  Cilantro seed is called coriander and is an excellent spice in it's own right, so you can plant it or add it to your spice rack.
Lettuces will cross-pollinate with impunity, as will spinach.  This means that if you plant several different types of these plants and they flower at the same time you will likely get seed that is the offspring of the two parents rather than a clone of the original plant.  You may end up with a fabulous new variety of lettuce or spinach all your own; of course the flip side of that is that you may end up with seed that grows less tasty plants that are not worth growing.  It's a gamble, but these plants grow quickly and it's worth it to try planting your own seeds and see what you get.  If you find a favorite new cross you can remove the others before they flower and just let that variety flower to make more seed of that type.

My Seed Order Arrived!

2012 seed order.  Sometimes I get a little carried away!

Yesterday my seed order arrived in the mail.  I am very lucky to have a seed company in my area that grows a number of plants specifically bred to do well in western Oregon.  Territorial Seed Company has a website, beautiful color catalogs, and is packed with information on each of the seeds they offer.  They also offer a limited selection of live plants, including fruit trees, and a large variety of garden tools and equipment that are difficult to find elsewhere.  My order arrived three days after it was placed (all but the rhubarb root division which doesn't ship until March).  I love TSC and am incredibly glad to have such a great company in my area.  My son was super excited to see the little box arrive, and kept asking if we could plant the vegetable seeds. It was hard to explain to a 3 year old the concept of "Spring" and that it was too cold and wet for the little seeds to grow still.  Some of the new things I am trying out this year are artichokes and rhubarb; and trying my luck on corn and leeks.  Kale and Swiss chard are also new to me, but I doubt I'll have any trouble growing them since they both grow like weeds in this climate year-round.

I think I may have bought too many peas though. Looking at the half pound bags of peas I am a little daunted, and the package says that pea seeds last 2 years, so I have this year and next to make those peas worth my $5.  If a pound of fresh snap peas is between $2.50 and $3.00 in the grocery store, the peas really only need to produce two pounds to be worth the seed cost.  Since peas don't need to be started inside there are no seed starting costs either, and I expect them to pump out at least 10 lbs. of peas in the 12 square feet I will plant.

One day's harvest of strawberries, nearly 5 lbs.  Well worth the cost!
Which brings me to my next subject:  making your garden worth the cost.  Of course any garden is worth the cost.  Aesthetically, as well as in terms of it's habitat and environmental benefits.  However, some of us have husbands that don't grasp the importance of aesthetics, and prefer to see the bottom line when it comes to letting his hard-earned cash go into a piece of dirt.  And finally, after 3 years of gardening, I have been able to show my husband that I can make it worth our while to invest in that dirt patch.

Some of the most money-saving plants in the garden are also some of the easiest to grow: herbs!  The little packets of fresh herbs sold in stores are generally a few dollars each, yet from one $2 rosemary plant you can have as much fresh rosemary as you could ever want or need for the next 20 years, and enough to stock up your friends' spice racks as well.  My parents had a rosemary that they planted as a 4" start when they moved into their house; it died last year, after growing four feet tall and four feet wide over 20 years and putting out so much fresh rosemary each year we resorted to burning it on several occasions because we ran out of room to dry it.  In fact, all of the perennial herbs will grow and produce for many years saving you a lot of money in store bought herbs, both fresh and dried.  Annual herbs also grow more than most people will use each year, you have to replant them every spring, but it's worth it for fresh pestos and dried herbs and all the dill you could want for your homemade pickles.  one of my favorite things to do with all of these herbs is mix up my own Italian seasoning rather than buy more from the store.  And guess what? It's all completely organic!

Most of the rest of my vegetables balance out my costs each year, but the herbs have proven to be my biggest money savers.  Generally fruits and veggies run between $1 and $2 per pound; so if I spend $150 on seeds and plants, and $150 on soil amendments, pest management, and equipment in a season I will need to grow 150 to 300 pounds of produce to make it worth the money.  Each year I get a little closer to this balance point.  The first year I spent a lot more on the garden, and got less in return.  The second year my costs were lower and my returns greater.  Last year my spending totaled around $400 and I got well over 200 lbs of veggies; that's $2/lb. I met my goal!  This year I am planning to weigh each harvest as it comes into the kitchen and keep a running tally to see exactly how many pounds my garden produces.  I'm hoping to bring my costs down to around $1.50/lb. this year, and even lower next year by saving a lot of my own seeds.

Thursday, January 19, 2012

And What To Do With All That Plenty... Pumpkin Muffin Recipe

This blog is intended to not only discuss gardening but to offer recipes and techniques for preserving your harvest.  Since it is January and miserably dismal outside I'll take this time to share a recipe that can be done with already preserved pumpkins.  While carving pumpkins are edible, they aren't very good to cook with, they can be cured and carved but I recommend Sugar Pie, Rouge Vif de'Tempes (Cinderella) or another eating variety of pumpkin for roasting.  Roasting and preserving directions also apply to any hard-rinded winter squash.

There are a few ways to keep pumpkins once they are harvested: one is to cure them.  If the skins of the pumpkin are undamaged (scarring is fine, but no fresh scrapes or cuts) you can cure it by letting it sit in a warm, dry area where it won't get damaged. If skins have fresh damage you will have to roast and process them immediately.  If you notice blemishes in the skin or mold growth your pumpkin isn't curing properly and needs to be processed into the freezer or canned immediately. Remove any areas that appear to have mold or spoilage.  Then follow the process for roasting.

If the skins toughen and the stems dry brown in about 10 days, your pumpkin has safely cured and will keep like this for several months.

Roasting:  You can roast your pumpkins directly after harvest, or cure them and roast them at a later date.  If you have a big harvest I can pretty much guarantee you will be sick of roasting pumpkins long before you are done, so cure as many as possible.  Curing pumpkins also increases their Vitamin A content.  Cut off any damaged areas of the fruit, cut it in half or quarters (depending on size) to fit in roasting pan.  Scrape out seeds and guts, discard guts; you can either add the seeds to your compost pile, dry them for planting next year, or roast them for eating.  Preheat your oven to about 350F.  Depending on what you intend to do with your pumpkin it may be worthwhile to butter or season the halves before roasting.  For pie, and other sweet making, I like to sprinkle the raw pumpkin with pumpkin pie spice.  Then roast in the oven for 1-2 hours or more, depending on the size of the pumpkin, until the meat is tender.  Let cool for half an hour, then scrape the meat away from the rind.  Use a blender or stick blender to puree the pumpkin meat until smooth.  Lastly, place puree in a colander lined with cheesecloth for 15-20 minutes to drain out excess water (this can be done later, such as after defrosting if you choose to freeze the puree).  The resulting puree can then be used right away in any pumpkin recipe, about two and a half cups is equivalent to a can of Libby pumpkin puree from the store; or it can be frozen for later use, generally in 3 or 4 cup containers.  I have never tried canning pumpkin because I don't have a pressure canner and have a healthy fear of botulism, but I'm sure it's possible.

So that is how to process pumpkins (and other winter squashes).  Here is a fabulously delicious recipe for your home grown pumpkin that my family will gobble up before it even cools.  I don't remember where the recipe came from so if someone knows my source please let me know so I can give credit where it is due.
Pumpkin muffin, served warm with butter is best.


Pumpkin Muffins - preheat oven to 350F
1 1/2 cups flour
1 tsp. baking powder
2 cups pumpkin puree
1/3 cup vegetable oil
2 lg. eggs
1 1/4 cups sugar
1/2 tsp. salt
1 tsp. pumpkin pie spice
1/2 tsp. baking soda
1 tsp. cinnamon

Stir together flour, baking powder, salt, spice, baking soda, and cinnamon.  In separate bowl, mix puree, oil, eggs, and sugar until well blended.  Gently fold together wet and dry ingredients until well moistened.  (As with all muffins, stir gently or the muffins will become tough).  Scoop into muffin cups about 2/3 full. Bake at 350F 25-30 minutes.  Serve warm with butter.  Makes 1 dozen.

Tying Up

There are many reasons to trellis plants, and many different ways to do it.
One reason to trellis a plant is for looks, a pile of morning glories strewn across the ground isn't nearly as attractive as a teepee of trellised morning glories, or a chain link fence blooming with sweet peas.  But looks are not the primary reason to lift your plants up to a higher level.  Trellising, staking, or tying up plants lifts them off the ground; it allows them to receive better light, keeps them from taking up more garden space, keeps them away from the wet ground and out of reach of some pests.  Supporting plants also helps to keep taller plants from blowing over in the wind when they are young and keeps them growing straight and tall.
By lifting peas up onto a trellis you provide a support that keeps the leaves out of contact with moist spring soil that can lead to fungus and mold problems, you ensure that the peas will get adequate sunlight despite other low-growing plants nearby, and you keep the sweet tasty pods out of reach of slugs and other non-flying pests.  You also save a lot of space.  Peas are one crop that is well-known to need a support of some kind, and while one square foot of soil can support 8 peas plants, those same pea plants if not supported would spread out in a mass three feet by three feet.  What a waste!
So yes, providing a support of some type is essential for many plants.  Among the plants that require support are peas, pole or runner beans, indeterminate tomatoes, morning glories, grapes, sweet peas, clematis, and all vines.  While these plants really need to be supported there are many others that benefit from support as well.  Winter squashes (including pumpkins), cucumbers, melons, sunflowers (sometimes they need a little help to keep winds from blowing them down), roses, luffas, etc.  Basically anything that grows more than two feet high/long could probably use some support. 

Whiskey barrel and tomato cage with eggplant, Thai chili, lemon cucumber and Tigger melon. 7/2011
In my experience there are a few types of plant supports you should have in your garden; trellises, both strong permanent ones and lightweight temporary ones; stakes; and cages.  A trellis is some type of net stretched across an area, it can have large openings in the netting (such as the 7" squares in my pumpkin trellis) or small openings.  It generally needs to be attached to some sort of sturdy frame, like a fence, or electrical conduit, or a wood frame, or even PVC pipe.  A chain link fence makes an excellent trellis for all but the largest of fruits; it has a strong frame to it and medium-sized openings to allow the plants to twine in and around while still offering enough room for fruits to grow without being squeezed in the chain.  Peas, beans, cucumbers, and many vines and flowers are all good options to grow along a chain link fence.  Sadly, I have a solid wood fence in my garden.  I add my own trellis to this fence (plastic bird netting stapled to the wood in the corners) for peas and beans.  Pumpkin trellising required a little more strength, so after a quick trip to the hardware store I built the pumpkin trellis out of 2- 6' long electrical conduit pipes, 1- 4' long conduit pipe, 2- 2' long pieces of rebar, 2- 90 degree conduit connections, and a large holed nylon (much stronger than plastic netting) net.  I drove the rebar about halfway into the ground on either side of my planting bed, connected my electrical conduits with the 90 degree connectors in an upside down U shape, and slipped the conduit ends over the rebar tops.  Then I just tied the netting tightly around the conduit pieces and slowly trained the growing pumpkin plants up over the trellis.  It is a very strong and stable trellis, yet can easily be removed and relocated by lifting the frame up off the rebar and pulling out the rebar; it can also be broken down by turning a few screws to store in a small space over the winter.  If you plan to make a trellis like this one you can find detailed directions for it in the All New Square Foot Gardening book by Mel Bartholomew.
One of the reasons I chose to use the lightweight plastic netting for my peas and beans is that they tend to become a large tangled mass by the end of the summer and pulling that mass loose from a strong netting is a royal pain.  Instead I can just cut the plastic or tear down the whole thing.  Though I think this year I will replace that net with a biodegradable version so that I can simply toss it all into the compost pile at the end of the season.  Some people dangle lines of string down to beans; I love the idea, but my beans haven't been very cooperative about climbing them without a lot of assistance, so I prefer a net.

Stakes: Stakes come in different materials, lengths, and diameters; for most plants that need staking you will want a stake no smaller in diameter than your index finger.  You can buy bamboo, wood or plastic stakes; I tried all of them and was surprised that I preferred the plastic ones. Bamboo was too flexible and the plant weight bent them, wood rotted too fast. You can also create your own stakes from things you have around the house, sticks, dowels, PVC pipe, rebar, anything you can tie a plant to.  You should select stakes about 4 to 6 feet long. Stakes are very useful supports for taller plants on which the stems are a little weak at first, or that produce large fruits that may weigh them down.  I stake young tomatoes, peppers, sunflowers and a few other things.  In my area we do get high winds late into the spring at times and staking these new transplants keeps them from being blown over.  Once tomato fruiting begins I tie all of the side branches to the stake as well as the center stalk so that large fruits won't break the branches, and to keep branches from drooping down to the ground or over nearby plants.

Cages, generally called tomato cages, are perfect for trellising cucumbers and other curcubits.  They are generally made of metal or sometimes plastic, while the metal ones will rust over time I prefer them to the plastic ones; I also prefer the square cages that can break down for storage over the round cone-like ones.  Cages will work for tomatoes, but when plants get large it often becomes difficult to find and pick fruits that are deep inside the cage.  Cucumbers tend to vine and will happily grow around the outside of a cage, leaving all of the fruits out where they are easy to reach.  This is a great way to grow cucumbers or melons in a small space like a pot.  My whiskey barrels were nearly invisible under their cuke covered cages last year.  Each barrel had a cage stuck in the center of it, and a cucumber, Tigger melon, pepper, and eggplant planted around the outside of the cage.  I tied the eggplant and pepper to the bottom rung to act as a stake, then wove the cucumber and melon vines around the cage.  Those were the healthiest, best fruiting, largest cucumber plants I've ever grown. I will definitely do the same again this year.  One of the biggest issues for cukes in my region is powdery mildew, the fleshy leaves are very susceptible and once it starts it is difficult to stop the spread of the disease.  By wrapping a cucumber around a cage or over a trellis, you keep the leaves and fruits up away from the ground and the moisture left behind by watering, protecting it from powdery mildew.  In addition, I saw a much better pollination rate in my caged cucumbers; the flowers were held up high in plain sight for pollinators and for the wind to spread the pollen as well.
Cucumber in whiskey barrel 7/2011

In conclusion... tie your plants up!!  If tying up a plant is an option, it's probably a good one.  If I had my way I'd develop a vining lettuce that I could trellis up out of the slugs' reach, but for now I'll just keep crying over chewed lettuces.

Tuesday, January 17, 2012

Planning Your Garden

2012 Garden Plan created in Territorial Seed Co.'s garden planner program.

There are dozens of software programs available for planning a garden, each has it's pros and cons.  The one I used for the plan shown here, for example, doesn't allow you to resize the plants. Yes, a bell pepper does need a square foot of it's own to grow, but there is no reason it should overlap into the next square.  There is also no reason you couldn't easily fit a thin row of carrots or radishes or green onions between squares of slower growing fruiting vegetables.  A simple, easy to adjust, non-computerized version of this plan may be better suited to some.  Drawing your beds out on a sheet of graph paper enlarged to 4 squares = 1 square foot is handier and neater than some programs.  A great way to do the hand drawn plan is to draw out your beds and then make a few copies of that sheet to use in years to come, saving the hassle of re-drawing it each time.  It also makes it easy to lay out a few different plans and compare them to determine your best course. 
Make a list of vegetables you'd like to have, include the ones you might not think of immediately that are often used in conjunction with others.  If you have a bumper crop of tomatoes but no onions, peppers, or garlic it becomes expensive to run to the store for those things before making your salsa or sauce.
You have two choices of how to proceed with your list at this point, you can decide to plant starts (an excellent option for the beginner) bought from the store or nursery, or to buy seed from a catalog or store.
Buying starts is simple, you wait until the season for the particular plant begins, buy the start, bring it home and plant it.  However, it is far more expensive, your selection is limited to the most popular varieties, and if you can't plant immediately you will have to keep those starts protected from weather, watered, and safe until you are able to plant.  Buying seed is far less expensive, a pack of 50 or more seeds can cost less than one plant start, seeds will last for one to five years in general before they are too old to germinate, your options are limited only by what will grow in your region, and if you start seeds too soon and the weather turns bad you are already set up to keep them warm and healthy a little longer, or just plant a few more if your plants are killed.  An added bonus to seed is sharing them with others, or sharing the starts you grow from them with others.  I usually plant a few extras of each thing in case my cats dig something up, or a transplant doesn't make it, which means I often have starts to spare for friends and family.  The primary downside to starting from seed is the initial cost of trays, tiny pots, and possibly a lamp; and finding a space to put them inside where they will be safe.
Most of my plants are from seed, but I have the advantage of having a brother with a grow room setup in his spare bathroom.  We share seeds and I have him get the hot weather plants started for me.  I handle the cold weather and non-transplantable seeds myself.  In early spring I generally have a few Jiffy trays set out on a card table in my dining room with cabbage, broccoli, kale, cauliflower and swiss chard growing in it.  When they get too big to stay under the warming dome, or begin to get leggy from lack of light I move them outside to my portable greenhouse until the weather improves enough to plant them. I have a few plants I won't grow from seed, some things just aren't worth it to me.  Celery is one of them, it sprouts from a miniscule seed and takes forever to grow big enough to plant outdoors.  I would basically have to plant it in December or January and care for it until April before planting it.  I prefer to buy celery starts.  Another one is basil, I've always had trouble growing basil from seed, so prefer to buy starts for it.

Whichever way you choose to go be sure to have an idea what plants you will put into the garden before drawing up a garden plan.  It is pointless to pre-plan your garden if you aren't sure if you will have determinate or indeterminate tomatoes, or bulbing or green onions.  Knowing what size you can expect each plant to grow to, and whether they will shade out their neighbors or not will vastly improve your garden's productivity.  Once you have that settled you can start laying out your plan, don't lose faith in yourself if something goes amiss though, trial and error is the best way to learn and even seasoned gardeners have a season in which the tomatoes never turn red, or the beets don't sprout at all.

How Much Harvest?

If you are new to gardening and want to grow some food this is the post for you.
Planting a tomato plant or two is nice and you get a few tomatoes, if you don't kill them somehow, but how do you know how much is right for you and your family?  When space is at a premium this can be an important decision, it can determine whether you will have room for tomatoes, carrots, zucchini, bell peppers and cucumbers... or just enough room for tomatoes.  Having too few tomatoes may mean you have enough for hamburgers one night, but not for salads the next day.  Or that you harvest more than your family can eat fresh, but not enough to make it worth the effort to can salsa.  Having too much of one harvest can mean an overstock of salsa, spaghetti, canned tomatoes, sun-dried tomatoes, tomato soup, fresh eating tomatoes... you get the idea.  You don't want to waste garden space growing more than you could possibly eat in a year.  Most home canned goods and frozens are only good for a year, and by the next summer you'll have a whole new crop to process.
Tomatoes are a good example for this.  I have a family of four that is not big on vegetable eating, my son is a huge cherry tomato eater, my husband and daughter prefer their tomatoes fresh in their meals, while I like to have salsas, sauces, canned tomatoes, soups, etc. for after the harvest.  My 2011 garden worked out just about perfect giving me a mix of cherry, saucing and slicing tomatoes at a rate of about 4lbs every 4 or 5 days.  When we had an overabundance of slicers I simply seeded them and added them to sauces, when saucers were more productive I would chop them into meals.  The cherry tomatoes were eaten fresh or added to salads.  In total we planted 12 tomato plants with a mix of extra-early to late season, in differing sizes shapes and colors.  We actually ended up short on spaghetti sauce but I gave a lot of tomatoes to my mom because I was sick of processing them.
The tomatoes worked out to 3 plants  per person, which seems to be just right for my family, though not necessarily for yours.  If you are big vegetable eaters, or plan to share a lot of your harvest aim for closer to 5 per person.  If you are overwhelmed with that number you can always post on craigslist that you have too many tomatoes and would love to make a trade with someone who grew too many bell peppers, or share your extras with friends and family.  Around here, summer squash are the most overgrown vegetable (people just don't realize how productive they are) and are nearly impossible to get rid of, but tomatoes, carrots, peppers, corn, and peas are an easy thing to trade with friends and neighbors.
Generally when I'm selecting a new food to grow I put in one or two (if needed for pollination) plants and wait to see what comes of it.  This served me well when my brother insisted I should grow five or six eggplants last year and I decided to leave more cucumber space instead and only plant 2 eggplants.  Those 2 eggplants produced more eggplant than I could have ever managed to eat, luckily my mom took a lot of it off my hands, and meanwhile the extra cucumber space was needed since my pickling cucumbers ended up being completely shaded out by the nearby tomatoes.  For new gardeners this is a great way to practice trial and error too, and may keep you from giving up in disgust when your favorite veggie does poorly the first year you plant it.  When planning your garden, plan many different types of vegetables, in several varieties if possible, plan for them to ripen at different times if you plan to eat them fresh, or all at once for processing big batches.  As exciting as a lush patch of hot chilis may sound, if you won't eat them or don't know someone who will, it's probably not worthwhile to grow them.  And obviously, if you are a massive watermelon eater who simply can't get enough it may be worthwhile to plant several just for yourself.  Keep in mind that perennial fruits and vegetables tend to get bigger or spread over the years too, don't keep investing in blueberry bushes or strawberry plants to fill your garden bed if a few will spread in a year or two and fill it nicely.  Instead use that money to purchase some u-pick berries the first year or two until your patch can keep up with your demands. 
As an example of what can be done in a small garden this is a list of what I planted last year in my 102 square feet.
-one Thai chili plant
-two jalapenos
-two lemon cucumbers
-four slicing cucumbers
-two eggplants
-one small melon
-one luffa
-three pumpkins
-one zucchini
-six marigolds
-four calendula
-about 30 runner beans
-12 tomatoes
-eight pickling cucumbers
-three bell peppers
-eight basil
-six garlic
-24 bush beans
-six mammoth sunflowers
-six celery
-three cabbage
-four broccoli
-24 lettuce
-27 spinach
-12 nasturtiums
-42 peas
-and a handful of carrots

That's over 200 individual plants, of 27 different types of vegetable/flower.  Admittedly there were only a few of each type but they were more than enough to keep my family stocked for the year, with a few exceptions.