Showing posts with label seed. Show all posts

Friday, August 3, 2012

Woohoo! First Tomato of the Year

In all its glory...
 Picked my first ripe tomato today, it's the Oregon Spring one that's been hanging around for over a month.  In a normal year the first tomato would be picked in mid- to late June.  This has not been a normal year.  On the plus side it weighed in at 7.5 ounces.  Also the two volunteer cherry tomatoes I left in the ground still haven't ripened anything, so I don't think my late planting really affected the other tomatoes; they are right on par with their volunteer cousins.  It would seem that the weather alone has been responsible for the tomato tardiness. 

Tomato and the first two pickling cucumbers.
 The pickling cucumbers are finally beginning to produce, not a lot so far.  I have a dozen plants, but if they don't start doing better i will never have enough cukes at once to pickle.  The slicing cucumber is cranking out fruit faster than they can ripen, I'm guessing I'll have about 3 cukes ready to pick tomorrow and more a few days after that.

I didn't take a photo of the onions i pulled earlier this week, nor did I weigh them, they are curing in the laundry room/grow room/pantry and once cured they will be weighed in and photographed.  I only pulled the ones with good sized bulbs and developed skins, which accounted for about a quarter of what was planted.

Herbs (this basket holds about 2 gallons)
Also, above is the photo of the herbs I trimmed the other day.  Most of this is rosemary, which is buried under the thyme, sage, spearmint, and lavender.  The oregano wasn't big enough for trimming yet, and the cats have mauled the catnip too much to harvest.  All of these herbs were lightly rinsed (to remove spiders and dust), blotted dry, bundled, tied up, and hung to dry.  Once they are crispy i will strip them from their stems, crumble them a bit, then mix up seasonings or bag and freeze them, or fill my nearly empty spice jars with them.  I am a bit disappointed the oregano didn't grow more, I was hoping not to have to buy it for making Italian Seasoning Mix.  The mint and lavender will likely be saved for potpourri or teas, since I don't do much cooking with them.

The one other major thing I did was pull a few problem plants: the last celery that I left to flower for the beneficial bugs, the cilantro (it had long ago gone to flower and was seriously shading out the rhubarb and some peppers) and the dill that was completely infested with aphids and ladybugs.  I let the dill stay in the garden long enough for the ladybug eggs to hatch, and the nymphs to grow into adults, but they were failing at eating enough aphids fast enough so I moved them onto other plants and tossed the buggy dill.  I'm disappointed that I lost the dill before the cucumbers were ready for harvest though, i had hoped to use my own dill for pickling.  The nasturtiums have done their job of black-fly-aphid-traps so well that the aphids are killing them and moving onto other plants nearby, so I pulled a few of the most infested nasturtiums and left the others to continue their work.  Hopefully the aphids will stay out of the other plants again and move into the healthy nasturtiums.


Thursday, May 31, 2012

Flower Companions: The 411

There are so many elements to gardening that many of them get overlooked in the details of climate and pests and nutrition and plant selection.  One of the oft overlooked elements to gardening is the use of flowers in the food garden.  Whether your food garden consists solely of a rhubarb plant, or two blueberry bushes, or is an entire backyard teeming with vegetables and fruits from Artichoke to Zucchini; adding flowers to it will be worth your while.

Cosmos in bloom
The benefits of flowers in the garden:

-As food! 
-They are pretty
-Attract and provide food/homes for beneficials
-Repel pests, or trap crops
-Reduce weeding
-Reduce erosion
-Cut flowers
-Smell wonderful
-They are pretty!

The only reasons not to plant flowers are the costs; space constraints; or that you hate pretty things. ;)
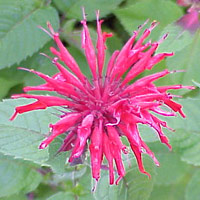
Bee balm or Monarda Didyma or wild bergamot attracts pollinators and makes a tasty tea as well.

So what are some good flower options for your garden?  Nearly any flower will do the job of attracting bees, but if you are looking for flowers that really pack a punch as far as benefiting the garden goes, I have listed a few common flowers below.

Marigold

Marigold:  Marigolds are one of the most commonly thought-of companion flowers.  They are said to deter some common insect pests, including nematodes; marigolds are often companion planted with nightshade plants (i.e. tomato, potato, pepper, and eggplant).  Some species are deer-, rabbit-, and rodent-resistant.  The flower petals African marigold (Tagetes erecta) can be used as a yellow food coloring.  Marigolds are a food plant for butterflies and certain Lepidoptera caterpillars. 
On the down side, marigolds do NOT smell particularly pleasant, and their roots emit antibacterial thiophenes so should never be planted near legume crops.

Potted nasturtium (center)

Nasturtium:  Nasturtiums are my favorite garden flower.  They grow as beautiful flowing carpets of green with bright yellow, orange, and red flowers.  They actually prefer to grow in poor soil; rich soil will give them abundant foliage but reduce flower production.  Nasturtiums make a great ground cover to keep down weeds in areas you are not ready to plant, or around bulbs that won't come up for a while.  They don't require much nutrition, have small root systems, self-sow year after year, and are very inexpensive seeds.  Most importantly, the leaves and flowers are edible (they have a mild peppery taste); and they repel a great many cucurbit pests, like squash bugs, cucumber beetles, and several caterpillars. They have similar benefits for brassica plants, especially broccoli and cauliflower. They serve as a trap crop against black fly aphids. They also attract beneficial predatory insects. 

Red Yarrow

Yarrow:  Yarrow flowers in a flat cluster of tiny white, yellow, or pink blossoms.  Yarrow has been used as a vegetable in the past, the younger leaves can be cooked similar to spinach or added to soups.  It has a sweet, slightly bitter flavor.  It has also been used medicinally as a tonic, and to treat wounds.  Pasture grasses traditionally contained a small proportion of yarrow, because it's leaves were particularly high in certain minerals, thus preventing certain mineral deficiencies in cattle.  It repels bad insects and attracts predatory wasps, ladybugs, and hoverflies.  It improves soil quality and its leaves are considered to be good fertilizer and a beneficial additive to compost.  It is said to improve the health of plants nearby, and starlings use it to line their nests (inhibiting the growth of parasites).  Common Yarrow can be invasive.  Wikipedia has some great information on the extensive history and uses for yarrow.


Sunflower:  Both a beautiful annual flower, and an edible; the sunflower's seeds and oil are eaten, while the leaves can be fed to livestock, and the stems can be used in papermaking.  The seed is often used in bird seed blends.  Sunflower is also used in phytoremediation to extract toxic ingredients from soil, such as lead, arsenic and uranium.  Sunflowers are allelopathic, meaning they inhibit other plant growth.  This can be a good thing!  Plant sunflowers in a sunny area that has major weed problems, or around the outskirts of your garden beds to protect from encroaching weeds.  Don't plant them inside the beds though, the roots exude a substance that will inhibit your plants' growth.  I am seriously considering growing them in my blackberry zone in hopes that they will kill off the remaining blackberries.


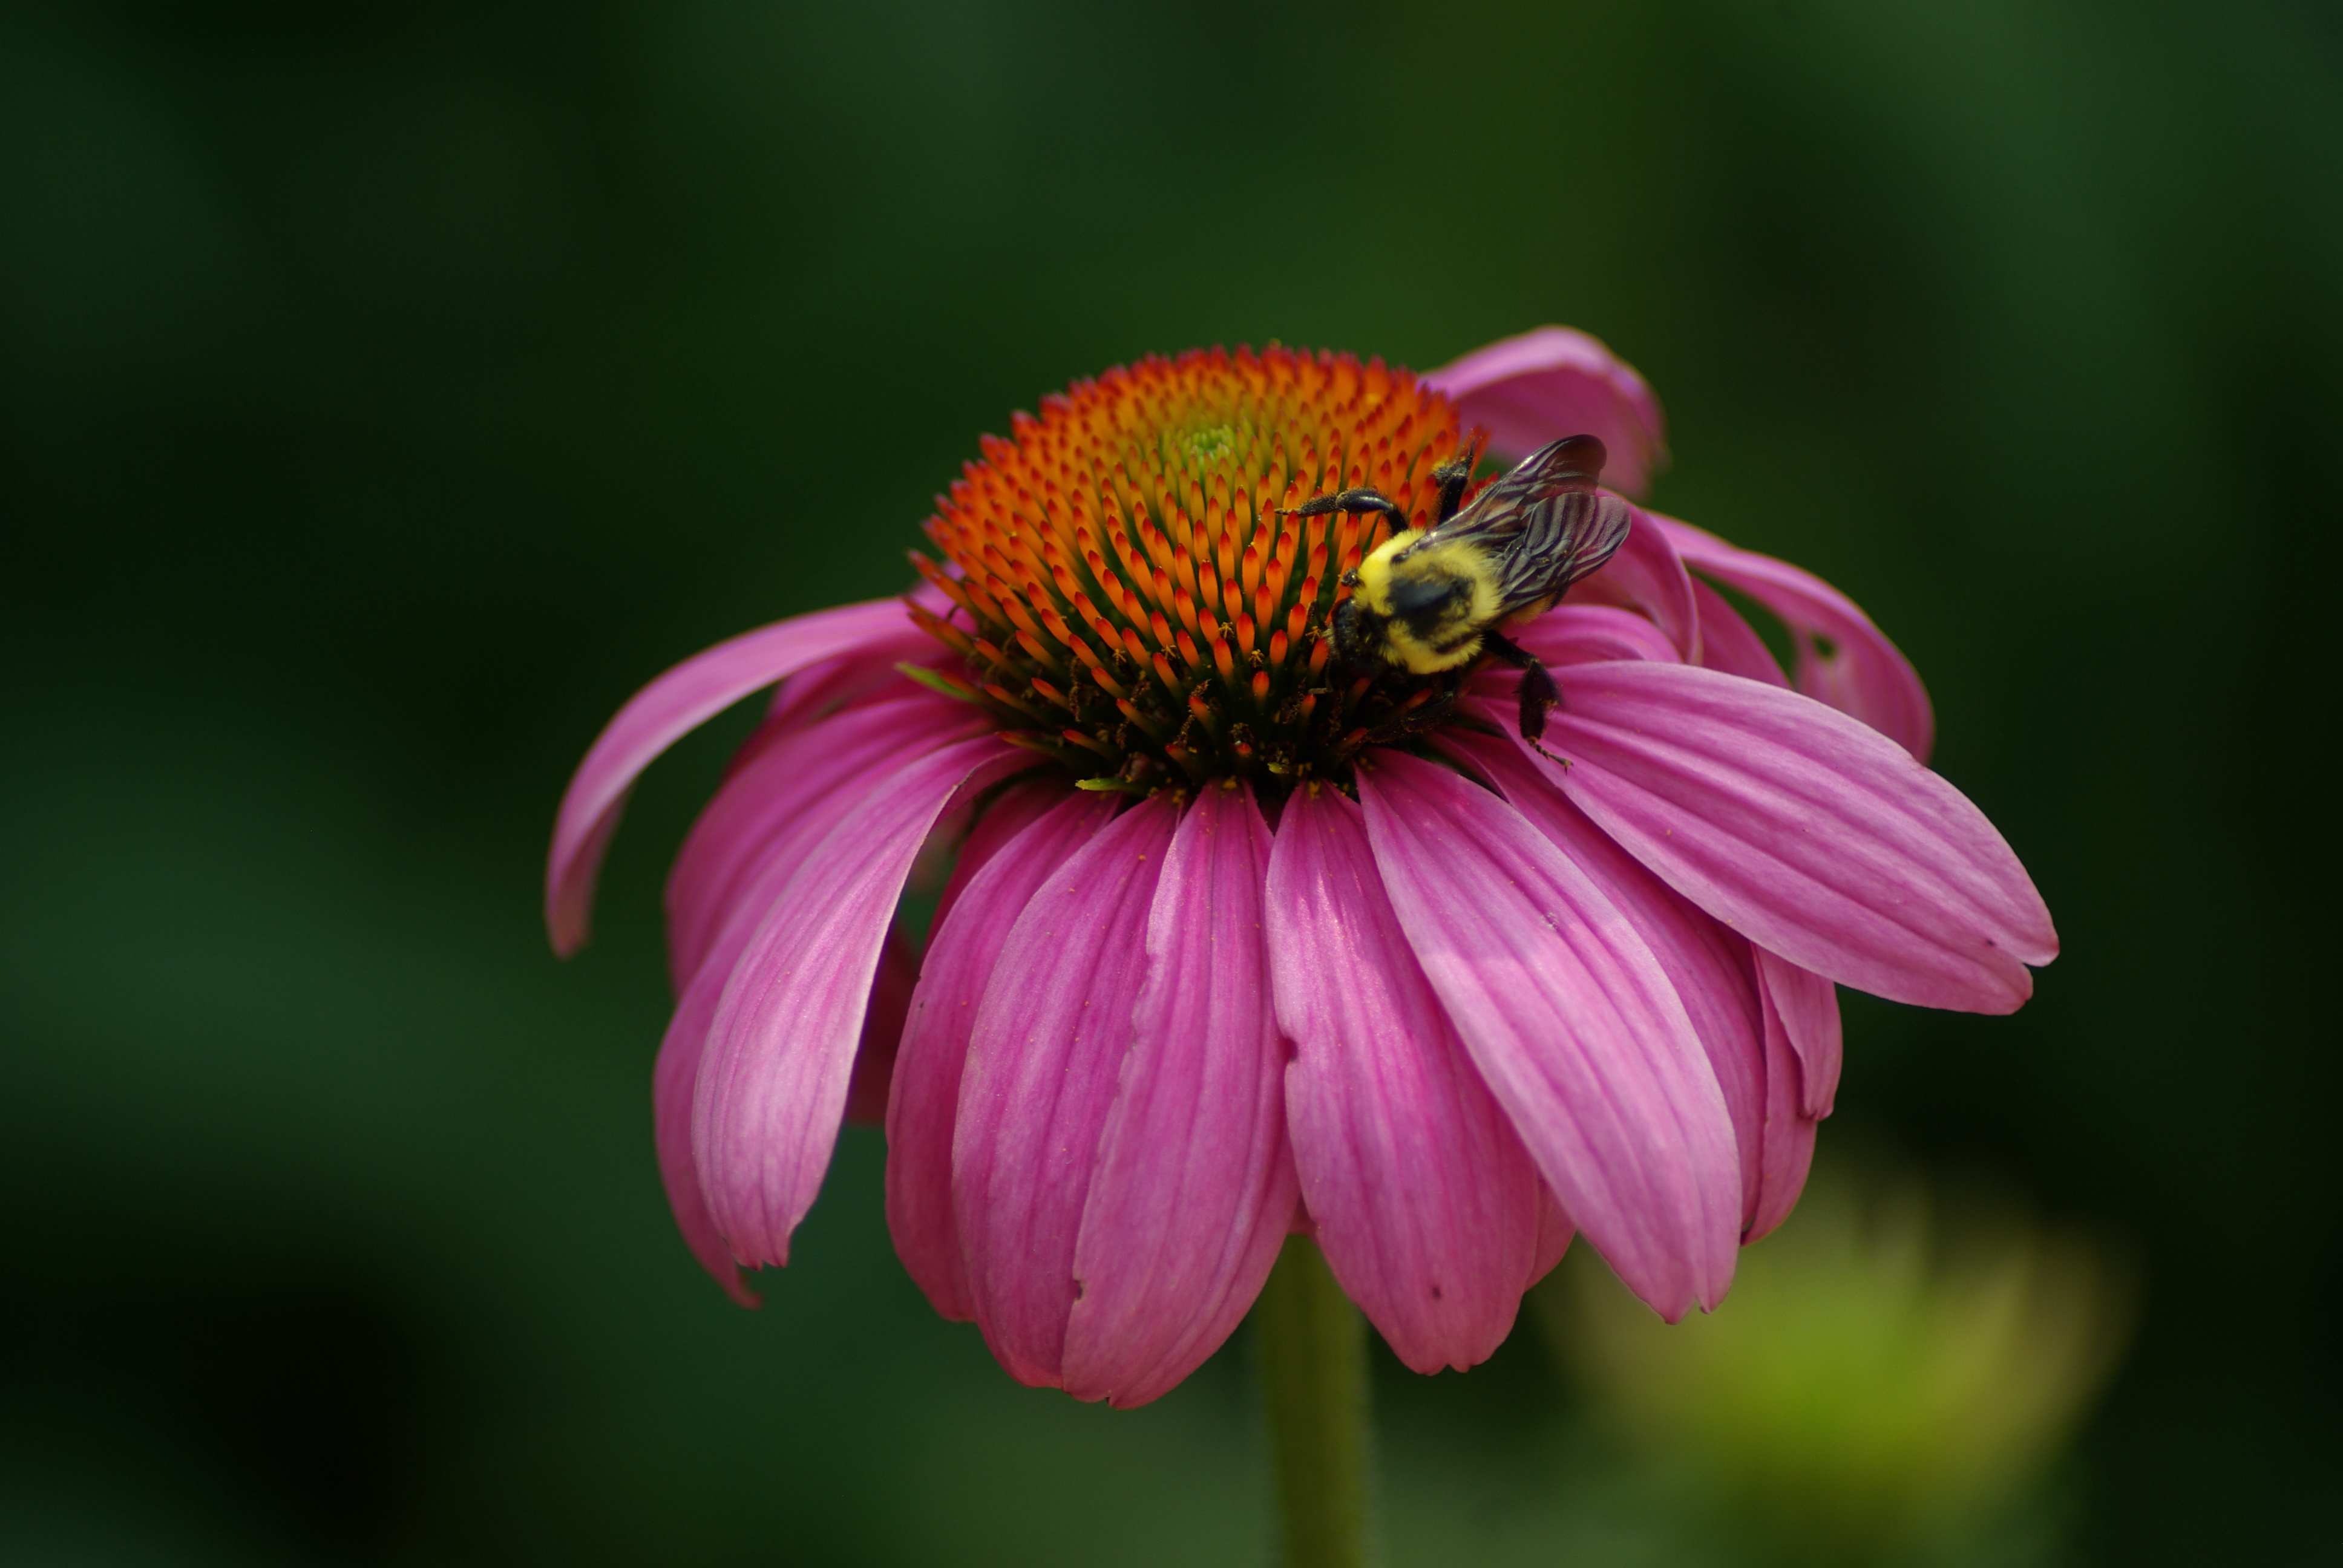
Coneflower (Echinacea):  Echinacea produces large, often purple, daisy-like flowers.  Medicinally it is used primarily as an immune booster, but also for several other purposes.  It also attracts beneficial insects to the garden.


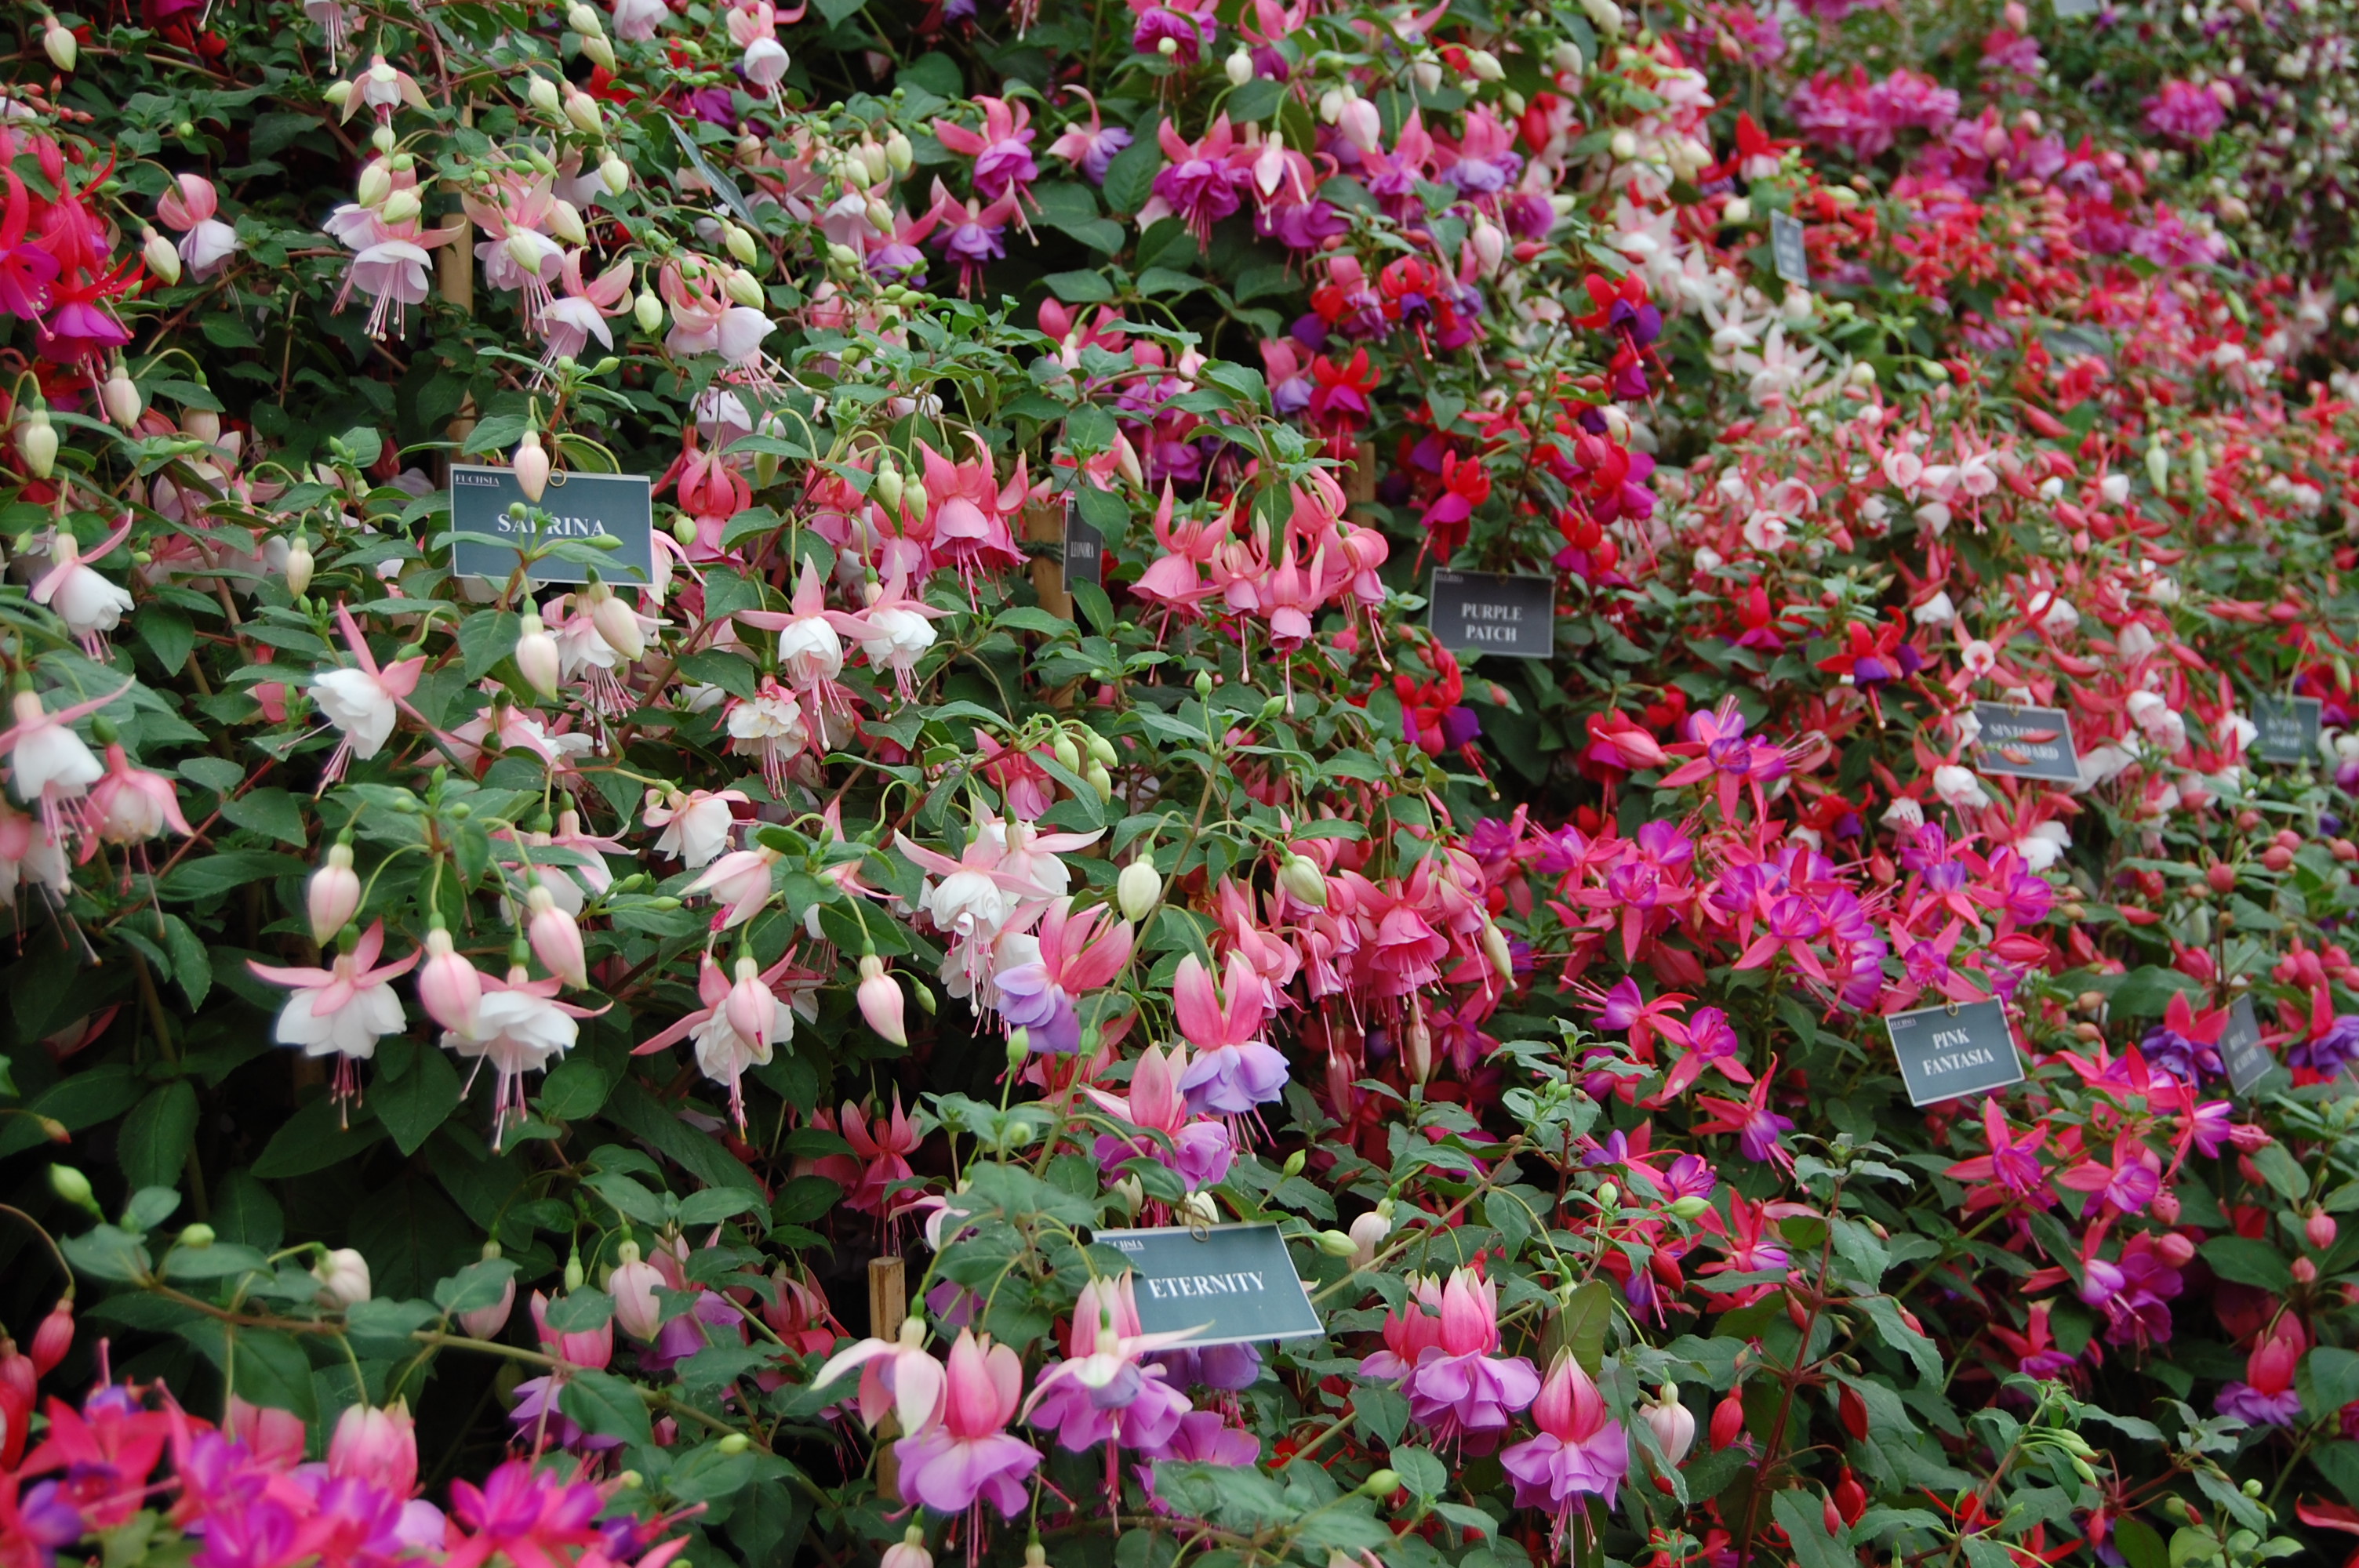
Fuchsia:  In my area fuchsia are commonly grown as trailing container plants, and annuals.  Fuchsia are actually perennial plants, though not especially hardy.  Besides being absolutely gorgeous, fuchsia are major attractors of butterflies, bees, and hummingbirds; they smell great, look better, and if you are going to plant them anyway you may as well do it near your vegetables.

Catmint:  Nepeta sp. include common catnip as well as several other catmints.  I'm sure most people know the purpose of planting catnip as far as cats go.  Catmints also produce very pretty flowers, and are used medicinally for humans.  It contains a chemical that is a strong repellant to mosquitoes, cockroaches, termites, and flies.  Planting it away from your vegetables can keep your cats out of the area, while planting it within the garden can repel certain insects.  While it is a perennial, if your cats are like mine you may need to buy multiple plants each season because they roll on it so often the whole plant dies.


Hollyhock (Alcea sp.)/Mallow (Althaea sp.):  Tall or short, gorgeous, biennial or short-lived perennials.  A beautiful cut flower and attractor of many beneficial species.  Hollyhocks will often self-sow and are very drought-resistant, they are a great way to brighten up a hot, dry corner of your garden.  Ancient peoples used the Althaea species in both medicines and cooking.  They are also considered one of the mainstays of a traditional cottage garden.


Morning Glory:  Not to be confused with Field Bindweed, a perennial species of Morning Glory that is a nasty weed!  Delicate flowers open in the morning and close in the evening, giving the morning glory its name.  It is a slender vining annual, that will quickly spiral its way up a trellis to offer shade to plants, animals or people below.  Morning Glory will happily cover up a chain link fence with a view of your neighbor's backyard and replace it with a view of green leaves and blue, pink, or white flowers.  The trumpet-like cones of the flowers are particularly attractive to hummingbirds and butterflies.


Rose:  Wondrously scented, beautifully flowered.  The hips and petals are edible; they have been used in cooking, perfumery, winemaking, as floral arrangements, and are a symbol of love and beauty.  A rose by any other name would smell as sweet... and would, obviously, attract plenty of pollinators.  But roses have so many pests and diseases, right?  Yes, and no.  Hybrid tea roses are very needy little things that do require much care (and are very commonly found), they have been developed over many years for the showiest blossoms, leaving the plants themselves weak and of poor quality.  The old garden roses, or heritage or historic roses, are far more independent.  They tend to have highly disease-resistant foliage.  Albas, Gallicas, Damasks, Centifolia, Moss, Portland, and China roses are all fairly safe older varieties of rose.  Also the Tea, Bourbon, Hybrid Rugosa, Noisette, Hybrid Musk, and Hybrid Perpetual.  Modern roses are more demanding and include the Hybrid Tea, Pernetianas or Hybrid Foetidas, Polyantha, Floribunda, etc.  Before purchasing a rose to include in your garden take time to do your homework, they are well worth the effort to plant, but if you buy based solely on the picture you may find they are too much work and too sickly to work for you.  (I did this once and was sorely disappointed by the sad sticks with even sadder single blossoms on top, I have since learned my lesson.)


Violet/Pansy/Johnny-Jump-Up/Heartsease:  Viola tricolor actually has over 200 colloquial names.  The wild variety has been cultivated into the many different sizes and colors of pansy we see in nurseries today.  The pansy in its wild form has been used for centuries as medicine, as a plant dye, and the flowers are edible.  They are hardy plants and will survive a short freeze even while blooming.  Pansies are actually biennials, but are often sold the second year and treated as annuals.  They may reseed themselves, but are susceptible to several diseases and a few pests.  They certainly do bring a bright spark of color to the garden early on though, and I can't imagine a Spring without them popping up all over.  The bonus is that pansies are not only pretty, but incredibly cheap!  They do suffer from aphids, but in my mind that makes them a great trap crop. ;)


So, I know I didn't cover all of the great flowers available and all of the great advantages they offer in the veggie garden, but I did cover most of my favorites!  If you have a favorite garden flower that you just couldn't live without, leave me a comment and tell me why it's so great.  (I probably should have included something about Cosmos and Bee Balm, ... but I'm tired!)


Friday, May 18, 2012

The Lettuce is Out Of Control

Just a quick update, the lettuce has grown so much, so fast, that I fear we will be eating so much salad in the next few weeks that it will start coming out of our ears.  Since my mom is in California visiting friends I can't even give some to her to stifle the avalanche.  We are expecting some last minute cool weather next week, so I am hoping it will give me time to use that lettuce before it starts to bolt.  I'm planning to leave at least one plant in for seed, but haven't yet decided if it will be the Valmaine, Red Sails, or SloBolt.  Those three have been my favorites of the mix I planted.  Valmaine did the best and I have the most of it, so I am thinking that since Red Sails seemed to be in the smallest proportion it is likely the best to save seed from. 

Note to Self: just spring for the individual packs of seed next year, seed mixes are kind of a pain.  As in, more than half the seeds ended up being Buttercrunch, and I can't specifically plant more of a different type because I can't tell from the seed what it will come up as.  And I still don't know if the green leaf is Salad Bowl or SloBolt because they are identical plants!

I'm still waiting on the strawberries, and the peas are getting tall, but haven't flowered yet.  Harvest total is at 1 lb. 10 ozs. today, after picking more lettuce and thinning the celery down (the tiny celery thinnings went into the stock bag).

I think it's about time for another informational post as well.  Maybe a culture post, or a recipe post... Not sure what I feel like doing yet.

Friday, March 2, 2012

Onion Culture

Allium cepa a.k.a. the bulb, common, or garden onion, is the most widely cultivated species of Allium.  Allium cepa only exists in cultivation; though there are a few Allium species in the wild, often referred to as "wild onions" they are NOT Allium cepa. 

Traces of onion have been found in Bronze Age settlements dating as far back as 5000 BC (about the time the potato was being developed on the other side of the world; because what is a potato without an onion?).  It is uncertain if these traces were of "cultivated" onion; true cultivated onions can be traced to about two thousand years later in ancient Egypt, leeks and garlic also had their beginnings at this time.  Ancient Egyptians believed the onion's spherical shape and concentric rings represented eternal life.  Traces of onion have been found in Egyptian burial chambers and it's believed that the workers who built the pyramids ate onions and radishes.  In Greece, onion was believed to lighten the balance of the blood.  in Roman culture, gladiators were rubbed with onion to firm up their muscles.  In the Middle Ages they were so important they were used to pay rent, and given as gifts.  Medicinally onions have been used to treat constipation, erectile dysfunction, infertility, headaches, coughs, snake bites, and hair loss.  Columbus brought cultivated onions with him to the Americas, only to find out later that the natives were already using wild onion for everything from food, to dyes, to toys.

You should never give onion to pets or other animals as it may poison them.

Onions contain chemicals known to have anti-inflammatory, anti-cholesterol, anti-cancer, and anti-oxidant properties (in humans).  Studies have shown that eating onions may lower the risk of head and neck related cancers.  The more pungent an onion is, the greater its ability to inhibit cancer cell growth.  Onions may also be beneficial in reducing the risk of osteoporosis in women. 

Lacrimatory Factor, or LF, is the gas created when an onion is cut into or bitten that causes your eyes to tear up.  This can be reduced by using a sharp knife to cut them, or by chilling or freezing them before use, or by cutting them under running water or in a bowl of water. 

Onions are propagated by seed, or by bulb set.  Onion sets are small bulbs of onion grown from seed the previous year, planted in the ground these will grow into full sized bulbs in a shorter time frame than seeds.  Sets are reputed to grow bulbs with less durability than seeds though.

Onions that produce seeds are "day-length sensitive", this means they require a certain number of daylight hours before they will begin to bulb.  Long-day onions require 15 or more hours of daylight, intermediate day onions require 12-13 hours, and short day onions require 9-10 hours.  Often, short day onions are planted in the fall in mild climates and will bulb in early spring. 

Green onion, or scallion, refers to either an immature onion that has not yet bulbed, or to the Welsh onion, an Allium species which does not bulb at all.  You can differentiate between a Welsh onion and a common onion scallion by the cross section of the leaves; Welsh onions leaves are flattened on one side, while the common onion leaf is round.  Tree onions, top onions, topsetting onions, walking onions, or Egyptian onions refer to the species Allium proliferum; this onion plant forms bulblets on top rather than a flower and seeds.  These bulblets can then be planted to grow more onions, or eaten like a normal onion bulb.
Tree onion

Green onions and leeks should be refrigerated after harvest.  Regular bulb onions can be stored at room temperature in a cool, dry, dark, ventilated area.  At room temperature onions have a shelf life of 1-5 weeks depending on variety; in the fridge this can be extended up to 4 more weeks.  In storage, onions can absorb the smells of apples and pears; they should be stored away from moister vegetables as they can draw that moisture from the air and will spoil sooner.

Onions generally come in 3 colors: red, white, and yellow.  Yellow onions are full-flavored and are usable for just about any culinary purpose.  Red onions are best chopped fresh, or as grilled or char-broiled onion.  Red onions have a sharper flavor.  White onions are traditionally used in Mexican food, they sautee to a golden color and develop a sweet flavor when cooked.

Small bulbed onions are used for pickling, or eaten as vegetables; these include pearl, boiler and pickler onions.  Onion seeds can also be eaten as sprouts, similar to alfalfa sprouts.

For longer season onions (those that make a regular bulb) you should plant seeds in the fall; or plant sets instead in cold climates.  Short season onions like scallions and pearl onions can be planted early in the spring.  Starting them inside can help you get ahead of the game when the weather stays cold late in the season.  Seeds can be planted very close together (my pearl onion seed pack said to plant up to 100 seeds per 4"-6" pot) then thinned after sprouting.  Thin to about 1-2" apart, further for larger onions.  Sets can be put into the ground as early as January, or as late as April depending on variety and climate.  Tops will grow up, when tops die back the bulbs are ready for harvest.  The whole onion can be harvested at any time too, for use as scallions.  Don't waste your thinnings! Chop them up into a recipe that calls for green onion. 

Onions are a great addition to any garden, they can deter some pests, look pretty both in growth and in bloom, take up very little space, and can be added to nearly any recipe.  If you're going to grow tomatoes, you'd better grow onions too.  You can't make salsa or spaghetti sauce without them.  I have never heard of a pest or disease problem with onions either, though I may be mistaken (Note: the SFG book says onion fly maggot can be a problem).  My only issue with them  in years past has been that they just don't want to bulb, so this year I'm giving them a head start in the house, both the pearl onions and the sweet Spanish white onions, in the hopes that I'll actually have some onions for all my summer recipes.  In an SFG garden plant 16 onions to a square foot.

After harvesting lay onions out in a single layer in a warm dry place, this will allow them to cure and the skins to dry, ensuring they will last longer in storage.

My onion growing knowledge is kind of slim, so if anyone can add to this please feel free to let me know.


Thursday, March 1, 2012

Potato Culture

There is a wealth of information out there about potatoes, the Wikipedia entry alone is full of potato facts.  In fact, reading up on them has given me a whole new appreciation of french fries.  It's kind of amazing to think that the potato we eat today is the descendant of potatoes first cultivated between 7 and 10 thousand years ago in Peru and Bolivia.  Even more amazing is that there are over 5000 varieties of potato today 99% of which were developed from a subspecies that grew in south central Chile.  That's quite a history.  The Spanish brought the potato home with them after their conquest of South America.  From Spain and other ports of Europe the potato spread across the world and today it is eaten in nearly every nation on the planet. 

One of the reasons for its popularity is that the potato is well-adapted to most climates; it can also be grown in a backyard garden in quantities adequate to provide for a family's sustenance; it grows easily; and is much less expensive than grain crops.  The potato has been a crop to grow at home for centuries, since potatoes have particular storage requirements they didn't keep as well as cereal grains and therefore were less market-worthy and more likely to be found in individual gardens.  This is part of what led to the Irish Potato Famine, the poor Irish tenant farmers fed their families on milk and the potatoes they grew on their small allocated plots.  Nearly all of the potatoes grown in Ireland at that time were a variety known for large harvests, which made sense when you were short on growing space and had a family to feed, but not at all resistant to late blight.  A particularly nasty year led to rampant infections of late blight taking out nearly one half of the potato crop in Ireland; and leading to the deaths of nearly a million Irish, and the emigration of more than a million others, effectively reducing the population by 20-25%.

Potato plants
Why mention the Irish Potato Famine in a blog post about potato gardening? Yeah, it is a little morbid.  But it's an important example of the folly of dependance on a single cultivar, or a single staple crop even.  Genetic diversity in food crops is something to be coveted, having a multitude of available cultivars offers people protection in the event of another devastating loss like the Potato Famine.  With that in mind, if you plan to grow potatoes, make an effort to try some lesser known varieties and get familiar with potatoes all over again.  One of the major reasons Russet potatoes are so common in grocery stores is not their flavor, or nutrition, or ease of production.  Can you guess why the Russet is found everywhere?  Because it can be shipped everywhere.  Russet potatoes are one of the longest-storing varieties, they can be bounced around, stored for months, and are none the worse for wear.  I am looking forward to getting familiar with my German Butterball potatoes, and learning what traits they have to offer other than shipping stability.

I recommend doing further reading on Wikipedia to learn more about the history of this plant, but I think I should move on to growing information at this point.

Potato plant in planting bag
Potatoes are grown from "seed potato" which is not a seed at all, it's a potato.  The "eyes" on a potato sprout and grow into a new plant.  You don't even need whole potatoes for this, just chop them into chunks with at least one eye on each.  Bury them in rich soil about 6-8" deep.  Keep them well-watered, with good drainage to avoid overwatering. 

Potato growth happens in 5 phases: first sprouts grow from the seed potatoes and roots begin to grow as well.  The second phase involves photosynthesis as the plant's leaves grow.  Phase 3: stolons develop from lower leaf axils on the stem and grow downwards into the ground and on these stolons new tubers develop.  Often, this phase is also when flowering occurs.  Tubers will stop forming when the temperature hits 80 degrees, this is why potatoes are considered cool weather crops.  The next phase involves the tubers growing larger.  The final phase involves the leaves and stems dying back, the skins of the tubers hardening, and the tuber sugars converting to starches.  You can harvest at this time, or during the fourth phase you can hand-harvest "new" potatoes while leaving the plant to continue growing more.

An important thing to remember about potatoes is that they are from the nightshade family and do contain small amounts of the toxin solanine.  To ensure that you don't become sick from your potatoes, never eat green potatoes.  Tubers will turn green when exposed to light; in the garden you can prevent this by keeping tubers that show above ground covered with dirt or a heavy mulch; once harvested store potatoes in a brown paper bag to reduce light exposure.  Also, after flowering the potato plant may develop fruits on it, these are toxic and should not be eaten.  For the home garden it may be best to pick all of the potato flowers when they fade to prevent accidental ingestion of the fruits by children or visitors.  Potatoes are generally cured in order to allow for skin-set, and increase storage capability.  Similar to winter squashes curing is done by setting them out in a warm, almost hot! place for several days.
Potato flowers

Potatoes make a very pretty flower and could be interplanted with annual or perennial flowers easily, without it being obvious that they are food plants.

I hope this has been as helpful to you as it has to me, and look forward to getting my potatoes started and seeing how well they do. 

Tuesday, February 28, 2012

Territorial Proves Superior Again

There has been an article shuffled around Facebook lately that includes a list of Monsanto owned vegetable seed varieties.  Meaning that Monsanto owns the trademark on that cultivar name, or the patent on a hybrid.  Since I am no fan of Monsanto I took a look at the list and found a few (not many luckily) that I had purchased last year.  So I sent an email to the Territorial Seed Co., from which I buy nearly all of my seed, to ask if they bought seed from Monsanto.

Within a few hours I was rewarded with a response.  No, Territorial Seed Co. no longer buys any of their seed from Seminis/Monsanto.  And they actually grow about 25% of their seed here in Oregon at their farms. 

You've got to respect that. I'm glad to know my purchases will not line the pockets of execs at Monsanto, a corporation who's ethics are questionable at best.  :)

Thanks, TSC, for making efforts like these to please your customers; for fast shipping, great catalogs, and amazingly fast email responses!  (My brother is still mad about his last order though, I have a feeling it was lost in the mail.)

Lettuce Culture

**most of my plant culture information comes from Wikipedia entries, opinions are all my own though.

Lactuca sativa, or lettuce, is a member of the Asteraceae family and actually makes a pretty little white or yellow flower similar to a dandelion if you allow it to bolt and go to seed.  When cut its stems ooze a milky white substance, hence the reason for the name Lactuca.  Some members of the Lepidoptera butterfly family eat lettuce.  In Ancient Egypt lettuce was considered an aphrodisiac.

Lettuce grows best in a humus rich, light soil, with constant moisture.  Lettuce prefers temperatures between 75 degrees and 45 degrees F.  A hot or dry environment may cause it to turn bitter and bolt, though this is less of a problem with certain bolt-resistant or heat-tolerant varieties.  Seeds can be direct sown into the garden or transplanted.  With a protective cover to keep lettuce from freezing it can be grown in mild climates nearly year round.

The primary types of lettuce are butterhead, romaine, crisphead or iceberg, and loose leaf.  Butterhead leaves have a buttery texture, they are similar to romaine, with less crispness and a shorter growth habit.  Romaine, or Cos, grows long leaves with a firm central rib, it is more heat tolerant than other varieties.  Crisphead, or iceberg, grows in a tight head similar to cabbage.  They have a crunchy texture and are generally the mildest flavored lettuces.  Loose leaf lettuce has tender, delicate leaves and doesn't grow a "head" but rather as a bunch of loose leaves.  Summer crisp or Batavian lettuce has a mix of traits of iceberg and loose leaf, being crunchy in texture and having only a moderately dense head.

The less bitterness a variety of lettuce has, the higher the water content, and consequently the lower the nutritional value.  All lettuce varieties will cross-pollinate easily, so be certain to allow only the cultivars you wish to harvest seed from to go to flower.

Lettuce is a fast grower, taking as little as 3 weeks to reach a harvestable size.  Remember to keep your lettuce plants moist, and protected from heat.  Slugs are the primary pest to watch for on lettuce, though cutworms can also ruin a planting by cutting the stems when seedlings first sprout.  Defeat slugs by baiting, hand picking, or laying down a copper barrier.  Protect from cutworms with a paper collar, or start lettuce indoors and move outside once they have a few true leaves on and have grown beyond cutworm edibility.  Lettuce can be grown indoors over the winter under a grow light or in a windowsill.

Mix varieties of red, green, and mixed color lettuce in a salad for a more interesting presentation.  Since lettuce varieties will cross so easily, try leaving two or three favorite varieties to cross-pollinate and see what exciting new crosses you can come up with.  For butterhead, romaine, or loose leaf lettuces harvest only the leaves you need and allow the plant to continue growth; crisphead is best harvested as a whole head. 

For planting: try planting lettuces under a fruit tree, in early spring they will receive full sun, and once the tree flowers and begins to put on leaves it will shade the lettuces leaves from the heat of the sun.  SFG suggests 4 lettuce plants per square, and they can also be interplanted between taller growing brassicas to protect and shade them.  If your tomatoes are ripening and you wish to have lettuces to go with them, try planting lettuce under the shade of the tomato plants, or in a shadier corner of the garden.  If all else fails, grow them inside during the hottest part of the year, in the cool of the AC.

You are unlikely to be able to preserve lettuce at all; it manages fine in the fridge for a few days though.  Be sure to stagger plantings every few weeks to ensure a crop all year and don't plant too many at once or you'll be swimming in fresh lettuce that HAS to be eaten, and can't be saved by preserving.

Happy lettuce growing!

Monday, February 27, 2012

Love Lettuce

Despite the fact that the seeds were planted Saturday night, and it is now only Monday morning, I spotted the tiny white slivers of lettuce stems in my pots today.  I am just amazed at how fast that was.  Optimal conditions for germination make a big difference.

Also, I called this morning for location services to ensure that planting my cherry tree won't involve electrocuting myself or bursting a water line... if it's a problem I will just have to look into a different location for the tree.  I probably should have done this before buying the tree, but oh well, live and learn I suppose.

That's all for today, hoping to get a chance to post a lettuce culture post soon so keep your eyes open for that.

Sunday, February 26, 2012

When the Men Are Away, the Women Will... Build a Grow Room?


Shelves, trays, lights, bulbs, and seedling mix.
The original shelf and all the stuff stored there.
Got my grow room set up yesterday, just like everything else it was more challenging than I expected.  The 2' light fixtures I bought were for wiring into a house and didn't have cords, plus they needed assembly which I didn't know until I opened the boxes.  So after returning them I was forced to visit two hardware stores and a Home Depot to find something that would work.  So here's a quick tip: undercabinet lights, shop lights, and aquarium lights are your best bets for fixtures.  Strip lights wire into a home and don't have cords.  Undercabinet lights are primarily less than 2' long, shop lights are 4' and longer, and aquarium lights are in between.  Since you pay close to the same amount for a 2' light as a 4' light it's more cost efficient to have a 4' space and buy one shop light (which are cheap) than to buy two 2' lights (or in my case two 18" lights).  Aquarium lights tend to be more spendy since they are rather specialized, the other advantage of shop lights is that they often come with chains to hang them.  Sadly, my space was not wide enough to fit a shop light so I had to resort to a less efficient system.

 When selecting flourescent bulbs be sure to buy the correct length, circumference, and light color.  While a standard soft white bulb will work to sprout seeds, they will become leggy fast searching for actual sunlight.  Flourescents come in varying circumferences (T12, T8, T5) and you should check the size on the fixture you choose and buy a bulb of the correct size to fit it.  My fixtures require 18" T8 bulbs.

Examples of different bulbs that would work for plant growth.
Once you find the correct size you need to select a light color as close to that of sunlight as possible.  Daylight, Full Spectrum, Wide Spectrum, Plant and Aquarium, Natural Light, or Natural Daylight are some of the names for the bulbs you need.  If you are unsure of whether a bulb will work for your starts you can check the label on the package.  Look for the "Color Temperature" on the label, it should be a number between about 5000K and 6000K.  A number higher than that will cross into the white light category and may not be adequate, while a lower number will become closer to red light and again won't serve your purpose.

Once I solved my light fixture problem I set up my shelf, moved all my junk onto it, then plugged in the power strip.  It took a bit of arranging to get the lights hanging correctly. Then I wrapped tin foil over the cardboard from the shelving box and hung it over the back of the shelf.  Finally, I planted some seeds, I will probably plant more today, but was surprised to find I could fit 29 pots of different sizes into one tray.  I may not need more than that!

Below are more pictures showing the grow room space.

The shelf all assembled, lights hung, you can't really see the tin foil but it's against the wall reflecting the light forward.  I also set my thermometer w/min max on top to watch the temps here and in the green house more easily.

Examples of reusing last year's pots, and of phone book page origami pots.

21 of my pots filled and ready to go.  I had to stop and make more paper pots.

Plastic dome over top.  Seeded, watered and under the lights.  Ready to sprout!

I could have fit 3 trays under these lights but by the time I was done last night I was not prepared to plant that many seeds.  Plus I think I'll need another bag of seedling mix first.  Be sure to keep lights positioned just above the tops of the plants, no more than 4" above them to encourage short, robust growth and deter legginess.  You can move the lights up as needed or move the plants down, whatever is easier.  Lastly I wanted to mention that while researching on plant lights I found out that plants require and grow better with both light and dark times each day, so be sure to turn your plant lights off at night and back on in the mornings, if you are too forgetful for that then set a light timer to do it for you.  Having dark time is nearly as important to plant health as having sunlight.  Good luck!


Friday, February 24, 2012

The Costs of an Early Start

Growing seasons differ across the country.  A lucky friend of mine just sent me a picture of the lemon and orange trees in her yard that are in full fruit right now, living in southern California makes a big difference I suppose.  The weather here is still touching on freezing overnight and with as mild as the winter was it would not be remiss to expect it to keep going this way for another month or even two.

I recently picked up an indoor/outdoor thermometer with min/max capabilities to keep an eye on how much the temperature in my tiny greenhouse is changing.  In the past week the minimum temperature inside the greenhouse was 33 degrees, and the maximum was 96.  Unless one of the kids slapped the thermometer with a hot potato when I wasn't looking, that means there was a more than 60 degree change in temperature just within the week.  Too cold for winter veggies and too hot for them too.  I definitely need a better greenhouse system, but I'm unwilling to invest in one since I have such limited space.  Instead the greenhouse will be used solely for hardening off, opening it up during the day and closing it on cooler nights to keep the temps from going out of control.

This has left me in need of a space to get my winter veggies started.  My brother, may his awesomeness reign forever, has agreed to start my hot weather plants for me again this year.  I plan to attempt starting the cold weather plants myself though.  With that in mind I decided to build a "grow room"... er, shelf inside.

People give you a lot of strange looks when you mention that you are building a grow room, it seems the phrasing just makes them think of growing marijuana, but in actuality it makes good sense (cents?).  Starts from a nursery are often limited to the most common varieties, and by what is in stock.  Each start you buy ranges in price from .99 to $5.00 (for gallons).  But if you have a grow room and some seeds you can effectively pay far less in the long run and have better quality plants of more varieties.  If you save your own seed it cuts the cost even further.

So let's talk about the costs of a grow room.  For cool weather plants the costs are lower than for hot weather plants, primarily because you don't have to heat them as much.  Start with a shelf, or shelves, or a tabletop, or a windowsill, anywhere you can find room to set one or more trays of pots, hang a light over it, and keep it away from things or people that could cause trouble.  You will need lighting, if it's a completely enclosed space you'll need ventilation, if it's outside of the house or you will grow hot weather plants longer than a few weeks you'll need a heat source you can monitor and adjust.  You also need trays, pots, potting soil, seeds, water, and a power source for the heat/lights/ventilation.

For example, my "grow room" will actually be a few shelves in my laundry room.  The furnace and back door are in there, and it is generally left open to the rest of the house so ventilation and heat should not be an issue.  There is a power source (the outlet the washer is plugged into) to run the lights, though I will need a power strip to use more than one light at a time.  Currently I have a small metal shelving unit in there which holds the overflow of my Costco shopping trips that won't fit in the kitchen.  My plan is to replace this with a 4 tier shelf that is wider and taller.  It will still hold my overstock goods in the bottom two shelves, but the upper two will be outfitted with lights and house my starts.

Costs:
36" wide 4 tier shelves:  $60
Power strip:  $20
2' wide single bulb flourescent light fixtures:  $10 each
2' long flourescent light bulbs (daylight or plant and aquarium):  $8 each
Plastic seedling trays:  $2 each
Organic seedling potting mix (small bag): $5 each
Aluminum foil: $5
Newspaper/reusable old pots/phone book:  $0
Cardboard:  $0

Depending on how many plants you plan to start it should have an initial cost of about $150 or more.  Nearly half the cost is just the shelving unit, which is totally reusable year after year and can be used for storage between growing seasons.  The other big cost is the power strip and it can also be used year after year, or used for other things when it's not needed for the plants.  The light fixtures and plastic trays should last you a few years too.

The things that need replacing each year are the potting mix, aluminum foil, cardboard and pots.  But cardboard is free from any recycling bin, aluminum foil is inexpensive, potting mix can be made in bulk, and pots can be made of free recycling items too.

So, to make the cost comparison, let's say you are planning to grow cabbage, broccoli, kale, onions, and carrots.  About 70 plants total.  To buy these plants already started you'd pay about $2 each for four packs of the larger veggies or 6 packs of the smaller ones.  For this price you get the smallest starts, basically a stem with its first set of true leaves.  If you want 40 of the large veggies it will cost $20 and let's say about another $10 for 30 of the smaller ones.  So you spent $30 on starts.  Not so bad really, in fact, I know I usually spend more than this... maybe I underestimated the cost.  But no matter.  4" potted starts will cost you up to twice as much for one plant.

The first year of building a grow room you will have spent $150 on the setup alone, and about $7.00 for the same five types of plants.  The difference is that a packet of kale seeds contains around 50 seeds, carrot packets contain closer to 100 or more.  So instead of 70 plants you have the ability to grow 250 plants.  You can grow spares and sell them, or trade them to other gardeners, or share with friends or family.  Or you can save all that extra seed for the next year and save yourself the seed costs.  Obviously there is no savings the first year, but the second year you only have to pay... well, nothing if you make your own potting soil from your own compost, about $5-$15 if you buy it, depending on how much you need.  And so on, for many years.  Light bulbs will need to be replaced every few years, and undoubtedly your plastic trays will eventually need replacing, but for the most part the grow room will be low maintenance and save you money in the end.

Considering I spend $150 on seeds alone, of nearly 40 different plants, if the grow room will allow me to improve their survival rate and possibly even turn a few starts into cash by selling them to neighbors or my mom at a discount I will be happy with the investment.  Two shelves of grow space alone should provide all of my cool season crops adequate room, and it could also be enough space for the hot season plants if needed (after the cool plants were moved outside).  Imagine how much you could grow in a whole room!

The other big bonus to creating your own grow room is getting ahead of the game on planting times.  In the Willamette Valley a gardener has between April 15th and October 1st to do all of their growing.  Just over 5 months.  If it takes a cabbage 60 days to reach maturity and a tomato 80 days... there just isn't enough time to plant one from seed and then follow it with the other from seed.  Working in a small space you can really increase your returns by planting the same area twice, or even three times, in one season.  With a grow room I can start my cabbages inside a month earlier than I could outside, while the soil is still too cold for germination.  They can grow larger under optimum conditions before being put outside, then finish their growth in the garden where they will have plenty of room.  This means that I should be able to have the cool weather crops (or at least most of them) harvested and pulled out in time for the hot weather plantings to go in at the beginning of June.  Then I can even start a fall crop in August when the determinate tomatoes have finished producing and the basil is harvested, leaving the longer season tomatoes to finish off before it gets cold again.

Lastly, I can use my grow space over the winter to grow entire plants for fresh eating indoors.  Spinach, lettuce, green onion, annual herbs like cilantro and basil, all of these can grow indoors over the winter.  They won't outgrow their space and can easily be harvested as needed without sacrificing the entire plant.  Inside a house they shouldn't even need extra heat to stay healthy.

P.S. I almost forgot to explain the purpose of the foil, cardboard and newspaper etc.  Backing and/or siding your shelves with a reflective surface (i.e. aluminum foil wrapped over cardboard for stability) will help keep the light and heat focused inward toward the plants and can make a big difference in plant health.  Newspaper or phone book pages make excellent paper pots, or you can reuse any old start containers from previous years, just be sure to wash them well with soapy water.  I've found that newspaper origami pots are about a 4" pot, while phone book pages make a pot closer to the size of a 2" peat pot.  Yellowbook phone books are totally recyclable and have soy based inks that won't contaminate your soil, check online to see if your phone book is made with soy based inks.  If not, stick to newspaper, which is always made with non-toxic inks.

Next time... When the Men Are Away, the Women Will... Build a Grow Room?
In which my daughter and I put together our grow room, start seeds, and then wait for my husband to notice it when he gets home.


Monday, February 20, 2012

A Bit About Bugs

While doing some weeding of the garden beds in preparation for my first spring plantings I came across some bugs (well grubs) of an unknown type.  By the way, this is a great time to pull up any dandelions, dock and other taproot weeds since the soil is still very soft and moist; it's more likely you will get the entire root out rather than have it break off and re-sprout.  The grubs I found were gray or dirty white with dark heads, I also found a green grub or caterpillar that was hanging around in the weeds.  I have no idea what they are, after some internet investigations the best answer I could find was cutworms.  Since I'm not certain of this I tossed them over the fence into the empty lot.  If they are harmful at least they are out of the garden, if not, I wish them the best in their new home.
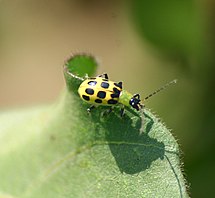
I am considering picking up some beneficial nematodes to help manage soil dwelling pests.  One reason for this is that I spotted two cucumber beetles at the end of last summer, bright beautiful little green ladybug-like beetles with 12 black spots.  While they are very pretty, these beetles are a real problem in the garden.  They eat just about any vegetable they can get to, then lay eggs in the soil, when larva hatch they too will feast on vegetables and they spread bacterial wilt and squash mosaic virus.

Spotted cucumber beetle


Cucumber beetles also have a striped species that looks similar but the spots are instead stripes that run from the head to the rear.  These guys are a real danger to a garden.  Unfortunately they are also a challenge to be rid of.  Parasitic wasps can be helpful, if you don't know how to get these, try planting flowers that will attract them to the garden.  Tiny nectar-filled flowers such as thyme, savory, dill, cilantro, parsley, yarrow, candytuft, verbena, sweet allysum and goldenrod.  If you spot caterpillars or other pest bugs with tiny white sacs attached to them leave them alone!  The sacs are the cocoons of parasitic wasps and the pests will die when they emerge, spawning a new generation of pest killers.  Another cucumber beetle predator is the soldier bug, "leather"-backed firefly-like bugs that can eat up to 100 bugs a day.  Soldier beetles are attracted to pollen and nectar filled flowers and particularly like hydrangea, goldenrod and milkweed.  Tachinid flies are also effective at managing beetle populations, and are another type of parasitoid.  Tachinids are not as preferential as other biological controls and will just as likely parasitize butterfly caterpillars.  Having a large garden variety will help to attract these pest managers.

Beneficial nematodes are microscopic roundworms that live in soil and prey on soil dwelling insects.  They are effective controls of fleas, ants, termites, roaches, flies, grubs; yet they are harmless to humans, pets, and our soil-dwelling friends the earthworms.  You can try to attract nematodes to the garden by adding plenty of compost and having rich organic soil, but this is a grab bag; you could just as easily attract pest nematodes.  It may be wiser to purchase a small package of beneficial nematodes to spread through your garden instead.

Since I live in a mobile home park that was built over an orchard in the 60s, I suspect this area was heavily treated with pesticides in the past and the likelihood of it supporting its own nematode population is fairly slim.  So I will most likely purchase them from a supplier and sow them in and around my garden and yard.  Ants are a major issue in our area, and I imagine if we had a natural nematode population that would not be the case. 

I also plan to sow a package of "Beneficial Bug Mix" flowers in the empty lot next door.  My garden lacks space to add a lot of these plants but I can at least use them to attract beneficials to the vicinity of the garden itself. 
If you plan to attract beneficials to your garden to help with pest management, you should keep a few things in mind:

-Don't spray! Insecticides will kill your beneficials, birds that eat pests, and the pests.  Let the birds and bugs do their jobs and handle the pests for you.

-Identify before you destroy.  It does you no good to attract ladybugs to your garden and then kill their nymphs because you thought they were pests.  Take time to identify bugs, if you can't then move them out of the garden and hope for the best.

-Provide what they need.  Food and shelter in the form of flowering plants, and water.  Your bugs need to drink too.

-Putting out a suet block or feeder of quality untreated bird seed will attract a variety of birds to your garden, many of which also eat pests.  You may find you have a lot of millet to pull up later in the year though.  You can also grow sunflowers and save the seed each year to offer the birds.

The garden is an environment all its own, keeping a balance between flowers and food, pests and beneficials will allow it to transform into its own natural environment that maintains its own balance rather than needing constant interventions. 


Friday, February 10, 2012

Smart Seed Sorting

I know this is kind of out of order, but I realized today as I was daydreaming about seed starting that I never sorted through my seed order when it arrived.

I generally like to sort through all of my seeds and organize them by planting time.  Cool weather crops (those that will sprout below 60 degrees) and long season crops (slow growers like onions) get put in the early start pile.  This pile includes cool crops like cabbage, kale, broccoli, lettuce, spinach, Swiss chard, cauliflower; long season crops like onion, garlic, artichoke, celery, and leeks.  These will be started inside a few weeks before last frost date, this pile should also only include crops that are okay with transplanting.

Cold Season- Indoor Start seeds laid out for organizing
For crops that are early but don't care for transplanting I will direct sow as soon as the weather allows, these go in a separate "direct sow - cool" pile.  Peas are an example of cool direct sow plants, it is a waste of space to start them indoors since they will sprout in soil as cold as 40 degrees and grow fairly fast. 

The next pile will be hot weather plants that need to be started inside, anything that requires hotter than 60 degrees to germinate goes in this pile.  Tomatoes, peppers, eggplant, basil, cucumbers, melons, and winter or summer squashes all fit in this category.  They will be started indoors in early May and transplanted to the garden by the first week of June.

There are a few plants that prefer hot weather but don't transplant well, corn, beans, and carrots are the most common of these.  They should be bundled separately and planted when the hot weather transplants go out, or a bit earlier if you're willing to keep them protected.


Hot Season- Indoor start seeds
I tie up each of these piles with a rubber band and a scrap of paper for a label, or if you find you have too many seeds for rubber bands you can put them in paper bags instead.  This helps me to avoid missing a plant date for something if I'm not paying attention.  I can just grab the pile of seeds I am ready to plant and go.  It really helps to avoid finding out in June that I completely forgot to get my artichokes started early enough.

Are We There Yet? Seed Starting

It's early February and while it's warm out right now, it's still a little too early for seed starting.  Last frost here in the Willamette Valley is the first week or two of April.  From my own experience and the particulars of my garden I will put out my coolest weather plants in late March.  I have plastic sheeting to cover the plants if there is a late frost expected, and my beds are all raised so the soil tends to warm up faster than in-ground beds. 

Far more of an issue in my garden is that the fence along the back of each bed is south facing.  Right now we can have a beautiful sunny day and my beds are completely shaded, as well as several feet past them onto the patio.  The fronts of the beds won't see direct sunlight until mid-March, and the backs won't until late April.  I can start seeds indoors though and put them out in mid- to late March.  The only issue with this is trying to find a balance between when to plant versus how large the plants will get by the time they can be moved outdoors.  My small greenhouse will keep them safe a little longer, but they will become spindly and weak quickly and exposed to very high temperatures in the greenhouse when the sun is out.  The little standing shelf style of  greenhouse is useful for the transition between indoor growing and outdoor growing, but it really doesn't have any temperature controls and heats up very fast.

I generally figure about 10-20 days of indoor growth.  The first ten days are just to allow for sprouting, the next ten are to allow at least one but preferably two or even 4 sets of leaves to develop before transplant time.  Most cool weather plants shouldn't have trouble with this; others, such as celery, need much longer to develop.

I also don't have any south facing windows or any grow lights currently, so if I plant seeds too early they will get lanky searching for light long before it's warm enough for them outside.  The only windows in my house that face south are in my kids' bedrooms, and that's just not a practical place for plants to be. 

My best bet for starting brassicas, lettuces, spinaches, and other cool weather crops is to plant them around the last week of February to the first week of March, then move them to the greenhouse in mid-March and wait for the weather to clear for transplanting.  This is one of the reasons for keeping notes on your garden.  Last year I started things inside the first week of March, then directly transplanted them at the end of March because I didn't have the greenhouse yet.  They were very spindly after a month in the house, and i was forced to put them directly in the ground a little too early because the greenhouse was tipped over in a Spring storm.  I learned to weigh it down with a cinder block to prevent that happening again!  The plants struggled outside until the sun finally started to reach the garden beds in April, they did well after that though. 

This year I think I can get a head start by starting just as early indoors, then moving things to the greenhouse, and holding off to transplant until April.

One thing I do plan to change is the size of pots I will be starting seeds in.  Last year I used the tiny 2" peat pots from a seed starting kit.  This year I will be starting seeds in 4" pots, this will save me from having to transplant them before they outgrow the 2" ones.  Since I'm not running a nursery where seed starting space is limited it makes more sense to me to save myself the step of switching up to bigger pots.

You can start seeds in anything, peat pots, plastic pots, egg cartons, or paper pots.  Anything that is roughly the right size and will hold dirt and water, just make sure it has some drainage holes in the bottom.  You will also need a tray of some kind to catch water runoff; plastic trays from seed starting kits are reusable for this year after year, cookie sheets with sides work too, or a mesh screen over a bucket even.  My dad found a collection of old school lunch trays at a garage sale many years ago that work great for all sorts of things, including seed starting trays.

My brother found a very cheap solution for pots as well, that also protects against transplant shock.  Newspaper pots! Fold newspaper origami-style into a pot shape, plant your seeds, watch them grow, then plant the whole pot into the garden.  Here is an excellent video showing how to make these.  If your origami skills are lacking you can also try this method.

So you have a tray, and pots, now you just need some dirt.  The one thing to be careful of for seed starting is not to use old, used dirt from the garden.  Normal garden soil is full of weed seeds, fungus spores, insect eggs, etc. that you just don't want in the pots with your seeds.  You should use potting soil, seed starting soil, or if you prefer a less expensive option you can use peat moss and give it an occasional dose of compost tea once the seeds sprout.  Peat moss can be bought for a few dollars a cubic foot, which is more than enough to start all the seeds you need.  It retains water well so won't dry out between waterings and is soft and loose, allowing roots to spread out and grow better.  Peat moss doesn't have any plant nutritional value though, it's like the potato chip of soils.  Spritzing your starts with compost tea once a week will help supply the nutrients they need to grow healthy in a peat soil, and prevent them from damping off before they are transplanted. 

Plant your seeds, smaller things like spinach can be planted 2 or 3 to a pot, larger plants should be in separate pots.  Label each pot, see tip below.  Find a sunny (or somewhat sunny) spot in the house where seedlings will be safe from kids and pets (my cat ate my first lettuce plantings last year).  Cover trays with plastic wrap, or the plastic domes that come with seed starting kits to help retain moisture and heat.  Remove the plastic covers once the seeds have sprouted to prevent mold though!  And wait for your sprouts to come up.

Make sure to note what day they were planted and what day each type of seed sprouts.  If you have sprouts of everything but lettuce after 10 days, you should probably plant new lettuce because it should have been the first thing to sprout.  Again, this is when taking notes is really useful.

Tip: Don't write labels on the paper pots, they will smudge after watering.  Instead, you can use plastic knives from party packs of plastic silverware (because you always end up with leftover knives, yet need more forks and spoons) and a permanent marker.  These work great; they are sturdy, don't smudge, and it's a nice way to reuse something that would otherwise just keep stockpiling in your cabinets.  Another option that I found at Backyard Homesteader's YouTube Channel is using window blinds as plant tags, plastic blinds can be found for a two to three dollars at most stores that sell housewares, then cut up into small tags to label plants with.


Wednesday, February 8, 2012

Make a Note

Well, the beautiful weather has gone back to a moist gray chill.  I suppose I will be back in the house for another week or two.  That's okay though, since I wanted to bring up the topic of notes.

Taking notes on your garden seems like a waste of time, but in reality it is rather hard to remember the date and conditions of planting a specific seed for a year or more.  As your garden gains more plant varieties and you start to push the limits of what you know, it's important to write these things down so that next year as you select tomato seeds you can refer back and remember that Brandywines were good producers, but Legend struggled in the bed it was in.  You can make a list of what seed you have at the end of summer, so your new order in Spring doesn't accidentally double up.  You can look back at some misconceptions you had and remind yourself not to do those things again.

I tend to get so excited about gardening by springtime that I put plants into the ground too early, or start them in the house too early and have sad spindly plants by the time the weather has warmed enough for them to go outside.  I have to make a note to remind myself that curcubits don't actually like the weather in Oregon in May, they get too cold and wet and end up with mildew issues.  If I use this information next year I'm more likely to hold off until June.  I also keep notes on what seeds were planted inside, outside, and at different times; what day they were ready for harvest; what sprouted well and what didn't; and what the weather was like.

Taking notes is like slowly building up a Farmer's Almanac that is based on your specific location, crops, and experiences.  You may plant rhubarb this year, have it die, then 6 or 7 years down the road think, "Oh, I should plant some rhubarb, I like rhubarb!" but not remember the circumstances that led to its death the last time and end up having the same thing happen again.

Note taking doesn't have to be really intensive, if you're a journaler by nature keep a little leather bound journal next to your garden gloves, or keep a cheap spiral bound notebook if you prefer.  If you're a blogger, type it all out in a blog.  I am lucky to have an iPhone that I keep on me nearly always, I use the Notes app to type in notes on what day it is, what the weather has been like, what seeds/plants are growing and how they fare, and this year I will add to that what sort of harvest I see from each.  I almost prefer to do a voice-to-text note taking; I am not a skilled typist and even less so on the iPhone keyboard, it's tedious to take notes that way but it's always at hand and is durable.  Plus I back my notes up with Dropbox so if my phone is lost or damaged I will have a backup copy safe and sound.
Sample of notes in the Notes app.

Note Dos and Don'ts:

-Do date your entries!
-Don't write a book, this is just some notes not a novel.
-Do list plant varieties as well as types, and anything special about them.  Indigo Rose (determinate, blue, slicer, hybrid) tomato produced 3lbs. by July 8th.  Oregon Spring (determinate, slicer, hybrid) produced 5lbs by July 8th, first tomato of the year ready on June 12th!
-Don't keep notebook in your bookshelf in the office or library.  Keep it close to hand to ensure you will keep it up to date.
-Do keep up with note taking throughout the year.  How much harvest and how long your preserved harvest lasts will be helpful in deciding how much to plant next time.  Jan. 31st 2012, still have 14 jars strawberry jam, and 20 jars freezer jam; ran out of frozen strawberries.  40 jams is too many, freeze more whole berries next time. 
-Don't forget to keep track of trials on new things! April 2nd, 2012 laid pennies around two cabbages to test for slug repellent, check back in two weeks.  April 16th, 2012 cabbages surrounded in pennies show less slug damage than others, will continue with penny use.

Monday, February 6, 2012

Eggs Florentine and Other Spinach Culture

Let's talk green.  Spinach, that is.  Spinach is an early spring crop,  it prefers cooler weather and will bolt when it gets too hot, you can also plant it in the Fall but if you aren't careful about timing it may still bolt.  The earliest record of the spinach plant is from China AD 647.  Since then it has been used throughout China, India, the Middle East, and was introduced to the Italians in the 9th century.  Native of Florence, Italy, Catherine de Medici was a huge fan of spinach and insisted it be served with every meal; this is why "Florentine" is the label attributed to foods with spinach added.  (BTW, all my spinach trivia is via Wikipedia's "spinach" entry)

Spinach plant, this is a much healthier plant than mine were.


Like many leafy greens spinach is said to have high antioxidant levels, it is a great source of Vitamins A, C, E, K, and the B complex vitamins.  It is also high in many minerals, and is considered to be a rich source of iron. Storage of spinach for more than a few days can destroy its nutritional value though, which is one reason to grow it yourself; fresh from the ground it is packed with vitamins and minerals.  Spinach is also one of the 12 most pesticide-laden produce products, so even if you don't grow your own organically you should always be sure to buy it organic.

Spinach comes in three primary types: Savoy, with dark green crinkly or curly leaves; Flat or Smooth, with broad smooth leaves that are easier to clean; and Semi-savoy, with less crinkled leaves this variety is a bit easier to clean than a standard savoy. 

New Zealand Spinach is actually not even closely related to spinach, it was given the name because of it's resemblance to spinach.  New Zealand Spinach leaves are eaten and have a similar taste and texture to spinach.  Unlike normal spinach it is comfortable growing in hotter climates, and is nearly untouched by slugs and snails.  If, like me, you find you lose more spinach to the slugs or bolting than you get on your plate, then New Zealand Spinach might be worth a try in your garden.

Start your spinach seeds in the ground several weeks before the last frost date, 3 to 5 weeks is acceptable.  In my garden it's pointless to start spinach this early since my garden beds don't see sunlight until April, I start spinach at the end of March.  It takes about 7 weeks to reach full size, but can be harvested a few leaves at a time after the first 4 weeks or so, when the leaves are large enough to be worth the trouble to harvest.  According to SFG standards spinach can be planted as close as 9 plants per square foot. 

At my house, early Spring is slug season so I rarely see much spinach at all.  In fact, I likely won't even be planting it this year since I lose so much to the slugs and most of the rest to bolting.  For those who want to plant it be sure to protect it from slugs, and if needed shade it from the heat to prevent bolting.  Some tips for doing this can be found in my posts "Slugs and Snails and Puppy Dog Tails" and "Bolting Is Bogus".


Since spinach is so very happy to bolt like crazy, make sure to plant open pollinated varieties and let them go to seed when they bolt.  You can essentially have free spinach seed for life!  Last year my spinach bolted the first week of June, set flowers that attracted pollinators to the garden, went to seed, and dropped the seed by early August.  Then that dropped seed sprouted just as the weather began to cool, and a second crop popped up for fall.  Not a bad system when you think about it.

As a final note, while spinach can be a bit touchy, and is appealing to certain slimy pests; it also grows quickly, is packed with nutrition, and is very versatile in cooking.  Give it a shot, and enjoy.

"I'm strong to the finish, cuz I eats my spinach!"--Popeye the Sailor Man

Thursday, February 2, 2012

Battle Blackberry

As I went out this morning to take my own advice and get an early start on spring cleanup in the yard, I tidied up the front and side yards, then closed my eyes and held my breath before glimpsing into the dark, creepy back yard.  Normally when I refer to my back yard I mean the side yard with the garden and patio.  Primarily because I like to pretend that the muddy, weedy space at the actual rear of my home does not exist.Which is part of the reason it is in its current state.  Full of old playground equipment from the previous tenants, random junk that broke and couldn't be fit in the trash can, some sort of annual weed that has set up a colony and breeding program, and huge masses of blackberries.  Well, they aren't THAT huge actually, it's only a 24x12 foot yard.  When we first moved in this yard was in decent, if not particularly hospitable condition.  The swing set worked and the trampoline was fun, but they took up a lot of space and the yard was surrounded on two sides with sheds, one side with a fence, and the other side with the house.  It got light for a few hours in the morning and became a murky cave after that point.  Two years ago the neighbors behind us removed a large birch tree that was dying; the birch had shaded the back yard so I was happy to have it gone.  As it turned out though, the birch had also shaded and restrained a small patch of blackberry canes underneath it too.  Once the tree was removed the blackberries had a heyday, growing up over the fence and landing in my back yard where they immediately sprouted suckers and new roots. 

Since I don't spend much time back there other than to toss scraps in the compost pile, I didn't really notice this until it was too late.  By then I had a 24x12 blackberry patch filling every space in and around the playground, crawling behind both sheds, and working it's way up over the bean trellis into my garden area. 

I have cut them back a few times to prevent them eating my house, but always during the growing season when they will quickly just sprout two more heads for every one that is cut, like a hydra.  Today I was ahead of them, and it made me think that as a garden blogger it was imperative that I share my intimate knowledge of blackberries with readers.  Now that my shed has been unburdened of blackberry canes I am free to take a break to write.

Blackberries are cane plants, they grow from seed, or rhizomes, or underground runners, or above ground runners; pretty much they can grow from anything.  They are thorny, pernicious weeds in most areas.  Mind you, when I am talking about blackberry as a weed I am referring to Himalayan blackberry, there are many other varieties of blackberry that are far less invasive and make delicious jams and pies too. 

The only way to beat blackberries is to kill, kill, kill year after year.  For large patches it's sometimes easiest to clear a small area each year and work it down until there is nothing left.  If you can borrow, or already own a goat, they are the blackberry's natural nemesis and will eat each and every cane until nothing is left if given the opportunity.  I think the very best way to handle blackberry destruction is to borrow a goat each spring to destroy new shoots until the shoots finally give up and stay dead.  My dad's neighbors put their goats out near a huge patch of blackberries on their property and a few months later were rewarded with a mobile home!  The house had been buried in blackberry canes for so long no one even knew it was there until the goats ate their way around it.

Not everyone has the goat option though, if you don't you'd better don your hat, leather gloves, sturdy pants, boots, and long sleeved shirt.  This is part of the reason to cut them back early in the year, it's still cool enough to keep yourself completely covered.  Cut down canes with a machete, or loppers, or pruning shears.  Most lawn weed whackers will just bend thicker canes and not actually cut them.  Cut down to the ground!  Rake up all the debris from your murderous rampage, then throw it out with the trash or in a yard debris bin.  Do not compost blackberries: they may grow back in your compost, seeds may sprout in the compost or garden beds where it is used, and dropped thorns might still be there when you add the compost to your garden. Ouch!

Once the canes are cut to the ground and the cuttings have been disposed of you should dig up as many root balls as you can.  They can grow back from even the smallest root, but if you can remove some of the largest ones you will have a head start, by leaving only small roots which are not well-stocked with food. This is another reason to kill blackberries early in the year, the ground is still soft and moist which makes root removal much easier.  If you keep all new shoots cut to the ground as soon as they pop up these smaller roots will eventually die, since they have no leaves from which to absorb sunlight, larger roots have much more stored nutrition and will live longer.  At this point you simply have to maintain the status quo, despite the blackberry's attempts to regrow.  Cut new shoots during the spring and summer season, in the fall lay down a VERY heavy mulch layer, next spring you can mow or weed whack new shoots if they are small enough.  Continue this way until you finally stop seeing any growth, but pay attention, check back every few weeks to ensure they really aren't coming back.  I also don't recommend doing any permanent landscaping in the area until you are certain there will be no regrowth, it's awfully hard to pull blackberries out of retaining walls and garden borders.  This may take a few years but eventually you can win the battle, if not the war.