Showing posts with label SFG. Show all posts

Monday, June 18, 2012

Harvest Monday: June 18th

My best harvest so far! Mostly because I decided it was high time to start pulling things so I could plant more tomatoes.  I even remembered to take photos this time.

Saturday alone I managed to harvest over 7 lbs. of veggies.

3 lbs. strawberries

A pile of celery

Some pearl onions that were starting to look like golf balls sitting on the dirt.

Garlic braid, I have no idea what variety this is but it doesn't seem to get very big, the tops had all fallen over.

The last of the Swiss chard and first planting of lettuce, and the first of Alex's carrots.
My garlic were ready according to everything I know (which isn't much), but the bulbs were very small and even the largest only appeared to have about 4 cloves to it.  Oh well, maybe next year I'll plant some other variety, these were given to me last year by a friend and i figured I'd give them a shot.

Alex is super excited about the carrots finally coming up, the Sugarsnax are fabulous and the first to arrive.  I think Little Finger and Atomic Red could wait a bit longer to harvest.

Harvest Monday is hosted by Daphne's Dandelions and is a place to share your harvests and what you do with those harvests with the garden blogger community.

Next week, more strawberries, peas, onions and carrots (I'm hoping!).

Wednesday, May 30, 2012

End Of May: Garden Update

I haven't posted in over a week, partly because I've had visitors coming and going, and partly because the garden hasn't done much in that week.  I harvested several more heads of lettuce, and some kale and chard that I sauteed up and threw in the freezer for another time.  There are still no ripe strawberries or peas and the anticipation of them is killing me.  I did pull enough lettuce to get my two earliest tomato plants into the garden finally, both are Oregon Spring and one is already flowering.  Sadly it also suffered a bit of sunburn during the hot days a few weeks ago.

Flowers on Oregon Spring tomato.
The garden as a whole is getting rather crowded.  Not so crowded that the plants are suffering, so I think my spacing is okay, but the carrots and onions are starting to get shoved aside by the cabbage leaves.  The good thing about spacing things so closely is that there's very little bare dirt, which reduces weeds, and the shade of the plants helps keep moisture in without needing mulch.  The bad thing is that sometimes your cabbage gets a little overzealous and completely smothers your carrots.

The garden is getting crowded.
 The broccoli are finally getting some heads on, I wish I had enough room to let them keep growing after the main heads are harvested, but I will likely get one large head each and then rip them out to make room for the tomatoes and peppers and cucumbers.

Broccoli head.  It had better get bigger than this!
 Despite the damage done by slugs, we are still swimming in lettuce.  Sadly, because there are no tomatoes and carrots and other such things, and I refuse to go buy them when we'll have some of our own soon... I have been struggling with making salads.  Plus, the lettuce are so pretty!  Especially the ruffly Red Sails next to Salad Bowl and the tall straight green of Valmaine.  All of these varieties ended up being delicious too.  I was very happy with my mixed lettuce seed, except that it was mixed so I couldn't control the proportion of each variety to each other.  I ended up with 2 Red Sails, 4 Salad Bowl/Slo-Bolt (I can't tell the difference!), 6 Valmaine, and like 20 Buttercrunch! 

Lettuces are too pretty to pull... just can't bring myself to do it yet.
 My little boy, Alex, has an amazing green thumb.  He was the one who planted the sunflowers last year that grew over 14 feet tall.  This year he planted some carrots in one of the whiskey barrels.  They are doing much better than mine, though I did have to thin them a bit.  Every day he goes out to check on his carrots and says "They are doin' good!"  He's so excited for them to get big enough to eat after all this waiting.

Alex's carrots.
 My brother informed me that it was way beyond time for me to fill up my potato buckets, so I scooped in more soil to a few inches below the tops of the plants.  I'm still kind of winging it on the potatoes, I just plan to keep them alive this year... I'll work on improving my harvest next time. 

Potato pots, potted kale and more lettuces in the whiskey barrel.
 The pumpkin bed is uncovered, and the beans are putting on their second set of leaves.  Soon enough the entire corner where the pumpkin bed is will be a wall of green, with piles of fresh green and purple beans coming in.
The pumpkin bed; pumpkins, zucchini, pole beans in back, and bush beans.
Finally, my stockpile of canned goods from last year has been reduced to 2 jars of applesauce, 1 bread and butter pickles, 1 pickle relish, 5 jars of strawberry jam, and 1 freezer jam.  Time for the last minute push to get things finished off before the restocking begins.  Guess we'll be eating a lot of PB&J in the next few weeks.  I made a total of 41 jars and frozen 1/2 pints of strawberry jam last year; I'm thinking that worked out to just about right.  Though this year I'll be doing more freezer jams and less canned, they are so much easier.

Soon enough the sun will be back full force and plant growth will take off again!  Can barely contain my excitement!

Monday, March 26, 2012

Planting Has Begun

Finally we had enough nice weather to dry out the soil enough.  Digging in soaking wet soil can damage soil structure, smooshing the particles together and destroying air pockets in it.  Since it stayed dry for two whole days, my beds were moist but not wet and in perfect shape for turning.  I mixed in a 1.5 cubic foot bag of garden compost to lighten things up and add organic matter, then evened it out and raked it as smooth as possible.  Then I added in a well-rounded "Garden" organic fertilizer (5-3-3); it was surprisingly hard to find a fertilizer that didn't have high levels of potassium, which my garden already has in plenty.  With occasional doses of fish emulsion to keep the nitrogen levels up I think this fertilizer will work out nicely.  I gently mixed about 1.5 pounds of fertilizer into the top few inches of soil.
Close up of Bed 2 before being turned


Once all of the soil amending was completed I measured out my square feet, and used string and thumb tacks to mark them.  All ready for planting!

Bed 1 ready for planting
My garden beds are a bit of a crazy mish-mash to the untrained eye.  While they are laid out in a square foot grid, the plants are arranged based on my particular location requirements.  For example, the peas are all along the back row where they can climb the trellis on the fence.  Garlic and onions line up along each side of the bed because slugs don't care for them and the slugs seem to come from the bare ground to either side of the bed rather than the front edge where the patio is.  Working toward the inside of the bed from there comes celery which grows taller than most of the brassicas and can help to shade them a bit as the weather gets warmer.  Then the rows of lettuce, between the celery and the brassicas, shaded by their height and away from the slug-filled edges.  The lettuce is also within easy picking range from all sides.  Lastly the brassicas fill the center of the bed, with carrots planted between rows.  Broccoli being tallest is in the back, with cauliflower and cabbage closer to the front. 

All planted and ready to grow!
After things start to grow in it should make for a pretty picture of a garden bed, with everything well located for easy harvest and mutual health. 

If the weather holds out long enough for my back to loosen up again I'll be out digging up the other bed and getting it planted as well.  The pumpkin bed will have to wait a bit, only hot weather plants are going in it.  It is also the cats' favorite place to leave me "gifts" so I want to wait until the other beds have filled in and no longer need the cat-proof screens before working on it.


Friday, March 2, 2012

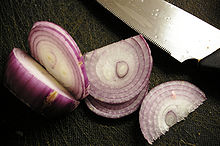
Onion Culture

Allium cepa a.k.a. the bulb, common, or garden onion, is the most widely cultivated species of AlliumAllium cepa only exists in cultivation; though there are a few Allium species in the wild, often referred to as "wild onions" they are NOT Allium cepa

Traces of onion have been found in Bronze Age settlements dating as far back as 5000 BC (about the time the potato was being developed on the other side of the world; because what is a potato without an onion?).  It is uncertain if these traces were of "cultivated" onion; true cultivated onions can be traced to about two thousand years later in ancient Egypt, leeks and garlic also had their beginnings at this time.  Ancient Egyptians believed the onion's spherical shape and concentric rings represented eternal life.  Traces of onion have been found in Egyptian burial chambers and it's believed that the workers who built the pyramids ate onions and radishes.  In Greece, onion was believed to lighten the balance of the blood.  in Roman culture, gladiators were rubbed with onion to firm up their muscles.  In the Middle Ages they were so important they were used to pay rent, and given as gifts.  Medicinally onions have been used to treat constipation, erectile dysfunction, infertility, headaches, coughs, snake bites, and hair loss.  Columbus brought cultivated onions with him to the Americas, only to find out later that the natives were already using wild onion for everything from food, to dyes, to toys.

You should never give onion to pets or other animals as it may poison them.

Onions contain chemicals known to have anti-inflammatory, anti-cholesterol, anti-cancer, and anti-oxidant properties (in humans).  Studies have shown that eating onions may lower the risk of head and neck related cancers.  The more pungent an onion is, the greater its ability to inhibit cancer cell growth.  Onions may also be beneficial in reducing the risk of osteoporosis in women. 

Lacrimatory Factor, or LF, is the gas created when an onion is cut into or bitten that causes your eyes to tear up.  This can be reduced by using a sharp knife to cut them, or by chilling or freezing them before use, or by cutting them under running water or in a bowl of water. 

Onions are propagated by seed, or by bulb set.  Onion sets are small bulbs of onion grown from seed the previous year, planted in the ground these will grow into full sized bulbs in a shorter time frame than seeds.  Sets are reputed to grow bulbs with less durability than seeds though.

Onions that produce seeds are "day-length sensitive", this means they require a certain number of daylight hours before they will begin to bulb.  Long-day onions require 15 or more hours of daylight, intermediate day onions require 12-13 hours, and short day onions require 9-10 hours.  Often, short day onions are planted in the fall in mild climates and will bulb in early spring. 

Green onion, or scallion, refers to either an immature onion that has not yet bulbed, or to the Welsh onion, an Allium species which does not bulb at all.  You can differentiate between a Welsh onion and a common onion scallion by the cross section of the leaves; Welsh onions leaves are flattened on one side, while the common onion leaf is round.  Tree onions, top onions, topsetting onions, walking onions, or Egyptian onions refer to the species Allium proliferum; this onion plant forms bulblets on top rather than a flower and seeds.  These bulblets can then be planted to grow more onions, or eaten like a normal onion bulb.
Tree onion

Green onions and leeks should be refrigerated after harvest.  Regular bulb onions can be stored at room temperature in a cool, dry, dark, ventilated area.  At room temperature onions have a shelf life of 1-5 weeks depending on variety; in the fridge this can be extended up to 4 more weeks.  In storage, onions can absorb the smells of apples and pears; they should be stored away from moister vegetables as they can draw that moisture from the air and will spoil sooner.

Onions generally come in 3 colors: red, white, and yellow.  Yellow onions are full-flavored and are usable for just about any culinary purpose.  Red onions are best chopped fresh, or as grilled or char-broiled onion.  Red onions have a sharper flavor.  White onions are traditionally used in Mexican food, they sautee to a golden color and develop a sweet flavor when cooked.

Small bulbed onions are used for pickling, or eaten as vegetables; these include pearl, boiler and pickler onions.  Onion seeds can also be eaten as sprouts, similar to alfalfa sprouts.

For longer season onions (those that make a regular bulb) you should plant seeds in the fall; or plant sets instead in cold climates.  Short season onions like scallions and pearl onions can be planted early in the spring.  Starting them inside can help you get ahead of the game when the weather stays cold late in the season.  Seeds can be planted very close together (my pearl onion seed pack said to plant up to 100 seeds per 4"-6" pot) then thinned after sprouting.  Thin to about 1-2" apart, further for larger onions.  Sets can be put into the ground as early as January, or as late as April depending on variety and climate.  Tops will grow up, when tops die back the bulbs are ready for harvest.  The whole onion can be harvested at any time too, for use as scallions.  Don't waste your thinnings! Chop them up into a recipe that calls for green onion. 

Onions are a great addition to any garden, they can deter some pests, look pretty both in growth and in bloom, take up very little space, and can be added to nearly any recipe.  If you're going to grow tomatoes, you'd better grow onions too.  You can't make salsa or spaghetti sauce without them.  I have never heard of a pest or disease problem with onions either, though I may be mistaken (Note: the SFG book says onion fly maggot can be a problem).  My only issue with them  in years past has been that they just don't want to bulb, so this year I'm giving them a head start in the house, both the pearl onions and the sweet Spanish white onions, in the hopes that I'll actually have some onions for all my summer recipes.  In an SFG garden plant 16 onions to a square foot.

After harvesting lay onions out in a single layer in a warm dry place, this will allow them to cure and the skins to dry, ensuring they will last longer in storage.

My onion growing knowledge is kind of slim, so if anyone can add to this please feel free to let me know.


Tuesday, February 28, 2012

Lettuce Culture

**most of my plant culture information comes from Wikipedia entries, opinions are all my own though.

Lactuca sativa, or lettuce, is a member of the Asteraceae family and actually makes a pretty little white or yellow flower similar to a dandelion if you allow it to bolt and go to seed.  When cut its stems ooze a milky white substance, hence the reason for the name Lactuca.  Some members of the Lepidoptera butterfly family eat lettuce.  In Ancient Egypt lettuce was considered an aphrodisiac.

Lettuce grows best in a humus rich, light soil, with constant moisture.  Lettuce prefers temperatures between 75 degrees and 45 degrees F.  A hot or dry environment may cause it to turn bitter and bolt, though this is less of a problem with certain bolt-resistant or heat-tolerant varieties.  Seeds can be direct sown into the garden or transplanted.  With a protective cover to keep lettuce from freezing it can be grown in mild climates nearly year round.

The primary types of lettuce are butterhead, romaine, crisphead or iceberg, and loose leaf.  Butterhead leaves have a buttery texture, they are similar to romaine, with less crispness and a shorter growth habit.  Romaine, or Cos, grows long leaves with a firm central rib, it is more heat tolerant than other varieties.  Crisphead, or iceberg, grows in a tight head similar to cabbage.  They have a crunchy texture and are generally the mildest flavored lettuces.  Loose leaf lettuce has tender, delicate leaves and doesn't grow a "head" but rather as a bunch of loose leaves.  Summer crisp or Batavian lettuce has a mix of traits of iceberg and loose leaf, being crunchy in texture and having only a moderately dense head.

The less bitterness a variety of lettuce has, the higher the water content, and consequently the lower the nutritional value.  All lettuce varieties will cross-pollinate easily, so be certain to allow only the cultivars you wish to harvest seed from to go to flower.

Lettuce is a fast grower, taking as little as 3 weeks to reach a harvestable size.  Remember to keep your lettuce plants moist, and protected from heat.  Slugs are the primary pest to watch for on lettuce, though cutworms can also ruin a planting by cutting the stems when seedlings first sprout.  Defeat slugs by baiting, hand picking, or laying down a copper barrier.  Protect from cutworms with a paper collar, or start lettuce indoors and move outside once they have a few true leaves on and have grown beyond cutworm edibility.  Lettuce can be grown indoors over the winter under a grow light or in a windowsill.

Mix varieties of red, green, and mixed color lettuce in a salad for a more interesting presentation.  Since lettuce varieties will cross so easily, try leaving two or three favorite varieties to cross-pollinate and see what exciting new crosses you can come up with.  For butterhead, romaine, or loose leaf lettuces harvest only the leaves you need and allow the plant to continue growth; crisphead is best harvested as a whole head. 

For planting: try planting lettuces under a fruit tree, in early spring they will receive full sun, and once the tree flowers and begins to put on leaves it will shade the lettuces leaves from the heat of the sun.  SFG suggests 4 lettuce plants per square, and they can also be interplanted between taller growing brassicas to protect and shade them.  If your tomatoes are ripening and you wish to have lettuces to go with them, try planting lettuce under the shade of the tomato plants, or in a shadier corner of the garden.  If all else fails, grow them inside during the hottest part of the year, in the cool of the AC.

You are unlikely to be able to preserve lettuce at all; it manages fine in the fridge for a few days though.  Be sure to stagger plantings every few weeks to ensure a crop all year and don't plant too many at once or you'll be swimming in fresh lettuce that HAS to be eaten, and can't be saved by preserving.

Happy lettuce growing!

Sunday, February 26, 2012

Save Your Soil!

One of the great things about organic gardening is that it costs so much less.  You don't need to buy expensive pesticides, herbicides, and soil amendments.  But that doesn't mean you don't need to amend your soil!

My own garden is managed pretty intensively, I try to keep it growing something as often as possible when there is sun available.  Because of this I have to be very careful about rotation, adding nutrients, and managing pests.  Here are some tips to help keep your soil healthy.

Follow with Fallow: If you have the space to let beds lay fallow for a year or two, by all means do so.  Since I'm working with so few square feet I don't have the luxury of letting it lie fallow.  Instead I make a point of rotating my veggies from bed to bed each year.  Certain ones have to stay in place, such as the pumpkins, but I can skip a year of pumpkin growing if needed to manage pest problems.

Rotate Plantings:  To keep your garden soil healthy and productive you should always move plant families from one space to another each year.  Not just individual plants, but plant families!  If you grew broccoli in a space one year, don't follow it with cabbage the next, instead try to follow it with a plant from a completely different family such as onions, carrots, or tomatoes.  Soil dwelling pests that were attracted to the broccoli initially may have laid their eggs in the soil, when they hatch they will be sorely disappointed to find there is no broccoli (or anything similar) there anymore. Similarly molds and diseases that developed around tomatoes will have no nearby victims if that space is followed with a planting of garlic, and your garden won't be as likely to suffer from them.  In addition, following fruit-bearing plants like peppers and tomatoes with root- or leaf- crops can keep your soil going longer without amendment.  Fruit crops use up a lot of nutrition, it requires much more effort to grow a plant, flower it, and ripen the fruits than it does to grow just the leaves, or the leaves and roots.  This can give your soil the break it needs between fruit crop plantings.

I Plead the 5th:  There are 5 primary organic practices to amend your soil, all of which add organic matter and nutrition to it.  Bio mulch of some type; fallen leaves, hay, etc.  Use these to mulch your summer garden to keep the ground moist.  After the crops are gone leave the mulch on the beds to rot then dig it into the soil in late winter or early spring.  Breaking down this mulch will use a lot of the nitrogen from your soil, but once it is decomposed the nitrogen levels will return to normal, so be sure to give the soil bacteria a couple months between digging it in and planting new veggies.  Hay costs between $3 and $6 per bale from farms, and can generally be found by checking Craigslist or asking at a local farm in the spring.  Growing a cover crop over the winter season such as oats or winter wheat also keeps your soil protected from erosion over the winter and then is turned over into the soil just like a mulch would be.  Adding compost is amendment number three.  The very best compost is made of a blend of leaves, grasses (lawn cuttings or hay), fruits or veggies that were not eaten, and plant waste from the kitchen.  For some people composting is an art form, I am not one of them.  My compost pile is not likely the most nutritious in the area, but it does the job.  Jack-o-lanterns, pulled out plants, peels, stems, cores, rotting hay bales, raked up leaves, all of these things go into my compost pile.  Why bother with a compost pile?  Because nature has a cycle.  Things grow from nutrients in the soil, they feed us, they die, they are decomposed and the nutrients are returned to the soil.  Why would you want to screw that up?  It's a perfect cycle in which you can dispose of all the kitchen waste from your harvests, then use it a few months later to feed your new plants.  We'll go in depth on composting at another time though.  The last two items on the organic 5 amendment list are tea and nutrient specifics.  Tea, or compost tea in this case, is nothing more than water that has had a "tea bag" of compost sitting in it for a short time.  The nutrients in the compost are leached out into the water making a muddy brown "tea" that can be spritzed directly onto plants or poured into the soil to add a boost of nutrition.  If a plant is struggling to survive an insect infestation, or you are transplanting a new plant a splash of tea can really give them a boost.  Nutrient specifics are a little more challenging, these are particular items that add a specific nutrient to your soil or compost.  Before worrying about these you should do soil testing to see if your soil is already in good shape.  Some examples of nutrient specific amendments are listed below.

N-P-K, often listed on fertilizer bags stands for Nitrogen, Phosphorus, and Potassium; each of which aids different types of plant growth.
The macro nutrients NPK; generally a well balanced compost will supply all of these without any additions.

Nitrogen (N) - legumes (beans, peas), cow and poultry manures well-rotted only.
Phosphorus (P) - banana peels, crab shells, shrimp peelings, most grains and nuts, and guano
Potassium (potash, K) - fruit skins, esp. banana peels.

 Micro nutrients, these can be more challenging to get in compost and commercial fertilizers don't generally contain them, which means an organic garden is more likely to be healthier!

Calcium (Ca) - eggshells, dolomitic lime
Magnesium (Mg) - manures, compost, dolomitic lime, and epsom salts.
Iron, Manganese, Zinc, Copper and Cobalt (Fe, Mn, Zn, Cu, Co) - kelp in its many forms; meal, powder, liquid.


pH amendments are used to adjust the soil acidity, they either sweeten or acidify soils.  Generally a good organic matter rich soil will not need these but certain plants prefer acidic soils, and some areas naturally have more acid soils and need to be sweetened.

Sweeteners - dolomitic lime, wood ashes.
Acidifiers - coffee grounds, vinegar, compost and manure.

While all of these things work to improve soils you may choose between them based on your own preferences; for example I prefer not to buy soil improvements if possible so would be more likely to use wood ash to sweeten soil rather than buying dolomitic lime.  Also some soil amendments sold at stores like blood meal, bone meal, and fish emulsion are by-products from other industries.  Personally I have no problem with using by-products in my soil; but I don't trust that the animals used to make the by-products were in good health and don't contain chemicals that could leach into my soil, so I stick with plant by-products as much as possible.  I also try to make sure they come from varied sources, using one plant's compost (i.e. mushroom compost) could leave your soil short on nutrients that particular plant doesn't use as much.

Remember to test your soil before adding amendments to it, except maybe for compost.  Compost is just all around good, and won't throw your soil out of balance.

Monday, February 6, 2012

Eggs Florentine and Other Spinach Culture

Let's talk green.  Spinach, that is.  Spinach is an early spring crop,  it prefers cooler weather and will bolt when it gets too hot, you can also plant it in the Fall but if you aren't careful about timing it may still bolt.  The earliest record of the spinach plant is from China AD 647.  Since then it has been used throughout China, India, the Middle East, and was introduced to the Italians in the 9th century.  Native of Florence, Italy, Catherine de Medici was a huge fan of spinach and insisted it be served with every meal; this is why "Florentine" is the label attributed to foods with spinach added.  (BTW, all my spinach trivia is via Wikipedia's "spinach" entry)

Spinach plant, this is a much healthier plant than mine were.


Like many leafy greens spinach is said to have high antioxidant levels, it is a great source of Vitamins A, C, E, K, and the B complex vitamins.  It is also high in many minerals, and is considered to be a rich source of iron. Storage of spinach for more than a few days can destroy its nutritional value though, which is one reason to grow it yourself; fresh from the ground it is packed with vitamins and minerals.  Spinach is also one of the 12 most pesticide-laden produce products, so even if you don't grow your own organically you should always be sure to buy it organic.

Spinach comes in three primary types: Savoy, with dark green crinkly or curly leaves; Flat or Smooth, with broad smooth leaves that are easier to clean; and Semi-savoy, with less crinkled leaves this variety is a bit easier to clean than a standard savoy. 

New Zealand Spinach is actually not even closely related to spinach, it was given the name because of it's resemblance to spinach.  New Zealand Spinach leaves are eaten and have a similar taste and texture to spinach.  Unlike normal spinach it is comfortable growing in hotter climates, and is nearly untouched by slugs and snails.  If, like me, you find you lose more spinach to the slugs or bolting than you get on your plate, then New Zealand Spinach might be worth a try in your garden.

Start your spinach seeds in the ground several weeks before the last frost date, 3 to 5 weeks is acceptable.  In my garden it's pointless to start spinach this early since my garden beds don't see sunlight until April, I start spinach at the end of March.  It takes about 7 weeks to reach full size, but can be harvested a few leaves at a time after the first 4 weeks or so, when the leaves are large enough to be worth the trouble to harvest.  According to SFG standards spinach can be planted as close as 9 plants per square foot. 

At my house, early Spring is slug season so I rarely see much spinach at all.  In fact, I likely won't even be planting it this year since I lose so much to the slugs and most of the rest to bolting.  For those who want to plant it be sure to protect it from slugs, and if needed shade it from the heat to prevent bolting.  Some tips for doing this can be found in my posts "Slugs and Snails and Puppy Dog Tails" and "Bolting Is Bogus".


Since spinach is so very happy to bolt like crazy, make sure to plant open pollinated varieties and let them go to seed when they bolt.  You can essentially have free spinach seed for life!  Last year my spinach bolted the first week of June, set flowers that attracted pollinators to the garden, went to seed, and dropped the seed by early August.  Then that dropped seed sprouted just as the weather began to cool, and a second crop popped up for fall.  Not a bad system when you think about it.

As a final note, while spinach can be a bit touchy, and is appealing to certain slimy pests; it also grows quickly, is packed with nutrition, and is very versatile in cooking.  Give it a shot, and enjoy.

"I'm strong to the finish, cuz I eats my spinach!"--Popeye the Sailor Man

Wednesday, January 25, 2012

The Square Foot Method

Cover of All New Square Foot Gardening

I've mentioned the Square Foot Garden or SFG Method several times so far.  This method was developed by a man named Mel Bartholomew who realized that the standard row method of gardening was wasteful and produced poor results, so he developed a different (and in some ways better) method.
Mr. Bartholomew's Square Foot Method of gardening has some advantages, less water, less space needed, more produce grown.  It is adaptable, easy to understand, and lends itself well to the backyard gardener.  The method stems from the idea that plants need a particular spacing to do well and rather than fill widely spaced rows with carrots 3" apart, you build a small raised bed that you can reach all the way around, divide it into one foot squares and plant a different crop in each square, spaced according to recommendations.  With this method a 4 foot by 4 foot bed will have a total of 16 square feet, each of which is planted with a different crop; one tomato, 4 lettuce, 16 carrots, 8 peas, 2 cucumbers, etc.  Each square contains the appropriate number of that crop based on seed spacing guidelines.  So a 12 inch by 12 inch square can support 16 carrots, evenly spaced in 4 rows of 4 seeds, each 3" apart.

Mel also realized that his garden beds only needed to be 6" deep, very few plants required more than that depth for root growth.  Originally he used 1 foot deep beds, but discovered that the extra depth was wasted and eliminated it.  He filled his beds with "Mel's Mix" a blend of compost, peat moss and vermiculite or perlite that he discovered was perfectly suited for growing vegetables, while staying soft and fluffy, rather than compacting or developing a crust like many soils.

With Mel's Mix he could fill a bed with the perfect soil for far less cost than repeatedly improving the soil in the ground.

Mel's books cover everything needed for a SFG garden, most of the information is very useful, some of it is just a reflection of Mel's own tendencies to be precise and linear.  \

In general I think the book is worth reading, which is why I list it in my Recommended Reading links.  Mel suggests laying out a permanent grid over the top of the bed to show the squares though, while he is right that this is a way to save time during planting, I dislike the straight lines of the grid showing amidst the wild tangle of plants.  It's just too structured for my taste.  Instead I go out each spring and lay tape over top of the beds to show my grid, do all my planting and then remove the tape.  Also, Mel suggests mixing things up to confuse pests, and while I think the idea is sound, I find I still end up with a straight row of peas; I can't fit them all mixed in with other plants because they require trellising.

Not all of Mr. Bartholomew's advice is useful to everyone.  The primary things I got from his books were:  bed size --make beds small enough to be able to reach every square easily; soil --Mel's Mix is relatively inexpensive and gives more bang for your buck; plant spacing --a small space can easily grow far more than you'd expect.

Last summer was the first time I tried using the SFG method, and I have to say it worked remarkably well. I was very happy with the production of my garden.  This year I plan to try pushing the limits of the SFG method by planting my larger plants by the square, then small root crops like green onion, carrots, radishes and garlic will be planted in rows between each square.  I am hoping that a few small root veggies won't crowd the larger fruiting veggies too much and will save me a few squares of planting space that can be used for larger plants.

In conclusion, buy or borrow from the library Mel Bartholomew's book.  Look it over, see what you can find in it that may prove useful.  I can attest that his methods have proven themselves in my garden and would love to hear about other successes (or failures!), and what has been helpful to other gardeners.