Showing posts with label seed starting. Show all posts

Friday, May 18, 2012

Cole-Ture

Brassicas, sometimes called cole crops or cruciferous vegetables, are a genus of plants in the Mustard family.  It is remarkable for containing more important agricultural and horticultural crops than any other genus.  Most Brassica species are annual or biennial.  The genus is native to Western Europe, the Mediterranean, and temperate Asia.

Some of the agricultural species of brassica today include: rutabaga, turnip, kohlrabi, cabbage, kale, broccoli, cauliflower, Brussels sprouts, mustard, cress, bok choy, and rapeseed (or, in the U.S., canola).

The brassicas provide high levels of nutrients, including Vitamin C, soluble fiber, and several anticancer agents.  To maximize the nutritional value of these plants avoid boiling them, and instead steam them for 3-4 minutes.

The ten most commonly eaten cruciferous vegetables are in a single species B. Oleracea, and only differ by cultivar.  Check out the Taxonomy Chart at Wikipedia to see just how closely related these plants are.

What follows is a brief description of the culture of the cole crops I am most familiar with:
Bolting broccoli

Broccoli was first introduced to the United States by Italian immigrants but did not become widely known until the 1920s.

Broccoli: broccoli is an annual, it will sprout from seed, grow, flower, and seed all within one year.  Like most of the popular cole crops, broccoli can be over-wintered in a sunny spot with a mild climate.  Light frost will not harm it, and in fact, too warm temperatures in Spring and Summer may cause it to bolt, going from dense green (or purple) heads to yellow flowers nearly overnight.  Once broccoli heads begin to flower they become very bitter.  Plants grow in an upright manner, unlike their cousins the cabbages.  Seeds can be started as early as December indoors, then planted outside once soil temperatures reach 50 degrees.  The earlier broccoli is transplanted, the better, as it will be more likely to produce large heads before the weather warms too much.  Broccoli can be planted as a Spring crop or direct seeded in summer for a Fall crop.  It prefers cool, moist soil; it is not susceptible to molds for the most part.  The primary scourges of broccoli, and most other cole crops  are slugs and cabbage moth caterpillars.  Removing plants after harvest can reduce the damage of caterpillars, as can row covers early in the season (preventing moths from laying eggs), and keeping plants indoors until they have at least two sets of true leaves will help with slugs.  Slugs
will eat holes in the leaves but if plants are large enough this is only cosmetic and won't affect the harvest.
Imported Cabbageworm, A.K.A. Cabbage moth larva.
 The best thing about broccoli is that it takes very little care, it is not disease prone, not particular about its soil (though it does best in Nitrogen high soil) and can be grown nearly all year in many climates.  The downside is that it tends to be hit or miss at harvest time, if you wait too long for the head to reach it's full size you may end up harvesting some very bitter broccoli that is ready to flower.  Also, once the main head is harvested many broccolis will put out side shoots; I have found though that unless I have an entire bed of broccoli these side shoots do not make a large enough harvest to be worth the wait and all the space they take up in the garden.

Cauliflower head.
The first reliable reference to cauliflower is found in the writings of Arab Muslim scientists between the 12th and 13th centuries.


Cauliflower:  cauliflower is similar to broccoli in many ways, it is annual, prefers cool weather, is mostly disease-free, and shares the same pests.  Cauliflower is usually planted early in Spring, or in the late summer for Fall harvest, along with its cousins broccoli and cabbage.  Cauliflower tends to be more picky about heat and drying out though, I have heard many a gardener bemoan the cracking and loss of their cauliflower heads after dry spells.  Planting early, even watering, or planting as a Fall crop are some ways to prevent this.  To keep your cauliflower pearly white, you should blanch it by wrapping the leaves over the head as it begins to develop.  Cauliflower most often is found as a tight packed white ball, but is also found in green, orange, and even purple.  Check out the different tastes of these variations at a local farmer's market and ask what the varieties are called so you can plan to plant your favorite in Fall, or next Spring.


Cato the Elder praised the cabbage for its medicinal properties, declaring that "It is the cabbage that surpasses all other vegetables."

Cabbage:  much like the previous two plants cabbage is grown in early Spring or late Summer.  It prefers cool weather, has no real disease problems, and few pests.  Cabbage however, is much less finicky when it comes time to harvest.  Primarily this is because cabbage is a biennial, it won't flower or go to seed until its second year of growth.  Because of this a head of cabbage can often be left for several weeks before it has to be harvested; it also means it is far less likely to split, and only extreme temperature or moisture changes will cause the head to split.  Cabbage requires no blanching either.  It is most commonly found as a solid green ball, but is also available in red or purple varieties, Chinese cabbage which is much looser leaved, and in all different sizes as well, from fist-sized to pumpkin-sized.  Cabbage heads are ready to be harvested when they are solid and hard to the touch.

In addition to this, cabbages are one of the prettiest plants to grow in my opinion.  I love the way their flat leaves open up into a massive rosette around the globe-like head.  The blue-tinged leaves sometimes take on a purple tinge as well, all in all they are very pretty.

In square foot gardening, broccoli, cauliflower, and cabbage each take one square foot to grow.  If you are selecting large varieties though it doesn't hurt to have nearby squares only half filled with smaller plants, such as 2 lettuce, or 4 peas.  Cabbage leaves especially are very wide and can cover up other plants next to them if they are too close.  One way to manage this is to grow cabbages in between slightly taller growing plants, the cabbage leaves can shade the roots of the taller varieties and in return they shade the cabbage a bit.

Saving seed from these crops can be a bit tricky, since the cultivated brassicas are so closely related they can easily cross-pollinate.  A 3-4 year rotation of seed saving can help with this: Year 1, save broccoli seed, not allowing other annual brassicas to flower; Year 2, save cabbage seed from biennial cabbage planted the previous year, not allowing other brassicas to flower; Year 3, save seed from cauliflower, don't allow others to flower; Year 4, repeat with another biennial, or annual brassica.  Since brassica seeds stay viable for 3 years this is a good rotation to follow, any more years would leave you with very old seed that may not germinate from your first year.  If you have more than four brassica cultivars you will either have to resort to trading for or buying seed, or put plenty of space between your cultivars.  There are other ways to manage this, including bagging, spacing farther apart, etc. but this is probably the simplest.  No extra steps but harvesting everything you don't want seed from before it blooms.

A final note on these crops: although we normally eat only the heads of these three plants, the outer leaves and stems are edible as well.  If you find yourself a bit short on cabbage for a recipe you can add cauliflower leaves, outer cabbage leaves, and broccoli leaves and stems (so long as they haven't become woody and tough) to fill in.

I think that's all I have for these crops, I will post some of my favorite recipes for them soon as well.  If you have any other tips or tricks about cole culture to share please leave a comment!


Wednesday, May 2, 2012

A Little Light Goes a Long Way

I stopped by my neighbor, Julie's, house the other day to exchange a few seeds with her and she gave me a couple tomato and jalapeno starts as well.

Seeing Julie's grow room system and the condition of her starts made me decide to put up a post regarding legginess and lighting.

Left, my pepper starts, planted about 2-3 weeks ago.  Right Julie's jalapenos, planted 2 months ago.

Left: my tomatoes, Right: Julie's tomatoes (the little ones in front are mine too.
In the photos above you can easily see that Julie's plants are much older than mine, but you can also see that they have a paler green color to their leaves, much longer stems between each set of leaves, and I'm actually holding the tomato up because its stem isn't strong enough.  So why the difference?  Light. 

I wish I had taken a picture of Julie's grow room, but sadly I'll just have to describe it.  She has one large set of fluorescents in a 4 bulb fixture above a wood shelf in a west facing window.  There is a second shelf below that one with no lighting.  The light fixture is suspended about 6-8 inches above the pots. 

All in all it isn't a bad system, but it's not adequate; the easiest way to tell that it's not adequate is the pale leggy look of the starts.  The light fixture she has would be perfect for the one shelf if it were positioned lower, but it does nothing for the lower shelf, especially since the wood shelves let no light from above down onto the plants below. 

So if you are having trouble with leggy, sickly pale green starts try adding more lights, bringing the lights closer to the plants (fluorescents are very cool and will not burn your plants even if the leaves touch them) or if possible the very best way to improve the health of your starts is to set them out in the sunshine a few hours a day.  Only do this when it's comfortably warm out though and slowly progress them from an hour or so to a full day in the sunlight.

Eggplants finally sprouted! (Only planted two though, WTF? Why are there three?)
 Just to add a quick update to things:  the past few days have been cold, rainy, and depressing.  The plants in the garden are growing very well and I'm waiting for my first harvest with bated breath.  I haven't been able to get the rest of my tomatoes started yet because there is no room under the grow lights, but the weekend is expected to be beautiful and I will try to get the pumpkin bed cleaned up and planted with pumpkins, beans, zucchini and basil.  Hopefully that will give me enough space to start the rest of the tomatoes.

More starts under the lights, I bought one Oregon Spring tomato in hopes of a very early harvest from it.
Keep your lights close to your plants, give them more light than you think they can bear, and good luck!


Thursday, April 26, 2012

The Need For Speed

One of the conundrums new gardeners face each year is when to plant each type of seed.  The seed packs always say 4-6 weeks before/after last frost date or something similar, but that's not all that helpful most of the time.  They also sometimes say what temperature the soil should be for germination, which is nice for outdoor planting, but doesn't really matter for things you start inside.  More important is the question of how fast the seeds will sprout and grow before you run out of room for them and are forced to put them outside?  And how slow will they grow?  Will you run out of summer before they are big enough to go outside?

So here's a quick list of the crops I've grown and their growing speed to give you an idea what should be planted super early, what can wait a bit and what will outgrow your indoor space before the weather warms.

Fastest to slowest:
-lettuce
-spinach
-squashes (summer and winter)
-radish
-brassicas
-melons
-peas
-beans
-tomatoes
-Swiss chard
-peppers
-carrots
-basil
-onion family (from seed, not set)
-herbs
-eggplant
-celery

I haven't grown corn yet, so have no idea how quickly it grows, but this should give an idea that you would not want to start celery and lettuce together in early Spring for a harvest at the same time.  In fact, celery is the slowest growing vegetable I've planted, which is why I usually buy it as a start.  I could plant celery in January and it still might be too small to go outside in April.  At the same time it would be pointless to plant zucchini seeds (summer squash) inside in February when it will outgrow your space by April and (here, in Oregon) can't be planted outside until the rains slow down in May.  I've lost many cucurbits to powdery mildew and no longer take any chances, plus since they grow so quickly I have plenty of time for a good harvest even after waiting out the rains.

Tomatoes are much faster growers than peppers or eggplants, if you plan to transplant all three together once the weather is warm enough you'll have to plant your eggplants, wait a week, plant the peppers, wait two more weeks and then start the tomatoes.  Otherwise your tomatoes will be far too large to keep under grow lights before the rest have a chance to catch up, especially if you have failed germination and have to replant something.

Point in case:  One row of my garden bed right now has lettuces and swiss chard that were planted inside the same day, cared for the same, and transplanted the same day as well; it also has peas that were planted outside the day the others were transplanted.  Today this row has lettuce that's nearly ready to harvest, peas that are about 6" tall, and Swiss chard that is still little more than a sprout with it's first true leaves.  I transplanted all of this on March 26th, then started some tomatoes on April 10th.  The tomatoes are already putting on their second set of true leaves, and are far ahead of the chard despite being planted 2 weeks after the chard went outside.

I hope this post is helpful in determining planting dates, and good luck with the gardens everyone!


Monday, April 23, 2012

Quick Pics and an Update

Just to keep things updated:  I cleaned out the back shed yesterday, forcing my poor mistreated husband to do the dirty work of smashing all the wasp nests in it.  Everything in there is now neat and tidy, we have tons of free space there now and as a bonus there is no longer a giant plastic Frankenstein staring at me every time I look for a shovel.  Frankie is going to Goodwill to grace the porch of some other kindly soul on Halloween night. 

The trailer is filled with things to go to the dump, and we didn't even get the other shed done!  I still have work to do in the back yard to prep it for all of my overflow plants and the squashes, but it's in much better shape now and won't be too much work.

The seedlings are all out enjoying a lovely sunny day.  Everything is in great shape; but I am desperately awaiting the sprouting of the eggplants and peppers which seem to be taking forever.  Until i know if they will sprout I don't want to plant more.  The eggplant seed pack says it'll take 16 days for germination!  In gardening, that's like saying an eternity.

Peaceful Valley Farm and Garden supply sent me a catalog the other day with an enclosed free pack of Beefsteak Tomato seeds, so I suppose I will add them to my list of varieties to plant, and a friend gave me a few seeds of Chadwick (?) Cherry tomatoes as well.  I think that brings my tomato variety list up to around 12.  Hopefully I can find room for all of them, I generally only plant one of each variety but the Brandywine and Cuore di Bue which I plant two of.  This year both beds will be planted in hot season crops though so i might be able to fit extras of each, as well as the peppers and cucumbers.

I can't wait to have a larger garden, the lack of space is really beginning to get to me. 

For posterity's sake here are a few quick pictures of how the garden is coming along:

Sasha enjoying the garden.

Sasha is a firm believer that the garden is a tiny jungle grown just for her.


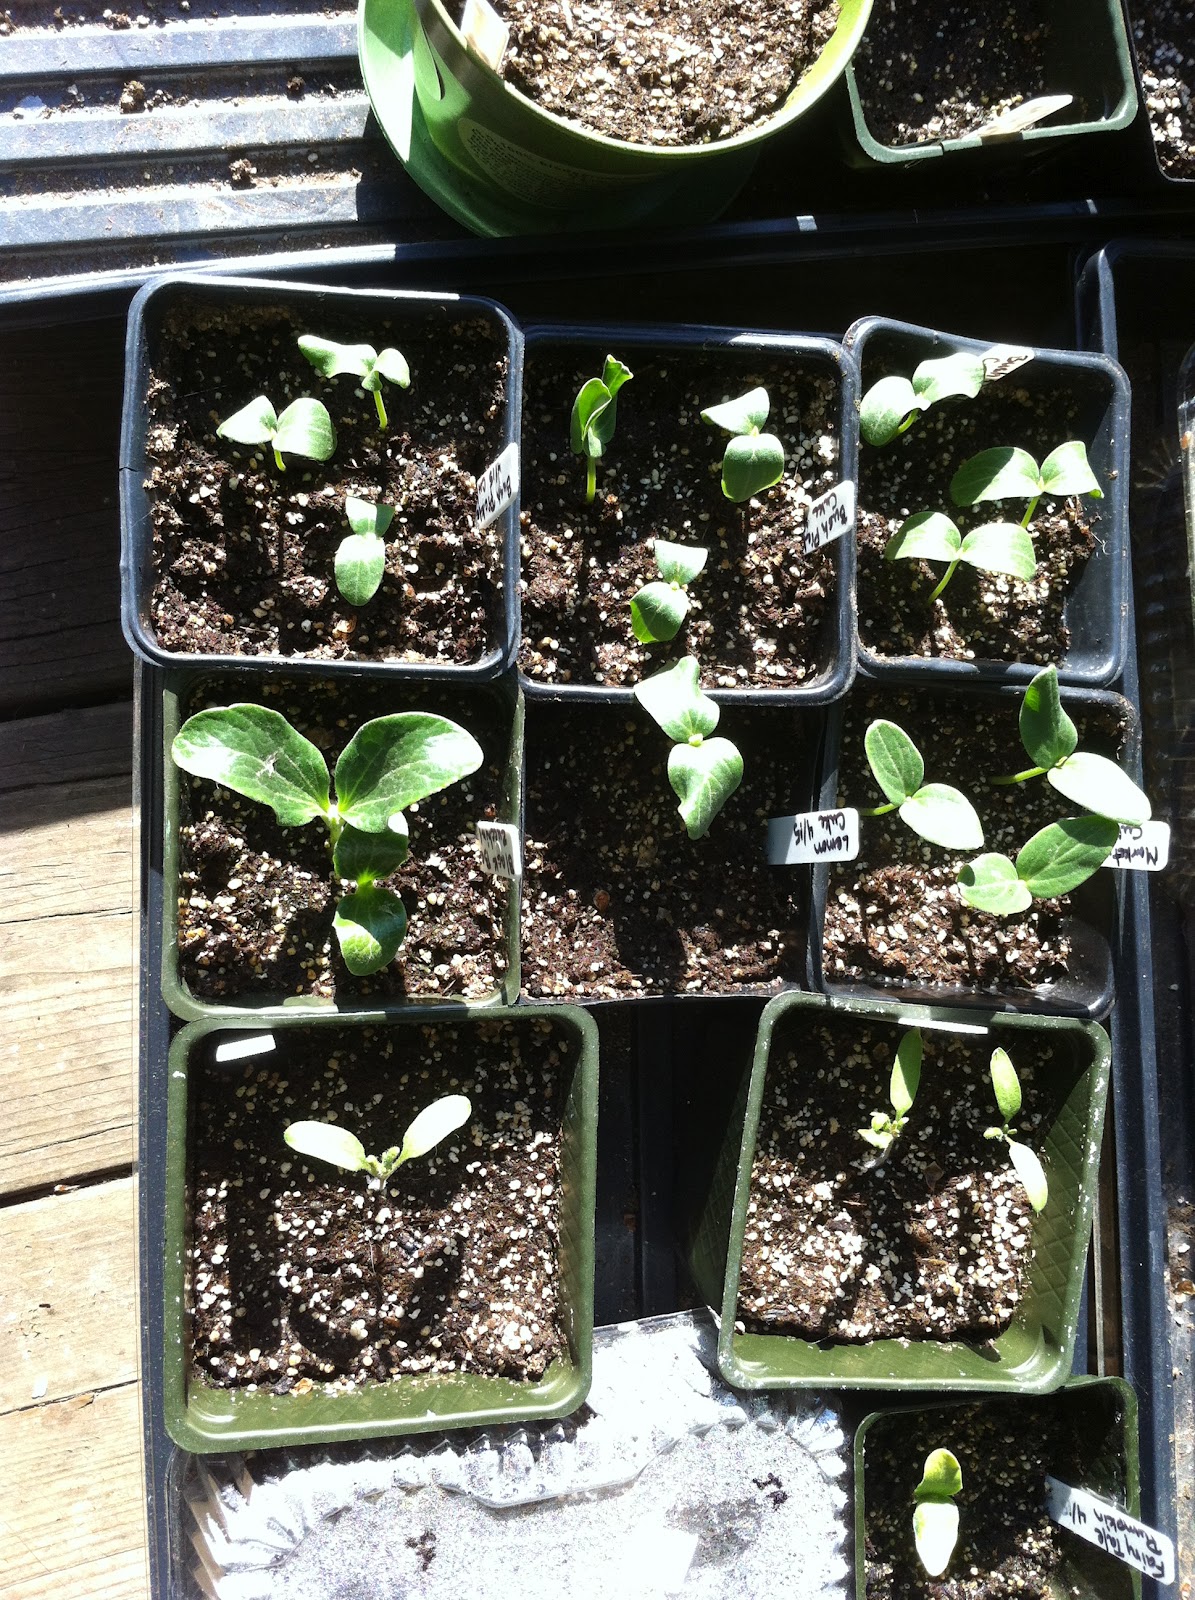
Pumpkin, zucchini, cucumber, and tomato seedlings in the sunshine.

more tomato seedlings, the ones in the clamshell haven't sprouted yet.

Winter squash seedlings are getting big... may be time to repot.

Bed #2 all planted and covered

Whiskey barrel #2 bizarre scattering of volunteer sunflowers, carrots my son threw in, cilantro in need of planting and two old onions I had no room for.

Whiskey barrel #1: kale and a few spare lettuces (they are sad because they went through the snow)
Backyard full of Goodwill holiday decor. Wanna play Where's Frankie?

The lovely, (almost) blackberry-free soil behind all the Goodwill boxes.


And that about wraps it up for today!  It's supposed to be hot, hot, hot today reaching a near record high of 81 degrees so I think I'll kick back and relax and just do the dump trip to conserve energy.  Have a lovely day all! :)


Wednesday, April 18, 2012

Garden Update: Pictures!

 Garden bed 1 has grown in enough that it was safe to remove the kitty covers; 24 hours later, no plants have been torn up and no presents left behind.  Yay! (plenty of digging happening in the whiskey barrels though. Grr!)

 View of the same bed from the front side. 

Close up of cabbage, tiny carrot sprouts and lettuces.  For once I've actually been impressed with the carrot germination, usually they don't turn out this well.

Above: peas popping up through the dirt.  It seemed like I was running late on everything this year until I checked last year's notes and found that my first peas last year popped up the second week of April too.  One more reason to keep good notes on your garden!

A muffin box from the bakery worked out great for starting seeds.  The clamshell top was used as a cover until the sprouts popped up and then cut off and placed underneath as a tray.  The plants in this are 4 Delicata squash, 2 Butternut Squash, and 2 Buttercup squash.  I hate squash, but my mom really likes them, especially Delicata, so I will be growing them in the blackberry patch  to supply her with all she could ever want.  (My mom is diabetic and lives in a tiny apartment on a very limited budget, I love being able to help her out by growing tons of extra veggies that she can eat throughout the year.)

Artichokes, basil, dill, and cilantro patiently waiting for me to find places to plant them.  I was warned that artichokes tended to be poor germinators, so overplanted in case they didn't do well... but they ALL sprouted and now I'm not sure what to do with them.  Maybe the extras can go out back with the squashes?

Brassicas, onions, and a couple very healthy lettuces for bed number 2.  Now that the kitty covers are no longer needed elsewhere I should be able to get these planted this weekend.  (Unless it's pouring rain!)

Very first tomato starts (Beaverlodge Plum).  They are looking super healthy and I am just hoping they stay that way.  I have had to start most of my own hot weather seeds after all, since my brother is in California and isn't sure he'll be home in time.  These are the first hot weather seeds that have sprouted so far.  Right now a heating pad is under the flat of seeds in hopes that they'll sprout well with the extra heat.  That room tends to wobble between 63 and 75 degrees, so the heating pad is really just for insurance, especially for the eggplants which love the heat.  I kind of wish I had gotten a seedling heat mat, but I think my husband is cranky enough about the money I spent on the grow lights already :).

Hopefully my weekend will be busy and sunny and lots of work!

Wednesday, April 4, 2012

Garden Update: Yep, Raining Again!

Since my last post it has rained all but 3 days; and it's not expected to stop for 4 more.  Luckily the weatherman is on my good side again for predicting sunshine for the next week after that!  One good week of sun should be enough to finally get all those transplants growing, and to get the second bed turned and amended and planted with more transplants.

My brother, for those who don't know, has a very nice heated grow room and was planning to get my hot weather starts going for me.  His grow room got infested with spider mites a few weeks ago though and is currently under quarantine.  Hopefully he'll still be able to get things started and grown to transplant size before June.  My fingers are crossed that we'll have tomatoes and peppers that are happy and healthy by then.  Last year he lost a lot of them to damping off and mildew issues from lack of air circulation.  This year he has a better ventilation system.

Since I gave him all my seeds for starting but the winter squash, I figured I'd go ahead and get them rolling along today.  I planted Buttercup Squash, Waltham Butternut Squash, and Delicata Squash.  Personally I am not a fan of squash; I kind of hate it.  My mom loves Delicata though, and will eat the others as well.  The main reason for growing them is to fill in the blackberry zone in the back yard.  If I tear out enough blackberries and put in squashes that grow fast and are huge and shade out the ground; my hope is the squashes will also shade out the blackberry roots and help keep them in check.  Of course, having squashes for eating isn't a bad thing either.

Meanwhile, back in the garden... Nothing in the main bed is really growing yet, a few leaves have appeared here and there but not much growth beyond that.  Who could blame them? All this rain doesn't help and they are still recovering from the transplanting.  On the plus side, none of the transplants have died, and the cat-proof covers have done their job.  The kales in the whiskey barrel are doing great though, they have really taken off and are actually putting on some decent sized leaves (about the size of my thumb), which is a big improvement over a week ago when they only had their tiny first set of leaves.

I'm still not seeing any growth from the potatoes, or the rhubarb, but I have heard they can take a while to get going. My cherry tree is popping out green leave buds though, so I guess I didn't kill it after all. :)

In other news:  I was out of town most of last week and apparently one of the cats tried to jump on my little greenhouse.  The cat broke through the plastic cover and tipped over the entire thing, including my tray of starts that was hardening off.  My husband did his best to save everything (and he did great!), I'm hoping the trauma won't do too much harm, but a few stems are looking kinked despite the plants looking as healthy as ever.

And that's the news for today!  Hope everyone's enjoying Spring and growing some garden goodness!

Thursday, March 8, 2012

Some Days the Writing Doesn't Come So Easy

I'd like to say I've been busy in the garden and that has slowed my postings.  Sadly, that's not the case.  Instead I've had to deal with chores, kids, planning dinner, washing laundry, and the weather.  This week has gone from rain and hail (Monday), to snow (Tuesday), to bright sunny days w/ freezing temperatures (Wednesday and Thursday).  It is supposed to warm up on Friday, it is also supposed to start raining on Friday.  I just can't seem to win against the weather, either the soil is frozen or so waterlogged it can't be dug in.

Despite the fact that I desperately need to turn my beds over and amend the soil I will have to wait out the weather for that.  This means I can't plant my peas, garlic (yes, I know, I should have planted it in November) or onions yet.  In fact, while other gardeners are planting things left and right, I am stuck waiting for soil to warm and dry out a bit, and the shade to move.  The only thing I can plant right now is my potatoes since they are going in pots; of course the potting soil I have for them is frozen solid, which means they too have to wait.

The cherry tree and camellia don't seem to be the least bit phased about the weather, in fact they are both starting to show signs of new leaf buds.  I must've done something right!

Hope things improve outside soon, if my starts get too big I won't have room for them under the grow lights.

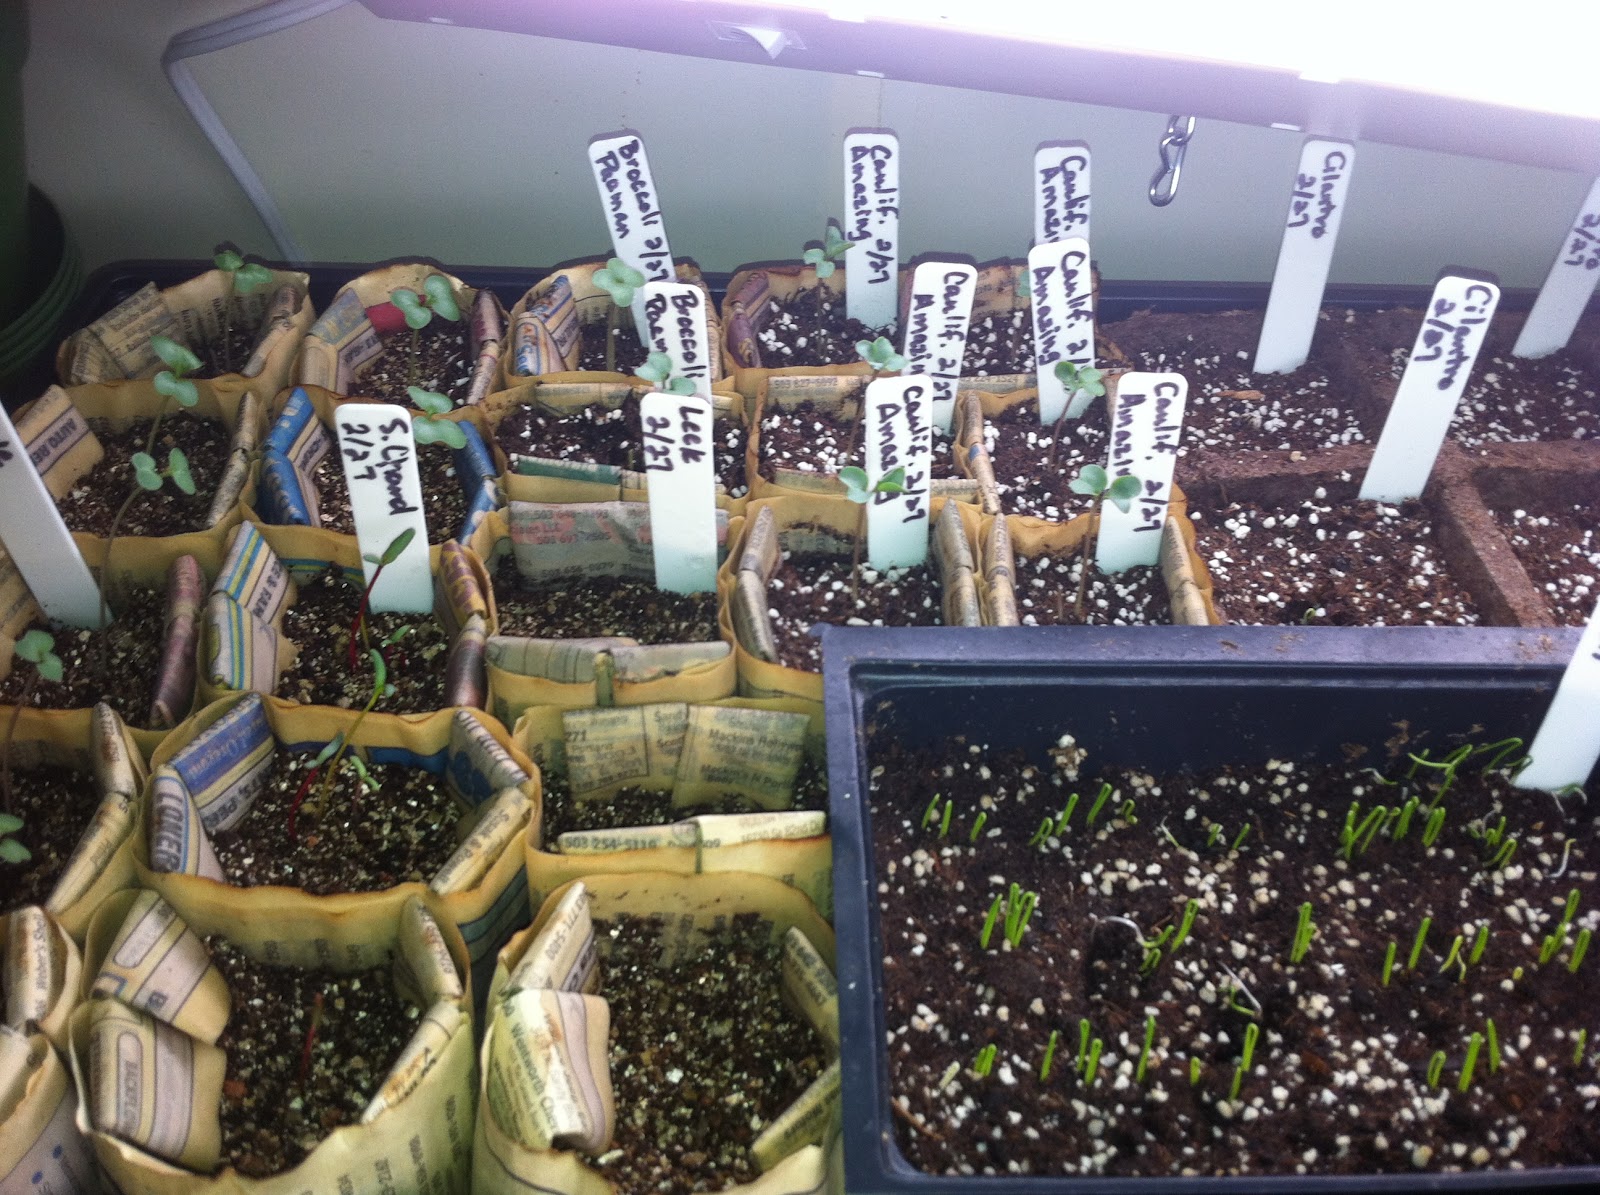
Today's seedling update:  Things are doing well; I planted too many lettuces in each pot, after some thinning I have decided I'm just going to have to move a bunch into other pots.  The final sprouts to pop up were the leeks, which are just beginning to show. 

Tray 2-planted 2/27 most of these have sprouted, though some aren't above the soil yet.

Tray 1- 2/25 everything is sprouted, lettuce are putting on first true leaves.

Who knew artichoke made such pretty little sprouts?  Hoping these won't get too big before I can move them outside and separate them.
 I ended up adding the 4' light fixture to the upper shelf because the littler ones just weren't cutting it.  it hangs over the washer a few inches, but really, who cares about clean clothes when there are plants to grow? I just have to remember to lift it out of the way to wash clothes; we don't really have to go without laundry.

So that's the news for now, I am chomping at the bit to get the garden in action.  I'll just have to rein it in a little longer.

Friday, March 2, 2012

Onion Culture

Allium cepa a.k.a. the bulb, common, or garden onion, is the most widely cultivated species of AlliumAllium cepa only exists in cultivation; though there are a few Allium species in the wild, often referred to as "wild onions" they are NOT Allium cepa

Traces of onion have been found in Bronze Age settlements dating as far back as 5000 BC (about the time the potato was being developed on the other side of the world; because what is a potato without an onion?).  It is uncertain if these traces were of "cultivated" onion; true cultivated onions can be traced to about two thousand years later in ancient Egypt, leeks and garlic also had their beginnings at this time.  Ancient Egyptians believed the onion's spherical shape and concentric rings represented eternal life.  Traces of onion have been found in Egyptian burial chambers and it's believed that the workers who built the pyramids ate onions and radishes.  In Greece, onion was believed to lighten the balance of the blood.  in Roman culture, gladiators were rubbed with onion to firm up their muscles.  In the Middle Ages they were so important they were used to pay rent, and given as gifts.  Medicinally onions have been used to treat constipation, erectile dysfunction, infertility, headaches, coughs, snake bites, and hair loss.  Columbus brought cultivated onions with him to the Americas, only to find out later that the natives were already using wild onion for everything from food, to dyes, to toys.

You should never give onion to pets or other animals as it may poison them.

Onions contain chemicals known to have anti-inflammatory, anti-cholesterol, anti-cancer, and anti-oxidant properties (in humans).  Studies have shown that eating onions may lower the risk of head and neck related cancers.  The more pungent an onion is, the greater its ability to inhibit cancer cell growth.  Onions may also be beneficial in reducing the risk of osteoporosis in women. 

Lacrimatory Factor, or LF, is the gas created when an onion is cut into or bitten that causes your eyes to tear up.  This can be reduced by using a sharp knife to cut them, or by chilling or freezing them before use, or by cutting them under running water or in a bowl of water. 

Onions are propagated by seed, or by bulb set.  Onion sets are small bulbs of onion grown from seed the previous year, planted in the ground these will grow into full sized bulbs in a shorter time frame than seeds.  Sets are reputed to grow bulbs with less durability than seeds though.

Onions that produce seeds are "day-length sensitive", this means they require a certain number of daylight hours before they will begin to bulb.  Long-day onions require 15 or more hours of daylight, intermediate day onions require 12-13 hours, and short day onions require 9-10 hours.  Often, short day onions are planted in the fall in mild climates and will bulb in early spring. 

Green onion, or scallion, refers to either an immature onion that has not yet bulbed, or to the Welsh onion, an Allium species which does not bulb at all.  You can differentiate between a Welsh onion and a common onion scallion by the cross section of the leaves; Welsh onions leaves are flattened on one side, while the common onion leaf is round.  Tree onions, top onions, topsetting onions, walking onions, or Egyptian onions refer to the species Allium proliferum; this onion plant forms bulblets on top rather than a flower and seeds.  These bulblets can then be planted to grow more onions, or eaten like a normal onion bulb.
Tree onion

Green onions and leeks should be refrigerated after harvest.  Regular bulb onions can be stored at room temperature in a cool, dry, dark, ventilated area.  At room temperature onions have a shelf life of 1-5 weeks depending on variety; in the fridge this can be extended up to 4 more weeks.  In storage, onions can absorb the smells of apples and pears; they should be stored away from moister vegetables as they can draw that moisture from the air and will spoil sooner.

Onions generally come in 3 colors: red, white, and yellow.  Yellow onions are full-flavored and are usable for just about any culinary purpose.  Red onions are best chopped fresh, or as grilled or char-broiled onion.  Red onions have a sharper flavor.  White onions are traditionally used in Mexican food, they sautee to a golden color and develop a sweet flavor when cooked.

Small bulbed onions are used for pickling, or eaten as vegetables; these include pearl, boiler and pickler onions.  Onion seeds can also be eaten as sprouts, similar to alfalfa sprouts.

For longer season onions (those that make a regular bulb) you should plant seeds in the fall; or plant sets instead in cold climates.  Short season onions like scallions and pearl onions can be planted early in the spring.  Starting them inside can help you get ahead of the game when the weather stays cold late in the season.  Seeds can be planted very close together (my pearl onion seed pack said to plant up to 100 seeds per 4"-6" pot) then thinned after sprouting.  Thin to about 1-2" apart, further for larger onions.  Sets can be put into the ground as early as January, or as late as April depending on variety and climate.  Tops will grow up, when tops die back the bulbs are ready for harvest.  The whole onion can be harvested at any time too, for use as scallions.  Don't waste your thinnings! Chop them up into a recipe that calls for green onion. 

Onions are a great addition to any garden, they can deter some pests, look pretty both in growth and in bloom, take up very little space, and can be added to nearly any recipe.  If you're going to grow tomatoes, you'd better grow onions too.  You can't make salsa or spaghetti sauce without them.  I have never heard of a pest or disease problem with onions either, though I may be mistaken (Note: the SFG book says onion fly maggot can be a problem).  My only issue with them  in years past has been that they just don't want to bulb, so this year I'm giving them a head start in the house, both the pearl onions and the sweet Spanish white onions, in the hopes that I'll actually have some onions for all my summer recipes.  In an SFG garden plant 16 onions to a square foot.

After harvesting lay onions out in a single layer in a warm dry place, this will allow them to cure and the skins to dry, ensuring they will last longer in storage.

My onion growing knowledge is kind of slim, so if anyone can add to this please feel free to let me know.


Monday, February 27, 2012

Love Lettuce

Despite the fact that the seeds were planted Saturday night, and it is now only Monday morning, I spotted the tiny white slivers of lettuce stems in my pots today.  I am just amazed at how fast that was.  Optimal conditions for germination make a big difference.

Also, I called this morning for location services to ensure that planting my cherry tree won't involve electrocuting myself or bursting a water line... if it's a problem I will just have to look into a different location for the tree.  I probably should have done this before buying the tree, but oh well, live and learn I suppose.

That's all for today, hoping to get a chance to post a lettuce culture post soon so keep your eyes open for that.

Sunday, February 26, 2012

When the Men Are Away, the Women Will... Build a Grow Room?


Shelves, trays, lights, bulbs, and seedling mix.
The original shelf and all the stuff stored there.
Got my grow room set up yesterday, just like everything else it was more challenging than I expected.  The 2' light fixtures I bought were for wiring into a house and didn't have cords, plus they needed assembly which I didn't know until I opened the boxes.  So after returning them I was forced to visit two hardware stores and a Home Depot to find something that would work.  So here's a quick tip: undercabinet lights, shop lights, and aquarium lights are your best bets for fixtures.  Strip lights wire into a home and don't have cords.  Undercabinet lights are primarily less than 2' long, shop lights are 4' and longer, and aquarium lights are in between.  Since you pay close to the same amount for a 2' light as a 4' light it's more cost efficient to have a 4' space and buy one shop light (which are cheap) than to buy two 2' lights (or in my case two 18" lights).  Aquarium lights tend to be more spendy since they are rather specialized, the other advantage of shop lights is that they often come with chains to hang them.  Sadly, my space was not wide enough to fit a shop light so I had to resort to a less efficient system.

 When selecting flourescent bulbs be sure to buy the correct length, circumference, and light color.  While a standard soft white bulb will work to sprout seeds, they will become leggy fast searching for actual sunlight.  Flourescents come in varying circumferences (T12, T8, T5) and you should check the size on the fixture you choose and buy a bulb of the correct size to fit it.  My fixtures require 18" T8 bulbs.

Examples of different bulbs that would work for plant growth.
Once you find the correct size you need to select a light color as close to that of sunlight as possible.  Daylight, Full Spectrum, Wide Spectrum, Plant and Aquarium, Natural Light, or Natural Daylight are some of the names for the bulbs you need.  If you are unsure of whether a bulb will work for your starts you can check the label on the package.  Look for the "Color Temperature" on the label, it should be a number between about 5000K and 6000K.  A number higher than that will cross into the white light category and may not be adequate, while a lower number will become closer to red light and again won't serve your purpose.

Once I solved my light fixture problem I set up my shelf, moved all my junk onto it, then plugged in the power strip.  It took a bit of arranging to get the lights hanging correctly. Then I wrapped tin foil over the cardboard from the shelving box and hung it over the back of the shelf.  Finally, I planted some seeds, I will probably plant more today, but was surprised to find I could fit 29 pots of different sizes into one tray.  I may not need more than that!

Below are more pictures showing the grow room space.

The shelf all assembled, lights hung, you can't really see the tin foil but it's against the wall reflecting the light forward.  I also set my thermometer w/min max on top to watch the temps here and in the green house more easily.

Examples of reusing last year's pots, and of phone book page origami pots.

21 of my pots filled and ready to go.  I had to stop and make more paper pots.

Plastic dome over top.  Seeded, watered and under the lights.  Ready to sprout!

I could have fit 3 trays under these lights but by the time I was done last night I was not prepared to plant that many seeds.  Plus I think I'll need another bag of seedling mix first.  Be sure to keep lights positioned just above the tops of the plants, no more than 4" above them to encourage short, robust growth and deter legginess.  You can move the lights up as needed or move the plants down, whatever is easier.  Lastly I wanted to mention that while researching on plant lights I found out that plants require and grow better with both light and dark times each day, so be sure to turn your plant lights off at night and back on in the mornings, if you are too forgetful for that then set a light timer to do it for you.  Having dark time is nearly as important to plant health as having sunlight.  Good luck!


Friday, February 24, 2012

The Costs of an Early Start

Growing seasons differ across the country.  A lucky friend of mine just sent me a picture of the lemon and orange trees in her yard that are in full fruit right now, living in southern California makes a big difference I suppose.  The weather here is still touching on freezing overnight and with as mild as the winter was it would not be remiss to expect it to keep going this way for another month or even two.

I recently picked up an indoor/outdoor thermometer with min/max capabilities to keep an eye on how much the temperature in my tiny greenhouse is changing.  In the past week the minimum temperature inside the greenhouse was 33 degrees, and the maximum was 96.  Unless one of the kids slapped the thermometer with a hot potato when I wasn't looking, that means there was a more than 60 degree change in temperature just within the week.  Too cold for winter veggies and too hot for them too.  I definitely need a better greenhouse system, but I'm unwilling to invest in one since I have such limited space.  Instead the greenhouse will be used solely for hardening off, opening it up during the day and closing it on cooler nights to keep the temps from going out of control.

This has left me in need of a space to get my winter veggies started.  My brother, may his awesomeness reign forever, has agreed to start my hot weather plants for me again this year.  I plan to attempt starting the cold weather plants myself though.  With that in mind I decided to build a "grow room"... er, shelf inside.

People give you a lot of strange looks when you mention that you are building a grow room, it seems the phrasing just makes them think of growing marijuana, but in actuality it makes good sense (cents?).  Starts from a nursery are often limited to the most common varieties, and by what is in stock.  Each start you buy ranges in price from .99 to $5.00 (for gallons).  But if you have a grow room and some seeds you can effectively pay far less in the long run and have better quality plants of more varieties.  If you save your own seed it cuts the cost even further.

So let's talk about the costs of a grow room.  For cool weather plants the costs are lower than for hot weather plants, primarily because you don't have to heat them as much.  Start with a shelf, or shelves, or a tabletop, or a windowsill, anywhere you can find room to set one or more trays of pots, hang a light over it, and keep it away from things or people that could cause trouble.  You will need lighting, if it's a completely enclosed space you'll need ventilation, if it's outside of the house or you will grow hot weather plants longer than a few weeks you'll need a heat source you can monitor and adjust.  You also need trays, pots, potting soil, seeds, water, and a power source for the heat/lights/ventilation.

For example, my "grow room" will actually be a few shelves in my laundry room.  The furnace and back door are in there, and it is generally left open to the rest of the house so ventilation and heat should not be an issue.  There is a power source (the outlet the washer is plugged into) to run the lights, though I will need a power strip to use more than one light at a time.  Currently I have a small metal shelving unit in there which holds the overflow of my Costco shopping trips that won't fit in the kitchen.  My plan is to replace this with a 4 tier shelf that is wider and taller.  It will still hold my overstock goods in the bottom two shelves, but the upper two will be outfitted with lights and house my starts.

Costs:
36" wide 4 tier shelves:  $60
Power strip:  $20
2' wide single bulb flourescent light fixtures:  $10 each
2' long flourescent light bulbs (daylight or plant and aquarium):  $8 each
Plastic seedling trays:  $2 each
Organic seedling potting mix (small bag): $5 each
Aluminum foil: $5
Newspaper/reusable old pots/phone book:  $0
Cardboard:  $0

Depending on how many plants you plan to start it should have an initial cost of about $150 or more.  Nearly half the cost is just the shelving unit, which is totally reusable year after year and can be used for storage between growing seasons.  The other big cost is the power strip and it can also be used year after year, or used for other things when it's not needed for the plants.  The light fixtures and plastic trays should last you a few years too.

The things that need replacing each year are the potting mix, aluminum foil, cardboard and pots.  But cardboard is free from any recycling bin, aluminum foil is inexpensive, potting mix can be made in bulk, and pots can be made of free recycling items too.

So, to make the cost comparison, let's say you are planning to grow cabbage, broccoli, kale, onions, and carrots.  About 70 plants total.  To buy these plants already started you'd pay about $2 each for four packs of the larger veggies or 6 packs of the smaller ones.  For this price you get the smallest starts, basically a stem with its first set of true leaves.  If you want 40 of the large veggies it will cost $20 and let's say about another $10 for 30 of the smaller ones.  So you spent $30 on starts.  Not so bad really, in fact, I know I usually spend more than this... maybe I underestimated the cost.  But no matter.  4" potted starts will cost you up to twice as much for one plant.

The first year of building a grow room you will have spent $150 on the setup alone, and about $7.00 for the same five types of plants.  The difference is that a packet of kale seeds contains around 50 seeds, carrot packets contain closer to 100 or more.  So instead of 70 plants you have the ability to grow 250 plants.  You can grow spares and sell them, or trade them to other gardeners, or share with friends or family.  Or you can save all that extra seed for the next year and save yourself the seed costs.  Obviously there is no savings the first year, but the second year you only have to pay... well, nothing if you make your own potting soil from your own compost, about $5-$15 if you buy it, depending on how much you need.  And so on, for many years.  Light bulbs will need to be replaced every few years, and undoubtedly your plastic trays will eventually need replacing, but for the most part the grow room will be low maintenance and save you money in the end.

Considering I spend $150 on seeds alone, of nearly 40 different plants, if the grow room will allow me to improve their survival rate and possibly even turn a few starts into cash by selling them to neighbors or my mom at a discount I will be happy with the investment.  Two shelves of grow space alone should provide all of my cool season crops adequate room, and it could also be enough space for the hot season plants if needed (after the cool plants were moved outside).  Imagine how much you could grow in a whole room!

The other big bonus to creating your own grow room is getting ahead of the game on planting times.  In the Willamette Valley a gardener has between April 15th and October 1st to do all of their growing.  Just over 5 months.  If it takes a cabbage 60 days to reach maturity and a tomato 80 days... there just isn't enough time to plant one from seed and then follow it with the other from seed.  Working in a small space you can really increase your returns by planting the same area twice, or even three times, in one season.  With a grow room I can start my cabbages inside a month earlier than I could outside, while the soil is still too cold for germination.  They can grow larger under optimum conditions before being put outside, then finish their growth in the garden where they will have plenty of room.  This means that I should be able to have the cool weather crops (or at least most of them) harvested and pulled out in time for the hot weather plantings to go in at the beginning of June.  Then I can even start a fall crop in August when the determinate tomatoes have finished producing and the basil is harvested, leaving the longer season tomatoes to finish off before it gets cold again.

Lastly, I can use my grow space over the winter to grow entire plants for fresh eating indoors.  Spinach, lettuce, green onion, annual herbs like cilantro and basil, all of these can grow indoors over the winter.  They won't outgrow their space and can easily be harvested as needed without sacrificing the entire plant.  Inside a house they shouldn't even need extra heat to stay healthy.

P.S. I almost forgot to explain the purpose of the foil, cardboard and newspaper etc.  Backing and/or siding your shelves with a reflective surface (i.e. aluminum foil wrapped over cardboard for stability) will help keep the light and heat focused inward toward the plants and can make a big difference in plant health.  Newspaper or phone book pages make excellent paper pots, or you can reuse any old start containers from previous years, just be sure to wash them well with soapy water.  I've found that newspaper origami pots are about a 4" pot, while phone book pages make a pot closer to the size of a 2" peat pot.  Yellowbook phone books are totally recyclable and have soy based inks that won't contaminate your soil, check online to see if your phone book is made with soy based inks.  If not, stick to newspaper, which is always made with non-toxic inks.

Next time... When the Men Are Away, the Women Will... Build a Grow Room?
In which my daughter and I put together our grow room, start seeds, and then wait for my husband to notice it when he gets home.


Friday, February 10, 2012

Are We There Yet? Seed Starting

It's early February and while it's warm out right now, it's still a little too early for seed starting.  Last frost here in the Willamette Valley is the first week or two of April.  From my own experience and the particulars of my garden I will put out my coolest weather plants in late March.  I have plastic sheeting to cover the plants if there is a late frost expected, and my beds are all raised so the soil tends to warm up faster than in-ground beds. 

Far more of an issue in my garden is that the fence along the back of each bed is south facing.  Right now we can have a beautiful sunny day and my beds are completely shaded, as well as several feet past them onto the patio.  The fronts of the beds won't see direct sunlight until mid-March, and the backs won't until late April.  I can start seeds indoors though and put them out in mid- to late March.  The only issue with this is trying to find a balance between when to plant versus how large the plants will get by the time they can be moved outdoors.  My small greenhouse will keep them safe a little longer, but they will become spindly and weak quickly and exposed to very high temperatures in the greenhouse when the sun is out.  The little standing shelf style of  greenhouse is useful for the transition between indoor growing and outdoor growing, but it really doesn't have any temperature controls and heats up very fast.

I generally figure about 10-20 days of indoor growth.  The first ten days are just to allow for sprouting, the next ten are to allow at least one but preferably two or even 4 sets of leaves to develop before transplant time.  Most cool weather plants shouldn't have trouble with this; others, such as celery, need much longer to develop.

I also don't have any south facing windows or any grow lights currently, so if I plant seeds too early they will get lanky searching for light long before it's warm enough for them outside.  The only windows in my house that face south are in my kids' bedrooms, and that's just not a practical place for plants to be. 

My best bet for starting brassicas, lettuces, spinaches, and other cool weather crops is to plant them around the last week of February to the first week of March, then move them to the greenhouse in mid-March and wait for the weather to clear for transplanting.  This is one of the reasons for keeping notes on your garden.  Last year I started things inside the first week of March, then directly transplanted them at the end of March because I didn't have the greenhouse yet.  They were very spindly after a month in the house, and i was forced to put them directly in the ground a little too early because the greenhouse was tipped over in a Spring storm.  I learned to weigh it down with a cinder block to prevent that happening again!  The plants struggled outside until the sun finally started to reach the garden beds in April, they did well after that though. 

This year I think I can get a head start by starting just as early indoors, then moving things to the greenhouse, and holding off to transplant until April.

One thing I do plan to change is the size of pots I will be starting seeds in.  Last year I used the tiny 2" peat pots from a seed starting kit.  This year I will be starting seeds in 4" pots, this will save me from having to transplant them before they outgrow the 2" ones.  Since I'm not running a nursery where seed starting space is limited it makes more sense to me to save myself the step of switching up to bigger pots.

You can start seeds in anything, peat pots, plastic pots, egg cartons, or paper pots.  Anything that is roughly the right size and will hold dirt and water, just make sure it has some drainage holes in the bottom.  You will also need a tray of some kind to catch water runoff; plastic trays from seed starting kits are reusable for this year after year, cookie sheets with sides work too, or a mesh screen over a bucket even.  My dad found a collection of old school lunch trays at a garage sale many years ago that work great for all sorts of things, including seed starting trays.

My brother found a very cheap solution for pots as well, that also protects against transplant shock.  Newspaper pots! Fold newspaper origami-style into a pot shape, plant your seeds, watch them grow, then plant the whole pot into the garden.  Here is an excellent video showing how to make these.  If your origami skills are lacking you can also try this method.

So you have a tray, and pots, now you just need some dirt.  The one thing to be careful of for seed starting is not to use old, used dirt from the garden.  Normal garden soil is full of weed seeds, fungus spores, insect eggs, etc. that you just don't want in the pots with your seeds.  You should use potting soil, seed starting soil, or if you prefer a less expensive option you can use peat moss and give it an occasional dose of compost tea once the seeds sprout.  Peat moss can be bought for a few dollars a cubic foot, which is more than enough to start all the seeds you need.  It retains water well so won't dry out between waterings and is soft and loose, allowing roots to spread out and grow better.  Peat moss doesn't have any plant nutritional value though, it's like the potato chip of soils.  Spritzing your starts with compost tea once a week will help supply the nutrients they need to grow healthy in a peat soil, and prevent them from damping off before they are transplanted. 

Plant your seeds, smaller things like spinach can be planted 2 or 3 to a pot, larger plants should be in separate pots.  Label each pot, see tip below.  Find a sunny (or somewhat sunny) spot in the house where seedlings will be safe from kids and pets (my cat ate my first lettuce plantings last year).  Cover trays with plastic wrap, or the plastic domes that come with seed starting kits to help retain moisture and heat.  Remove the plastic covers once the seeds have sprouted to prevent mold though!  And wait for your sprouts to come up.

Make sure to note what day they were planted and what day each type of seed sprouts.  If you have sprouts of everything but lettuce after 10 days, you should probably plant new lettuce because it should have been the first thing to sprout.  Again, this is when taking notes is really useful.

Tip: Don't write labels on the paper pots, they will smudge after watering.  Instead, you can use plastic knives from party packs of plastic silverware (because you always end up with leftover knives, yet need more forks and spoons) and a permanent marker.  These work great; they are sturdy, don't smudge, and it's a nice way to reuse something that would otherwise just keep stockpiling in your cabinets.  Another option that I found at Backyard Homesteader's YouTube Channel is using window blinds as plant tags, plastic blinds can be found for a two to three dollars at most stores that sell housewares, then cut up into small tags to label plants with.