Ok, so obviously if you have pickling cucumbers... make pickles. There are literally thousands of different recipes for pickles, some involve crocks, some don't, some involve dozens of spices and herbs, some don't. Pickle recipes are easy to come by. I recommend starting out by trying the recipes in the Ball Complete Book of Home Preserving (the link to it on Amazon can be find on the sidebar -->). It will give you a basis from which to begin your pickling adventures.
More importantly what are you going to do with the overproducing slicing cucumbers?! They are really meant for fresh eating, but honestly you need to come up with other ideas unless you want a stomachache from cucumber over-indulgence.
So here are the recipes I use when I am sick of fresh sliced cukes:
Tsatsiki: greek dip
2 single serve containers plain greek yogurt (I used Chobani nonfat and it turned out great)
1-2 cloves fresh garlic, peeled
1 slicing cucumber (half of one if it's large), peeled
1/2 tsp lemon juice
Pinch of dill weed, fresh or dried is fine
Pinch of mint leaves, fresh
You can chop these items all together and then stir into the yogurt, but if you have a food processor you can save a lot of time by throwing the garlic, mint, and cucumber in and giving it a whirl until it's well minced.
In a bowl combine the minced ingredients with the rest and stir well. Refrigerate an hour or two, serve with veggies, pita bread, pita chips, or falafel.
Refrigerator Pickled Veggies
(this is a recipe for cucumbers, but other veggies can be thrown in as well, like peas, cauliflower, broccoli, etc.)
In medium bowl with tight-fitting lid combine: 1 part white or apple cider vinegar, 4 parts water, 1 part sugar. This is the basis of refrigerator pickles. Soak sliced cucumbers with onions (or other veggies) in this solution in the refrigerator. For variation in flavor add salt, pepper, pickling spice, dill, etc. to taste. These pickles will keep for about a week and make a zesty side salad for any meal.
For an Asian take on refrigerator pickles try using rice wine vinegar, soy sauce, a few splashes sesame oil, and a dash of Tabasco or Rooster sauce.
Pickle Relish
While most pickles are better made with pickling cucumbers, relish is a chopped pickle and is a great way to make use of over ripe cucumbers. Just spoon out the seeds and then shred the cucumber flesh. I use a combination of slicing and lemon cukes for this recipe.
2 lbs. cukes, peeled, seeded, and shredded or finely chopped
1 large sweet onion, shredded or finely chopped
1/2 red bell pepper, finely chopped
1/2 cup salt
Toss the vegetables together with salt in a large bowl, set aside 2 hours, drain thoroughly. (To save time, use your food processor for finely chopping all the veggies).
3 cups cider vinegar
1 1/2 cups sugar
1 cup water
2 garlic cloves, minced
2 tsp. ground allspice
1 tsp black peppercorns (I prefer ground)
1 tsp celery seed
Combine above ingredients in large non-interactive pot and bring to a boil, stir until sugar is dissolved. Add vegetable mix and return to boil. Simmer five minutes. Remove from heat.
For canning: Boiling water method. Ladle hot relish into half pint jars covering solids with 1/4 inch liquid. Leave 1/4 inch headspace. Process for 15 minutes, turn off heat, let jars rest 5 minutes. Remove jars.
Two things to note about this recipe: it tends to be a bit watery, if it is too watery for your taste add in 1 tsp. corn starch while simmering, or you can simply drain off some of the liquid in each jar when you open it. Also, this relish looks brownish rather than the clear green color of store bought relish. I would imagine the color would improve by substituting distilled white vinegar for the cider vinegar, but I haven't tested what effect this would have on the flavor and I like the flavor enough not to want to mess with it.
I hope these recipes have given you a few ideas to help manage the influx of cucumbers from your garden. Please, if you have other recipes for using garden cucumbers up, post a comment to share it with the rest of us. Enjoy!
Showing posts with label recipe. Show all posts
Showing posts with label recipe. Show all posts
Tuesday, August 7, 2012
Tuesday, May 8, 2012
Taking Stock
Just had a little fledgling swallow land on the sill outside my window and chirp at me for about five minutes while I sat at the computer. Apparently he had something important to share with me. Lol.
***
It always kind of amazes me that there are so many people of my generation (and younger) that have no idea how to make certain things from scratch and assume those things just come from the store. A good example of this is stock. Vegetable stock, chicken stock, beef stock... so many people think it comes in a can from Swanson and either don't know how to make it or think it is a huge time-consuming task.
The other day I was watching the Food Network and caught Ina Garten (The Barefoot Contessa) discussing her recipe for making stock. Now, I appreciate that Ina makes good food with high quality ingredients, but I find her show a disappointment for the average viewer because she lives such an elitist lifestyle and it shows in her food choices. Not too many of us can sit around nibbling crab cakes for a Sunday afternoon apperitif before moving onto the main course of fresh caught salmon steaks, with caviar and caper compote, arugula chantrelle salad and sherry trifle for dessert in December. Sorry Ina, but most people can't afford these things. So I stumbled across Ina showing how she would make a lovely chicken noodle soup for lunch using her own homemade chicken stock.
Ina's recipe for stock sounds delicious, but who can afford to use three whole chickens just to make broth? And piles of fresh veggies, and fresh bunches of herbs as well?
Here's my recipe for stock, it's simple, inexpensive, and yes it does take a lot of time, but like doing laundry, you're actual involvement in that time is negligible.
First of all you have to have a system in place for stock-making, the goal with stock is to use every part of the food and waste nothing, it is what poor people have done for decades to get the most flavor from their food. A good system involves a "Stock" bag in your freezer, to which you can add the leftovers of whatever mirepoix (meer-pwah) ingredients (that's carrots, onion, and celery) you use. The centers of celery with the short pale stalks, the ends of carrots, skins of onions... so long as these trimmings are not dirty or moldy they will work fine. Each time I use these vegetables in the kitchen, or if they start to fade before I can use them, I toss them into the "Stock" bag in the freezer. If my stock bag is slim I will fill in with fresh veggies, but I prefer to use the trimmings in the stock bag. Appearance of the veggies in this doesn't matter, you just need the flavors. I know this post isn't very garden related, but if you have a garden it's a great way to fill your stock bag, veggies that were nibbled by pests make a great addition to the stock bag, as well as those that bolted or became woody or failed to bulb (the flavor's still there, they just don't have the right texture or appearance). Why toss them in the compost when they can be used in stock?
Secondly, you need a source for your meat flavor (obviously this isn't needed for vegetable stock). Generally when I make a roast chicken for dinner, the first night it is served as roast chicken, the second night the remaining meat is served as some kind of soup or casserole, and the third day the bones and drippings are used for stock. This is why Ina Garten seems very wasteful to me, one chicken should be able to provide nearly three meals for a family of four. So my third day chicken carcass provides the meat flavor. This also works with pot roast leftovers and beef bones, or ham bones and hocks to make ham stock, or turkey bones and drippings, etc.
Finally, you can throw any seasonings you'd like in your stock, in my case I tossed in some garlic cloves that had sprouted a bit and then dried out in the fridge and a handful of thyme I had accidentally cut off while trimming out dead branches on my thyme plant.
Throw your chicken carcass, including all of the skin, bones, fat, and drippings into the pot.
If you want to, you can add salt or pepper to your stock, I usually save that step for when I'm ready to use it in preparing a meal though.
Fill the pot with water, you need enough to cover all the ingredients, but leave a little room at the top of the pot to avoid a boil over. Put a lid on it, bring it to a boil, uncover, stir, and let simmer for several hours until the liquid is reduced by about half. Every 30 minutes to an hour it helps to walk by and give it a quick stir to ensure nothing scorches on the bottom of the pot.
Once your stock is reduced turn off the heat and let it sit for another 30 minutes to an hour so you don't burn yourself when you strain it out.
After cooling set a colander in a large bowl (for a super clear broth lay cheesecloth inside the colander), then pour the entire pot into the colander. Be careful as it may still be hot, and be sure to use a large enough bowl to hold it all. Lift the colander out and dispose of the now flavorless remains.
What you are left with is a bowl full of beautiful, flavorful stock. It's not quite done though. Pour the stock into a freezer safe container (or two), label it, put a lid on it, then place it n the refrigerator overnight.
The next day uncover your stock, you should be able to see a top layer of pale fat over the stock itself. Spoon off this semi-solid fat for a nice lean stock.
Finally, you are left with your chicken stock, low fat, flavorful, ready to use in soups or whatever meal you'd like. It will keep for months in the freezer, but only another day or two in the fridge. Now wasn't that easy? Time consuming yes, but really not that much work.
And I didn't even need 3 whole chickens and 6 handfuls of fresh herbs. Plus, if you started with organic chicken and veggies it's completely organic too. ;)
***
It always kind of amazes me that there are so many people of my generation (and younger) that have no idea how to make certain things from scratch and assume those things just come from the store. A good example of this is stock. Vegetable stock, chicken stock, beef stock... so many people think it comes in a can from Swanson and either don't know how to make it or think it is a huge time-consuming task.
The other day I was watching the Food Network and caught Ina Garten (The Barefoot Contessa) discussing her recipe for making stock. Now, I appreciate that Ina makes good food with high quality ingredients, but I find her show a disappointment for the average viewer because she lives such an elitist lifestyle and it shows in her food choices. Not too many of us can sit around nibbling crab cakes for a Sunday afternoon apperitif before moving onto the main course of fresh caught salmon steaks, with caviar and caper compote, arugula chantrelle salad and sherry trifle for dessert in December. Sorry Ina, but most people can't afford these things. So I stumbled across Ina showing how she would make a lovely chicken noodle soup for lunch using her own homemade chicken stock.
Ina's recipe for stock sounds delicious, but who can afford to use three whole chickens just to make broth? And piles of fresh veggies, and fresh bunches of herbs as well?
Here's my recipe for stock, it's simple, inexpensive, and yes it does take a lot of time, but like doing laundry, you're actual involvement in that time is negligible.
First of all you have to have a system in place for stock-making, the goal with stock is to use every part of the food and waste nothing, it is what poor people have done for decades to get the most flavor from their food. A good system involves a "Stock" bag in your freezer, to which you can add the leftovers of whatever mirepoix (meer-pwah) ingredients (that's carrots, onion, and celery) you use. The centers of celery with the short pale stalks, the ends of carrots, skins of onions... so long as these trimmings are not dirty or moldy they will work fine. Each time I use these vegetables in the kitchen, or if they start to fade before I can use them, I toss them into the "Stock" bag in the freezer. If my stock bag is slim I will fill in with fresh veggies, but I prefer to use the trimmings in the stock bag. Appearance of the veggies in this doesn't matter, you just need the flavors. I know this post isn't very garden related, but if you have a garden it's a great way to fill your stock bag, veggies that were nibbled by pests make a great addition to the stock bag, as well as those that bolted or became woody or failed to bulb (the flavor's still there, they just don't have the right texture or appearance). Why toss them in the compost when they can be used in stock?
 |
| Stock bag from the freezer. |
 |
| Ingredients collected |
 |
| Veggies and herbs go into the pot. |
 |
| Looks terrible, smells and tastes fabulous. |
 |
| All set for a nice long simmer. |
 |
| Reduced by half. 3-4 hours later. |
 |
| Colander full of strained chunks. |
 |
| Stock! Well, almost. |
 |
| Ready for chilling overnight. |
 |
| Fat separated to the top of the container. |
 |
| Ready to freeze for chicken and dumplings! |
Monday, February 20, 2012
Drowning in Berries
I have already discussed strawberries to some extent, how they grow and how to care for them in Strawberries, The Ultimate Food Crop. I did not include recipes and preserving directions though since I was pressed for time that day. So today we will cover what to do with all of those strawberries.
The first few days of finding ripe strawberries will likely be filled with fresh eating, strawberry shortcakes, and sliced strawberries in your cereal bowl or on your salad... but a few days later you'll find the novelty of it wears thin and long for a way to save those flavors for the winter months. Luckily by this time your strawberries should be in full fruit. If your patch is small and you are still only harvesting a few berries here and there, go out and pick some at a local farm and use them for these recipes.
There are two primary ways to preserve your strawberries, prepared or frozen. Some ways to prepare them include making jams, pies, or syrups. If this is too much hassle it's often easier to just wash and hull the berries, then lay them in a thin layer on a cookie sheet, freeze them like this and then bag them up. This method of freezing keeps the berries from freezing into one solid lump, instead you can remove what you need to defrost from the bag and put the rest back in the freezer.
Making prepared strawberry recipes is more time consuming, but pays off when you can pull a strawberry-rhubarb pie out of the freezer at Thanksgiving and throw it in the oven right away, or pop the lid off a jar of strawberry jam and enjoy the taste of summer in February.
Jams are what most people think of when they consider preserving strawberries. They are incredibly easy to make, keep well without needing to be pressure canned and are a product used in most households year round. There are a number of recipes for jams available and depending on your own tastes and preferences you can choose the one that best suits you. A standard jam recipe such as is found inside a pectin package can have up to twice as much sugar in it as berries; this will give you a very sweet jam and sometimes sets too firmly leaving you rolling a chunk of strawberry Jell-O across a slice of bread.
Many pectin packages also include reduced sugar recipes, these cut down on the sugar which in turn can effect the jam's firmness and leave it runny. They are not as sweet and allow more of the berry flavor through, however the reduced sugar is also more likely to cause the jam to brown in the jar.
I am still trying to find a perfect canned pectin jam recipe, each year I try a few in hopes of making the perfect jam. Freezer jam on the other hand is so simple my toddler can make it. Select a pectin designed for making freezer jams, mash up berries and scoop the required amount of berries into a bowl. Mix in required amount of sugar and pectin for a few minutes allowing it to dissolve completely. The pectin brand I use calls for 1 2/3 cups fruit, 2/3 cups sugar, and 2 Tbsp pectin. This makes 16 oz. of jam, which you then scoop into freezer safe containers (leaving head room for expansion) and put into the freezer up to a year. Freezer jams aren't cooked so they tend to be runnier than cooked jams, but being uncooked also means more of the bright fresh strawberry flavor. Of course to make freezer jam you also have to have a large enough freezer to hold it, and once it's opened freezer jam will spoil faster than a cooked jam.
Last year I bought Ball RealFruit Pectin in "flex batch" containers that turned out to be really helpful with making small batch jams. Instead of using an entire pectin packet to make a huge batch of jam I can measure out how much pectin I need based on how many berries I have on hand.
I also found a pectin-free jam recipe last year that I had to try purely because it meant one less thing to buy in order to make my own food. The pectinless recipe came from Clearly Delicious:An Illustrated Guide to Preserving, Pickling, and Bottling by Elisabeth Lambert Ortiz. It requires a bit more work, but I definitely appreciate being able to make jam without running to the store for pectin. For this recipe you need 4 quarts of strawberries (4 lbs.) crushed, 2 Tbsp. lemon juice. Simmer these until berries are soft. Add 7 1/2 cups warmed sugar over low heat and stir until well mixed. Increase the heat and boil rapidly without stirring for 15 minutes or until it reaches setting point. Candy thermometer should read 220 degrees. Skim off froth, cool slightly then pour into sterilized jars and water bath process them. I don't think my jam using this recipe cooked quite long enough, it turned out a little bit runny, but it tasted fabulous and I can appreciate that this recipe contained far less sugar than most of the others.
One thing to note about strawberry jams: if berries aren't completely crushed the air pockets inside them will cause them to float to the surface of your jam and this can make them discolor leaving you with unappealing brown berries at the top of the jar. Crush them well to prevent this.
Looking for a strawberry rhubarb pie recipe (since I have no rhubarb yet I have never made one) I found this site and was amused by the author, plus it links to the recipe she used.
You can also make up these pies into single serving pie-in-a-jar, for days when you have no one to share with. A recipe for this can be found at Adventures in Sustainability and is usable for any fruit pie. Be sure to tell her who sent you. ;)
So there you have it, some easy and some not-so-easy ways to deal with excess strawberries. If they survive long enough to be "excess".
The first few days of finding ripe strawberries will likely be filled with fresh eating, strawberry shortcakes, and sliced strawberries in your cereal bowl or on your salad... but a few days later you'll find the novelty of it wears thin and long for a way to save those flavors for the winter months. Luckily by this time your strawberries should be in full fruit. If your patch is small and you are still only harvesting a few berries here and there, go out and pick some at a local farm and use them for these recipes.
There are two primary ways to preserve your strawberries, prepared or frozen. Some ways to prepare them include making jams, pies, or syrups. If this is too much hassle it's often easier to just wash and hull the berries, then lay them in a thin layer on a cookie sheet, freeze them like this and then bag them up. This method of freezing keeps the berries from freezing into one solid lump, instead you can remove what you need to defrost from the bag and put the rest back in the freezer.
Making prepared strawberry recipes is more time consuming, but pays off when you can pull a strawberry-rhubarb pie out of the freezer at Thanksgiving and throw it in the oven right away, or pop the lid off a jar of strawberry jam and enjoy the taste of summer in February.
Jams are what most people think of when they consider preserving strawberries. They are incredibly easy to make, keep well without needing to be pressure canned and are a product used in most households year round. There are a number of recipes for jams available and depending on your own tastes and preferences you can choose the one that best suits you. A standard jam recipe such as is found inside a pectin package can have up to twice as much sugar in it as berries; this will give you a very sweet jam and sometimes sets too firmly leaving you rolling a chunk of strawberry Jell-O across a slice of bread.
Many pectin packages also include reduced sugar recipes, these cut down on the sugar which in turn can effect the jam's firmness and leave it runny. They are not as sweet and allow more of the berry flavor through, however the reduced sugar is also more likely to cause the jam to brown in the jar.
I am still trying to find a perfect canned pectin jam recipe, each year I try a few in hopes of making the perfect jam. Freezer jam on the other hand is so simple my toddler can make it. Select a pectin designed for making freezer jams, mash up berries and scoop the required amount of berries into a bowl. Mix in required amount of sugar and pectin for a few minutes allowing it to dissolve completely. The pectin brand I use calls for 1 2/3 cups fruit, 2/3 cups sugar, and 2 Tbsp pectin. This makes 16 oz. of jam, which you then scoop into freezer safe containers (leaving head room for expansion) and put into the freezer up to a year. Freezer jams aren't cooked so they tend to be runnier than cooked jams, but being uncooked also means more of the bright fresh strawberry flavor. Of course to make freezer jam you also have to have a large enough freezer to hold it, and once it's opened freezer jam will spoil faster than a cooked jam.
Last year I bought Ball RealFruit Pectin in "flex batch" containers that turned out to be really helpful with making small batch jams. Instead of using an entire pectin packet to make a huge batch of jam I can measure out how much pectin I need based on how many berries I have on hand.
I also found a pectin-free jam recipe last year that I had to try purely because it meant one less thing to buy in order to make my own food. The pectinless recipe came from Clearly Delicious:An Illustrated Guide to Preserving, Pickling, and Bottling by Elisabeth Lambert Ortiz. It requires a bit more work, but I definitely appreciate being able to make jam without running to the store for pectin. For this recipe you need 4 quarts of strawberries (4 lbs.) crushed, 2 Tbsp. lemon juice. Simmer these until berries are soft. Add 7 1/2 cups warmed sugar over low heat and stir until well mixed. Increase the heat and boil rapidly without stirring for 15 minutes or until it reaches setting point. Candy thermometer should read 220 degrees. Skim off froth, cool slightly then pour into sterilized jars and water bath process them. I don't think my jam using this recipe cooked quite long enough, it turned out a little bit runny, but it tasted fabulous and I can appreciate that this recipe contained far less sugar than most of the others.
One thing to note about strawberry jams: if berries aren't completely crushed the air pockets inside them will cause them to float to the surface of your jam and this can make them discolor leaving you with unappealing brown berries at the top of the jar. Crush them well to prevent this.
Looking for a strawberry rhubarb pie recipe (since I have no rhubarb yet I have never made one) I found this site and was amused by the author, plus it links to the recipe she used.
You can also make up these pies into single serving pie-in-a-jar, for days when you have no one to share with. A recipe for this can be found at Adventures in Sustainability and is usable for any fruit pie. Be sure to tell her who sent you. ;)
So there you have it, some easy and some not-so-easy ways to deal with excess strawberries. If they survive long enough to be "excess".

 Labels:
canning,
freezing,
fruit,
garden,
harvest,
money-saving,
organic,
recipe,
rhubarb,
strawberry
Labels:
canning,
freezing,
fruit,
garden,
harvest,
money-saving,
organic,
recipe,
rhubarb,
strawberry
Saturday, January 28, 2012
It's Pizza Night!
Garden veggie pizzas are another recipe worth making. Pizza cravings get out of control some days, but it's expensive, full of stuff that's bad for us, and lacks any nutritional value (my kids are straight up pepperoni eaters so don't even get veggies with their pizza).
To make pizzas throughout the year you need to plan during the vegetable season. Make up some batches of spaghetti sauce, and blanch, chop/slice, and freeze some veggies in small portions. Or you can get crazy and make tons of pizzas up in one day and freeze them in gallon bags for frozen pizzas ready to bake.
Garden topping options include:
-spinach
-kale
-tomatoes
-mushrooms (trade with your neighbor who grows shiitakes in a closet)
-sweet peppers
-jalapenos or other spicy peppers
-onions
-fresh basil
-fresh herbs in general
-artichoke
-garlic
-zucchini
I wouldn't necessarily build a pizza with all of these toppings, but you could pick 3 or 4 for each pizza you make. Some ideas: artichoke, zucchini, mushroom, and chicken with pesto sauce; mozzarella, kale, tomato, fresh basil on tomato sauce; barbecue sauce, jalapeno, sweet pepper, onion, hot Italian sausage. That one's for the spicy fans.
Not all veggies work out well for toppings, the ones that don't you save for your sauce. While pizza sauce is primarily tomatoes, it won't hurt it to work in some other veggies to give it character and nutrition. Basil, oregano, onion, garlic, tomatoes, mushrooms, and bell peppers (any color) are pretty much expected to be in a good spaghetti or pizza sauce. Some you might not think of though are: eggplant, this mild flavored vegetable thickens sauces and is decidedly an acceptable addition to many Italian foods; carrots/sweet potatoes, these orange veggies add beta carotene and can help to sweeten a too-acid sauce without adding sugar, they also won't change the color of your sauce noticeably; summer squash, my stepmom believes these belong in everything, cooked into tomato sauces they add nutrition without making a drastic change in flavor; kale/spinach/chard, unlike some greens, these have decent cooked properties, they are full of nutrition and pizza may be your only chance to get your kids to eat them (use sparingly to avoid the obvious color change).
Pizza crust is easy, any bread machine comes with some kind of pizza crust recipe, or you can pick up a Boboli or refrigerated tube of crust. I prefer to make my own in the bread maker or by hand from scratch. Recipes are all over the internet for pizza crust, just pick one and give it a shot.
Sauce recipes are much more challenging. You have a few options in sauce, you can do home canned pizza sauce, or a spicy version of home canned, or a pesto sauce, or a white (alfredo) sauce. If your goal is to use up your garden produce choose one of the first three. If your goal is to keep the nutrition content high and fat and calorie content low for your pizzas, also choose one of the first three. Alfredo sauce has it's place, but on top of a pile of empty calories, topped with a pile of saturated fat... it probably isn't worth it. It would be delicious over homemade whole wheat linguine with fresh spring vegetables though! I am a foodie, but I am not a chef. Sadly my mouth's idea of delicious and my hand's ability to cook often end up on separate sides of a cookbook. So we keep it simple around here.
To make a basic tomato sauce:
Get together enough tomatoes to fill a glass baking dish about 8x11, use primarily saucing tomatoes. Saucing tomatoes are meatier than slicers or cherries, they tend to have smaller seed pockets and less juice to them. Heat a small pan of water to boiling, with a slotted spoon dip each tomato in the boiling water for a few seconds then drop in a bowl of cold water. This is totally a two person job and having a helper makes it go much faster. Once each tomato has cooled you can easily cut off the stem and core, then slip the skin off the tomato. Chop each tomato into large chunks and toss into the roasting pan. Don't worry about all the juice and seeds on the cutting board, in fact squeeze the juice out of some of the bigger tomatoes before chopping. All of the juice and seeds will just make it take longer to thicken your sauce. If you want to add red pepper to your sauce it's a good idea to core and quickly chop them as well to roast with the tomatoes. Set your oven to about 350F, roast the tomatoes for an hour or so. When they are done they will be tender and have developed that fabulous roasted vegetable smell. Nearly all of the vegetables can be roasted like this before being added to a saucepan for simmering, I don't recommend it for greens, mushrooms or herbs though.
When the pan of tomatoes is roasted, pour off some of the liquid at the bottom of the pan. Chop some onion and garlic. Get a large stock pot or 6-8 quart pot and heat a few tablespoons of olive oil in it. Sweat the garlic and onion in oil until it is soft, and gently browned. Taking the time to do this will give these aromatics a sweeter flavor. Pour in your roasted tomatoes, roasted red peppers, and any other veggies. Give this mix a quick twirl with a stick blender (or blend briefly in a regular blender before adding to the pot). Cover and let simmer about 20 minutes.
After the 20 minutes is up, blend to a nice smooth puree. Your sauce still won't have much flavor, but it should smell great. Add in dried herbs: bay leaves, Italian seasoning, and salt (lots of salt!). Remember this is a big batch of sauce so add quite a bit of seasoning to give it the flavor you want. Allow the sauce to simmer for another 10 minutes, then taste and add more seasoning as needed. Lastly, add about a cup of red wine (capestrano, zinfandel, or anything that isn't sweet is fine), and throw in some fresh basil. If your sauce still tastes too acidic, add a couple tablespoons of sugar. Uncover and turn the heat down to a low simmer, let the sauce cook down to the desired consistency. Double check that it tastes right and salt, sugar or season until the flavor is right. Remove the bay leaves. This sauce is pretty basic and can be jazzed up when you are ready to use it for lasagnas, spaghetti, pizza, or in a meat ragu or whatever other recipe you have. Italian seasonings can be skipped over also to make an even more adaptable tomato sauce.
You are then able to can your tomato sauce using a water bath method, but be sure to add a tablespoon of lemon juice to the bottom of each pint jar to ensure the acidity and prevent botulism.** Or you can scoop the sauce into freezer safe containers the appropriate size for one meal and freeze up to a year.
**Disclaimer: AnywhereEden shall not be responsible for any illness or loss due to home canning and preserving. If you plan to do home canning get the Ball Complete Book of Home Preserving for full instructions on safe home preserving. I am not a pro at canning, please be advised that tomatoes border on low acid and it is always safer to pressure can or freeze them. Adding acid will help prevent botulism but is never a guarantee, and always follow canning safety measures. Keep jars, lids, and rings clean; throw away any jars with broken seals, visible mold, bulging lids, or strange smells. If it doesn't look right... throw it away! Don't take the risk of eating spoiled foods. Learn about botulism here.
Pesto Sauce:
Pesto is an easy sauce to make, it's delicious and recipes for basil pesto can be adapted to make other herb pestos, if you've made pesto in the past and been saddened to see it oxidize (turn brown), you can prevent this by adding some lemon juice to the pesto and also by not allowing it to get too hot. Tossing fresh pesto into hot pasta is guaranteed to make it change color, instead let the pasta cool a bit before adding the pesto and it shouldn't brown as much. Some grocery stores' canning aisles carry oxidation prevention agents that may work to improve this but I have never tried one so can't advise regarding their effectiveness.
2 cups firmly packed fresh basil leaves
3/4 cup grated Parmesan cheese
3/4 cup olive or vegetable oil
3 cloves garlic
1/4 cup pine nuts
1 Tbsp. lemon juice
1. In blender or food processor, place all ingredients.
2. Cover; blend on medium speed about 3 minutes, stopping occasionally to scrape sides, until smooth.
3. Spoon into 8 oz. or smaller freezer containers and freeze up to one year.
After a long day of making sauce, the perfect way to end your day is to throw together your pizza crusts, toppings, and sauce into a garden pizza feast.
Enjoy!
To make pizzas throughout the year you need to plan during the vegetable season. Make up some batches of spaghetti sauce, and blanch, chop/slice, and freeze some veggies in small portions. Or you can get crazy and make tons of pizzas up in one day and freeze them in gallon bags for frozen pizzas ready to bake.
 |
| Blurry, but this one day's harvest is enough tomatoes to make a whole batch of sauce. |
Garden topping options include:
-spinach
-kale
-tomatoes
-mushrooms (trade with your neighbor who grows shiitakes in a closet)
-sweet peppers
-jalapenos or other spicy peppers
-onions
-fresh basil
-fresh herbs in general
-artichoke
-garlic
-zucchini
I wouldn't necessarily build a pizza with all of these toppings, but you could pick 3 or 4 for each pizza you make. Some ideas: artichoke, zucchini, mushroom, and chicken with pesto sauce; mozzarella, kale, tomato, fresh basil on tomato sauce; barbecue sauce, jalapeno, sweet pepper, onion, hot Italian sausage. That one's for the spicy fans.
Not all veggies work out well for toppings, the ones that don't you save for your sauce. While pizza sauce is primarily tomatoes, it won't hurt it to work in some other veggies to give it character and nutrition. Basil, oregano, onion, garlic, tomatoes, mushrooms, and bell peppers (any color) are pretty much expected to be in a good spaghetti or pizza sauce. Some you might not think of though are: eggplant, this mild flavored vegetable thickens sauces and is decidedly an acceptable addition to many Italian foods; carrots/sweet potatoes, these orange veggies add beta carotene and can help to sweeten a too-acid sauce without adding sugar, they also won't change the color of your sauce noticeably; summer squash, my stepmom believes these belong in everything, cooked into tomato sauces they add nutrition without making a drastic change in flavor; kale/spinach/chard, unlike some greens, these have decent cooked properties, they are full of nutrition and pizza may be your only chance to get your kids to eat them (use sparingly to avoid the obvious color change).
Pizza crust is easy, any bread machine comes with some kind of pizza crust recipe, or you can pick up a Boboli or refrigerated tube of crust. I prefer to make my own in the bread maker or by hand from scratch. Recipes are all over the internet for pizza crust, just pick one and give it a shot.
Sauce recipes are much more challenging. You have a few options in sauce, you can do home canned pizza sauce, or a spicy version of home canned, or a pesto sauce, or a white (alfredo) sauce. If your goal is to use up your garden produce choose one of the first three. If your goal is to keep the nutrition content high and fat and calorie content low for your pizzas, also choose one of the first three. Alfredo sauce has it's place, but on top of a pile of empty calories, topped with a pile of saturated fat... it probably isn't worth it. It would be delicious over homemade whole wheat linguine with fresh spring vegetables though! I am a foodie, but I am not a chef. Sadly my mouth's idea of delicious and my hand's ability to cook often end up on separate sides of a cookbook. So we keep it simple around here.
To make a basic tomato sauce:
Get together enough tomatoes to fill a glass baking dish about 8x11, use primarily saucing tomatoes. Saucing tomatoes are meatier than slicers or cherries, they tend to have smaller seed pockets and less juice to them. Heat a small pan of water to boiling, with a slotted spoon dip each tomato in the boiling water for a few seconds then drop in a bowl of cold water. This is totally a two person job and having a helper makes it go much faster. Once each tomato has cooled you can easily cut off the stem and core, then slip the skin off the tomato. Chop each tomato into large chunks and toss into the roasting pan. Don't worry about all the juice and seeds on the cutting board, in fact squeeze the juice out of some of the bigger tomatoes before chopping. All of the juice and seeds will just make it take longer to thicken your sauce. If you want to add red pepper to your sauce it's a good idea to core and quickly chop them as well to roast with the tomatoes. Set your oven to about 350F, roast the tomatoes for an hour or so. When they are done they will be tender and have developed that fabulous roasted vegetable smell. Nearly all of the vegetables can be roasted like this before being added to a saucepan for simmering, I don't recommend it for greens, mushrooms or herbs though.
When the pan of tomatoes is roasted, pour off some of the liquid at the bottom of the pan. Chop some onion and garlic. Get a large stock pot or 6-8 quart pot and heat a few tablespoons of olive oil in it. Sweat the garlic and onion in oil until it is soft, and gently browned. Taking the time to do this will give these aromatics a sweeter flavor. Pour in your roasted tomatoes, roasted red peppers, and any other veggies. Give this mix a quick twirl with a stick blender (or blend briefly in a regular blender before adding to the pot). Cover and let simmer about 20 minutes.
 |
| Homemade spaghetti sauce on the stove |
After the 20 minutes is up, blend to a nice smooth puree. Your sauce still won't have much flavor, but it should smell great. Add in dried herbs: bay leaves, Italian seasoning, and salt (lots of salt!). Remember this is a big batch of sauce so add quite a bit of seasoning to give it the flavor you want. Allow the sauce to simmer for another 10 minutes, then taste and add more seasoning as needed. Lastly, add about a cup of red wine (capestrano, zinfandel, or anything that isn't sweet is fine), and throw in some fresh basil. If your sauce still tastes too acidic, add a couple tablespoons of sugar. Uncover and turn the heat down to a low simmer, let the sauce cook down to the desired consistency. Double check that it tastes right and salt, sugar or season until the flavor is right. Remove the bay leaves. This sauce is pretty basic and can be jazzed up when you are ready to use it for lasagnas, spaghetti, pizza, or in a meat ragu or whatever other recipe you have. Italian seasonings can be skipped over also to make an even more adaptable tomato sauce.
You are then able to can your tomato sauce using a water bath method, but be sure to add a tablespoon of lemon juice to the bottom of each pint jar to ensure the acidity and prevent botulism.** Or you can scoop the sauce into freezer safe containers the appropriate size for one meal and freeze up to a year.
**Disclaimer: AnywhereEden shall not be responsible for any illness or loss due to home canning and preserving. If you plan to do home canning get the Ball Complete Book of Home Preserving for full instructions on safe home preserving. I am not a pro at canning, please be advised that tomatoes border on low acid and it is always safer to pressure can or freeze them. Adding acid will help prevent botulism but is never a guarantee, and always follow canning safety measures. Keep jars, lids, and rings clean; throw away any jars with broken seals, visible mold, bulging lids, or strange smells. If it doesn't look right... throw it away! Don't take the risk of eating spoiled foods. Learn about botulism here.
 |
| Save some time and freeze sauce in meal-sized containers. |
Pesto is an easy sauce to make, it's delicious and recipes for basil pesto can be adapted to make other herb pestos, if you've made pesto in the past and been saddened to see it oxidize (turn brown), you can prevent this by adding some lemon juice to the pesto and also by not allowing it to get too hot. Tossing fresh pesto into hot pasta is guaranteed to make it change color, instead let the pasta cool a bit before adding the pesto and it shouldn't brown as much. Some grocery stores' canning aisles carry oxidation prevention agents that may work to improve this but I have never tried one so can't advise regarding their effectiveness.
2 cups firmly packed fresh basil leaves
3/4 cup grated Parmesan cheese
3/4 cup olive or vegetable oil
3 cloves garlic
1/4 cup pine nuts
1 Tbsp. lemon juice
1. In blender or food processor, place all ingredients.
2. Cover; blend on medium speed about 3 minutes, stopping occasionally to scrape sides, until smooth.
3. Spoon into 8 oz. or smaller freezer containers and freeze up to one year.
After a long day of making sauce, the perfect way to end your day is to throw together your pizza crusts, toppings, and sauce into a garden pizza feast.
Enjoy!
Tuesday, January 24, 2012
Pea Recipes
Obviously peas can be tossed into just about anything to brighten it up and add some vegetable goodness. I prefer to eat snow and snap peas fresh. I also toss fresh snow peas into stir fry at the last minute, just enough to warm them through. Peas can easily be blanched for 1-2 minutes, drained, and frozen in bags to store them for up to a year. But if you have a bumper crop and no idea what to do with them, here are some recipes specifically for peas.
From The Kitchen Garden Cookbook (a.k.a. Allotment Cookbook) edited by Caroline Bretherton:*
Pea Soup with Mint Gremolata
For the soup:
1 onion finely chopped
2 tbsp butter
1 potato coarsely chopped
1 lb. peas in their pods coarsely cut up
5 cups chicken or vegetable stock
1 tsp. superfine sugar
1 sprig fresh mint
Salt and pepper
Small amount half and half
For the gremolata:
2 tbsp finely chopped flat leaf parsley
2 tbsp finely chopped fresh mint
2 tsp finely grated lemon zest
1 garlic clove finely chopped
Gently cook onion in butter about 7-10 minutes, until soft. Add remaining ingredients for soup, except half and half. Bring to a boil, cover, reduce heat and simmer about 20 minutes. Until vegetables are very soft. Remove and discard mint sprig. Puree soup with stick blender or standard blender, strain through sieve to remove any strings or pod pieces, adjust seasoning to taste. Can be served hot or cold, or frozen for later eating.
Mix together gremolata ingredients. To serve, ladle soup into bowls, top with a swirl of half and half and a sprinkle of gremolata mixture.
*This is an excellent cookbook full of recipes for garden vegetables.
From Too Many Tomatoes, Squash, Beans, and other Good Things: A Cookbook For When Your Garden Explodes by Lois M. Landau and Laura G. Myers:*
Shrimp Risotto Salad
In large bowl combine:
1 cup peas, cooked
2 1/2 cups cold, cooked rice
1 cup diced celery
2 green onions, minced
2 tomatoes, quartered
1/2-1 lb. fresh, cooked shrimp
6 ozs. marinated artichoke hearts
Mix together and pour over salad:
Oil from artichoke hearts
2 Tbsps. white wine
1 tsp. anchovy paste
1 tsp. sharp prepared mustard
1/2 tsp. ground dried sage
Toss salad and dressing together and chill at least one hour.
Top with 2 quartered hard-boiled eggs and a little minced fresh parsley.
For some other ideas check out these websites:
Martha Stewart's pea recipes

Yes Peas! recipe pages

Eating Well Healthy Pea Recipes

My mom also has a recipe that she has made for many years with shelling peas, called Creamed Peas and Mushrooms, I will have to call her and get the recipe so that I can share it here.
From The Kitchen Garden Cookbook (a.k.a. Allotment Cookbook) edited by Caroline Bretherton:*
Pea Soup with Mint Gremolata
For the soup:
1 onion finely chopped
2 tbsp butter
1 potato coarsely chopped
1 lb. peas in their pods coarsely cut up
5 cups chicken or vegetable stock
1 tsp. superfine sugar
1 sprig fresh mint
Salt and pepper
Small amount half and half
For the gremolata:
2 tbsp finely chopped flat leaf parsley
2 tbsp finely chopped fresh mint
2 tsp finely grated lemon zest
1 garlic clove finely chopped
Gently cook onion in butter about 7-10 minutes, until soft. Add remaining ingredients for soup, except half and half. Bring to a boil, cover, reduce heat and simmer about 20 minutes. Until vegetables are very soft. Remove and discard mint sprig. Puree soup with stick blender or standard blender, strain through sieve to remove any strings or pod pieces, adjust seasoning to taste. Can be served hot or cold, or frozen for later eating.
Mix together gremolata ingredients. To serve, ladle soup into bowls, top with a swirl of half and half and a sprinkle of gremolata mixture.
*This is an excellent cookbook full of recipes for garden vegetables.
From Too Many Tomatoes, Squash, Beans, and other Good Things: A Cookbook For When Your Garden Explodes by Lois M. Landau and Laura G. Myers:*
Shrimp Risotto Salad
In large bowl combine:
1 cup peas, cooked
2 1/2 cups cold, cooked rice
1 cup diced celery
2 green onions, minced
2 tomatoes, quartered
1/2-1 lb. fresh, cooked shrimp
6 ozs. marinated artichoke hearts
Mix together and pour over salad:
Oil from artichoke hearts
2 Tbsps. white wine
1 tsp. anchovy paste
1 tsp. sharp prepared mustard
1/2 tsp. ground dried sage
Toss salad and dressing together and chill at least one hour.
Top with 2 quartered hard-boiled eggs and a little minced fresh parsley.
For some other ideas check out these websites:
Martha Stewart's pea recipes

Yes Peas! recipe pages

Eating Well Healthy Pea Recipes

My mom also has a recipe that she has made for many years with shelling peas, called Creamed Peas and Mushrooms, I will have to call her and get the recipe so that I can share it here.
Labels:
easy plants,
garden,
harvest,
money-saving,
organic,
peas,
plants,
recipe,
soup,
vegetable
Pea Culture
Hopefully I can get a few posts about the culture of different veggies up before spring comes along, to help out gardeners trying new things; on that note, this post is all about peas.
Peas originated in the Mediterranean and Middle East regions, they are eaten fresh or cooked. They can be frozen, canned (pressure can method), or dried. Peas are harvestable between 50 and 75 days depending on variety. There are three primary types of pea; the snow pea, snap pea, and shelling pea. Shelling peas are removed from the pod and only the pea seeds are eaten as the pods are tough and tasteless. Snow peas are the variety most often seen in stir fries, whole pods with smaller undeveloped seeds inside. Snap peas are eaten in the pod as well, but are even sweeter than snow peas and have a crisp, thick pod that is nearly stringless. Depending on which way you prefer to eat your peas you could plant one, two or all three types of pea in your garden.
Peas are one of the first things planted in the spring, they can germinate in soils that are only 40 degrees F. So long as the risk of hard frost has passed they can go directly into the garden. Peas should be sown in the ground, rather than started indoors. They are long and slim vining plants and don't always cope well with transplanting, they are also such fast growers, and have such large seeds that it's just much simpler to put them in the garden. If they fail to germinate in a week or so, plant another round and keep waiting. Pea seeds should be planted fairly deep, about an inch underground. They take up little room and require little nutrition, they can be planted as close as 1-2 inches apart. Or in SFG style, 8 plants to a square. Pea seeds will only be viable for about 2 years, so despite their inexpensive price don't be tempted to stock up too much. Peas are very easy to save seed from, simply leave the end-of-season crop on the vine until they brown and become dry, then harvest, dry further inside, then shell and store seeds in paper bags. (Avoid plastic bags as they can trap any remaining moisture and rot your seeds). Peas also self-pollinate, they don't require pollinators, and generally each flower will pollinate itself. This means that to accidentally cross two pea plants you pretty much have to rub them together. Pea seed will fairly reliably produce seed that grows the same plants as the previous generation.
A cool season crop, peas prefer temperatures below 70 degrees. Peas that mature in temperatures over 85 degrees can develop tough pods. Also, peas stop putting on flowers once temperatures get over about 85 degrees. Harvest continually to ensure continued production of fruits. You can increase your harvest by using a pea innoculant, but innoculant in no way guarantees a great harvest.
The greatest risk to peas is the enation virus, and you should watch for enation resistant varieties when selecting peas for your garden. Peas actually build nitrogen stores in the soil they are planted in, so are a great winter crop or rotation crop to keep in the organic garden. Move them around each year, or start an early spring crop in the space of later heavy feeders. By the time the peas are finishing their growth the heavy feeding summer plants should be ready to put outside.
As vining crops peas will need a trellis of some type, which also helps to keep the fruits up off the ground and in easy picking reach. Peas are an inexpensive, simple to germinate, delicious crop to grow and are perfect for gardens that have small children around. Kids can pick them easily, eat them straight from the vine, watch how they grow and twine around each other and the trellis. In general peas are a great crop for anyone.
I prefer to grow the snow or snap peas, shelling peas are so easy and inexpensive at the store it just doesn't make sense to use up garden space on them, snow and snap peas are expensive though. Plus, I don't look forward to all that shelling. Snow peas are delicious eaten fresh, they can also be blanched and frozen for eating throughout the year. Snap peas are also delicious fresh; sweet, crunchy, and very low in calories; snap peas do not store nearly as well though and can become mushy if frozen or canned. I suggest growing primarily shelling or snow peas, with a small bunch of snap peas just to eat fresh. Last year I planted 6 squares of peas, each square holding 8 plants and I was overwhelmed with the quantity of produce I harvested from them. It may not seem like it at first, but over time, as round after round of peas is ready to pick you will find that each plant is actually very productive. How many peas (in the pod) will you eat each day? However many you think that is, that's probably about how many plants you need. I will happily eat my way through 20-40 pea pods in a day, and my husband and kids rarely eat them. So I need 20-40 plants to produce that amount, if I plan to freeze them I will have to plant more. This year I am putting in more than last year because I only ended up with 2 quarts of frozen peas and would like to have more than that for next winter.

Next time: Pea Recipes, My Own and links to others.
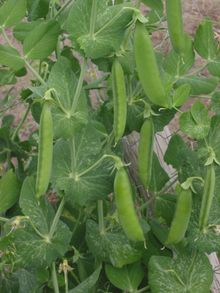 | |
| Pea plant in full fruit. |
Peas originated in the Mediterranean and Middle East regions, they are eaten fresh or cooked. They can be frozen, canned (pressure can method), or dried. Peas are harvestable between 50 and 75 days depending on variety. There are three primary types of pea; the snow pea, snap pea, and shelling pea. Shelling peas are removed from the pod and only the pea seeds are eaten as the pods are tough and tasteless. Snow peas are the variety most often seen in stir fries, whole pods with smaller undeveloped seeds inside. Snap peas are eaten in the pod as well, but are even sweeter than snow peas and have a crisp, thick pod that is nearly stringless. Depending on which way you prefer to eat your peas you could plant one, two or all three types of pea in your garden.
Peas are one of the first things planted in the spring, they can germinate in soils that are only 40 degrees F. So long as the risk of hard frost has passed they can go directly into the garden. Peas should be sown in the ground, rather than started indoors. They are long and slim vining plants and don't always cope well with transplanting, they are also such fast growers, and have such large seeds that it's just much simpler to put them in the garden. If they fail to germinate in a week or so, plant another round and keep waiting. Pea seeds should be planted fairly deep, about an inch underground. They take up little room and require little nutrition, they can be planted as close as 1-2 inches apart. Or in SFG style, 8 plants to a square. Pea seeds will only be viable for about 2 years, so despite their inexpensive price don't be tempted to stock up too much. Peas are very easy to save seed from, simply leave the end-of-season crop on the vine until they brown and become dry, then harvest, dry further inside, then shell and store seeds in paper bags. (Avoid plastic bags as they can trap any remaining moisture and rot your seeds). Peas also self-pollinate, they don't require pollinators, and generally each flower will pollinate itself. This means that to accidentally cross two pea plants you pretty much have to rub them together. Pea seed will fairly reliably produce seed that grows the same plants as the previous generation.
A cool season crop, peas prefer temperatures below 70 degrees. Peas that mature in temperatures over 85 degrees can develop tough pods. Also, peas stop putting on flowers once temperatures get over about 85 degrees. Harvest continually to ensure continued production of fruits. You can increase your harvest by using a pea innoculant, but innoculant in no way guarantees a great harvest.
The greatest risk to peas is the enation virus, and you should watch for enation resistant varieties when selecting peas for your garden. Peas actually build nitrogen stores in the soil they are planted in, so are a great winter crop or rotation crop to keep in the organic garden. Move them around each year, or start an early spring crop in the space of later heavy feeders. By the time the peas are finishing their growth the heavy feeding summer plants should be ready to put outside.
As vining crops peas will need a trellis of some type, which also helps to keep the fruits up off the ground and in easy picking reach. Peas are an inexpensive, simple to germinate, delicious crop to grow and are perfect for gardens that have small children around. Kids can pick them easily, eat them straight from the vine, watch how they grow and twine around each other and the trellis. In general peas are a great crop for anyone.
 |
| Snow peas, purple beans, and zucchini: one day's harvest. |

Next time: Pea Recipes, My Own and links to others.
Labels:
cross-pollinate,
drying,
easy plants,
flower,
freezing,
fruit,
garden,
harvest,
money-saving,
open pollinated,
organic,
peas,
plants,
recipe,
seed,
small space,
trellis,
vegetable
Monday, January 23, 2012
Kale, Kale, Rock N Roll!
One of the few things that you can still be harvesting in January is kale. Kale is a relative of broccoli and cabbage, a brassica. In moderate climates you can grow kale nearly year round. It has few, if any, issues with pests and disease. Kale is incredibly high in nutritional value as well, being a dark leafy green. So why isn't kale grown in every garden all year? Many people don't know much about it, or have no idea what to make with all of that kale. Like the rutabaga, kale has gotten a bit of a bad rep.
Since kale really does grow so easily I really don't need to go into much detail on kale culture, just give it dirt, water and sunshine. It should start easily from seed and can be grown almost any time of year; obviously not during a heavy freeze, or major drought. Since kale doesn't need much detail regarding care, the more important question to answer is "what do I do with all that kale?".
One option is lizard food. Anyone who has a vegetarian reptile, such as an iguana, knows they require dark leafy greens in their diets to stay healthy. So feel free to donate your bumper kale crop to a friend with an iguana.
Kale is not like lettuce, it has a much tougher texture and is not as good fresh eating. Instead it should be cooked and added to foods. It can be added to soups, casseroles, colcannon (a great vegetable and mashed potato dish), or wilted and served as a side dish. It will wilt quickly and should be kept in the coldest part of your refrigerator. When grow in colder weather it is sweeter, if grown during the summer heat it will become bitter. The one thing to watch out for is to wash it really well, the deep ruffles in kale leaves often collect dust and grit. Wash well and enjoy.
Here are some of my favorite uses for kale:
Olive Garden's Zuppa Toscana Soup

Colcannon

Bobby Flay's Sauteed Kale
Spaghetti With Kale and Sun-Dried Tomatoes

Vegetable Barley Soup

Kale is a great way to add some nutrition and color to just about any cooked dish. Good luck with your kale cuisine!
Since kale really does grow so easily I really don't need to go into much detail on kale culture, just give it dirt, water and sunshine. It should start easily from seed and can be grown almost any time of year; obviously not during a heavy freeze, or major drought. Since kale doesn't need much detail regarding care, the more important question to answer is "what do I do with all that kale?".
One option is lizard food. Anyone who has a vegetarian reptile, such as an iguana, knows they require dark leafy greens in their diets to stay healthy. So feel free to donate your bumper kale crop to a friend with an iguana.
Kale is not like lettuce, it has a much tougher texture and is not as good fresh eating. Instead it should be cooked and added to foods. It can be added to soups, casseroles, colcannon (a great vegetable and mashed potato dish), or wilted and served as a side dish. It will wilt quickly and should be kept in the coldest part of your refrigerator. When grow in colder weather it is sweeter, if grown during the summer heat it will become bitter. The one thing to watch out for is to wash it really well, the deep ruffles in kale leaves often collect dust and grit. Wash well and enjoy.
Here are some of my favorite uses for kale:
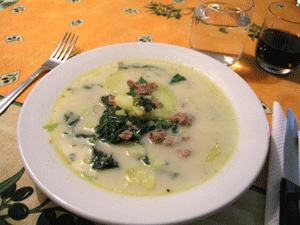
Olive Garden's Zuppa Toscana Soup
Colcannon
Bobby Flay's Sauteed Kale
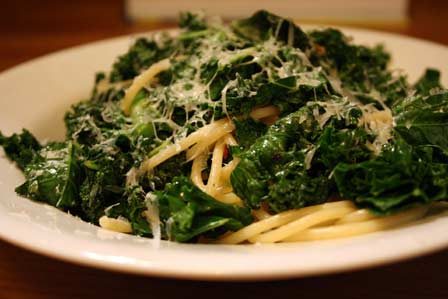
Spaghetti With Kale and Sun-Dried Tomatoes
Vegetable Barley Soup

Kale is a great way to add some nutrition and color to just about any cooked dish. Good luck with your kale cuisine!
Labels:
colcannon,
easy plants,
garden,
harvest,
kale,
money-saving,
organic,
plants,
recipe,
soup,
vegetable,
zuppa toscana
Perennial Herb Culture
Perennial herbs are generally the herbs with woody stalks that survive year after year. In milder climates some soft herbs can survive for more than a year, such as chives. Primarily the perennial herbs people think of are rosemary, lavender, thyme, oregano, sage, the mint family, and marjoram. There are others but the culture of these plants is pretty similar between species. Personally I don't recommend starting these plants from seed, the seeds are incredibly tiny, and a bit finicky to get started. Plus they are available as starts everywhere and aren't terribly expensive.
Perennial herbs need a sunny spot that won't be a swamp during the wet season. They manage pretty well in my area which is basically a temperate rain forest, but if they are in a depression and get too much water with too little drainage they can die. I have never had a pest problem or disease problem with these plants. In fact they have strongly scented oils that can act as repellents to some pests, and at the same time most produce a flush of flowers in spring or summer that attract many pollinators. These herbs are a great addition to any garden, attracting bees and butterflies, smelling fabulous, keeping out pests. They don't require any fertilization so long as they are in moderately fertile soil to begin with. Adding nutrients early in the spring can improve the abundance of fresh growth in the springtime; but don't add more after June since they are finished with most of their growth at that point.
You can plant them in pots or in the ground around your garden, I wouldn't plant them in among your annuals though as planting new annuals each year could damage the roots of the perennials, and the perennials will spread quite a bit over time leaving your no room for the annuals after a few years. If you put them in pots make sure to move them to a warmer spot during the winter. I have never lost a perennial herb to frost when they're in the ground, but pots are not as insulating and I often have to replace potted herbs the next spring.
Rosemary, thyme, sage, oregano and marjoram are all Mediterranean herbs; they are comfortable in hot, cool, dry or moist conditions; they will appreciate both thick clay soils and sandier soils. In fact, I don't think I've met a soil they wouldn't grow in. Mints on the other hand prefer a cooler spot with more moisture, sandy soil doesn't suit them well. Different varieties of these herbs will grow in different ways also. If you're looking for a ground cover an option to consider is a creeping or spreading version of rosemary or thyme, or a standard version of oregano. All of these will stay low growing and spread over an area, they smell lovely and produce a sprinkling of tiny purple flowers in spring and summer. Choosing variegated, or odd colored varieties can add some excitement as well, like lemon thyme with it's yellow and green splashed leaves, or purple sage. For culinary use smell or taste the leaves of the plants before buying them to ensure they have the flavors you want as well as the look, woolly thyme for example is a spreading attractive ground cover but it is not as flavorful and therefore does not make a quality culinary herb. No one will mock you for nibbling the plants at the nursery, I promise.
If you are looking for more upright growth in your herbs (for use as a back row with a fronting of bulbs or annuals, or something similar) chives grow a lively bunch of bright green onion-like tops, sage comes in a variety of colors and has a silvery fuzz to it's leaves, a standard (non-spreading) rosemary can reach 4 feet tall and act as a hedge, lavender stays fairly small and makes a great perennial border, and most varieties of mint spread by underground runner and stand up to 18 inches high.
All of these herbs can be cut fresh with a pair of scissors and added to foods, teas, or used as fragrance. They can also be dried. To dry herbs hold a bunch of stems in your hand no bigger than you can wrap your index finger and thumb around (if your bunch is too large the center may not get adequate air flow and can mold), tie the ends together with a string, hang in a cool, dry place where they will get ventilation. Under the eaves of your porch, on a clothesline strung across your laundry room, wherever you can find the space. I hang my bunches from my pot rack over the island, if my stove were underneath it I wouldn't hang them there because the heat and moisture coming off the stove could ruin the herbs. Let them dry like that for a week or more, until the leaves are crisp and crumble under your fingers. If in doubt about whether they are dry enough, just let them hang longer until there is no doubt. Once they are totally dry you'll want to store them in airtight containers; either plastic bags stored in the freezer or in spice jars in the cabinet. Either way you will save a lot of space by stemming the herbs and giving them a quick grind with a mortar and pestle or spice grinder. you can continue to hang your herbs in their bunches but they will lose flavor faster and can get a build up of dust on them if left for long.
My favorite way to deal with my dried herbs is to throw together some Italian seasoning, one of the spice mixes I use most often. First I get my herbs all prepped for putting in jars or the freezer, then just mix together roughly equal parts rosemary, thyme, oregano, basil, and marjoram. Then store in a glass spice jar labeled Italian Seasoning. If this blend isn't to your taste you can also add in savory, or red pepper flakes if you prefer it a little spicy, some people also add garlic, onion, or parsley. I prefer to keep it a simple blend and add those extras only for certain dishes, or if I have no fresh onion or garlic.
Some other great ways to use these plants include: lavender sachets, dried catnip for pets, herbal soaps and lotions, potpourri, rosemary barbecue skewers, sage smudging, teas, mint sprigs in drinks, and medicinal tinctures and teas.
Perennial herbs need a sunny spot that won't be a swamp during the wet season. They manage pretty well in my area which is basically a temperate rain forest, but if they are in a depression and get too much water with too little drainage they can die. I have never had a pest problem or disease problem with these plants. In fact they have strongly scented oils that can act as repellents to some pests, and at the same time most produce a flush of flowers in spring or summer that attract many pollinators. These herbs are a great addition to any garden, attracting bees and butterflies, smelling fabulous, keeping out pests. They don't require any fertilization so long as they are in moderately fertile soil to begin with. Adding nutrients early in the spring can improve the abundance of fresh growth in the springtime; but don't add more after June since they are finished with most of their growth at that point.
You can plant them in pots or in the ground around your garden, I wouldn't plant them in among your annuals though as planting new annuals each year could damage the roots of the perennials, and the perennials will spread quite a bit over time leaving your no room for the annuals after a few years. If you put them in pots make sure to move them to a warmer spot during the winter. I have never lost a perennial herb to frost when they're in the ground, but pots are not as insulating and I often have to replace potted herbs the next spring.
 |
| Pots of perennial herbs between vegetable beds. |
Rosemary, thyme, sage, oregano and marjoram are all Mediterranean herbs; they are comfortable in hot, cool, dry or moist conditions; they will appreciate both thick clay soils and sandier soils. In fact, I don't think I've met a soil they wouldn't grow in. Mints on the other hand prefer a cooler spot with more moisture, sandy soil doesn't suit them well. Different varieties of these herbs will grow in different ways also. If you're looking for a ground cover an option to consider is a creeping or spreading version of rosemary or thyme, or a standard version of oregano. All of these will stay low growing and spread over an area, they smell lovely and produce a sprinkling of tiny purple flowers in spring and summer. Choosing variegated, or odd colored varieties can add some excitement as well, like lemon thyme with it's yellow and green splashed leaves, or purple sage. For culinary use smell or taste the leaves of the plants before buying them to ensure they have the flavors you want as well as the look, woolly thyme for example is a spreading attractive ground cover but it is not as flavorful and therefore does not make a quality culinary herb. No one will mock you for nibbling the plants at the nursery, I promise.
If you are looking for more upright growth in your herbs (for use as a back row with a fronting of bulbs or annuals, or something similar) chives grow a lively bunch of bright green onion-like tops, sage comes in a variety of colors and has a silvery fuzz to it's leaves, a standard (non-spreading) rosemary can reach 4 feet tall and act as a hedge, lavender stays fairly small and makes a great perennial border, and most varieties of mint spread by underground runner and stand up to 18 inches high.
All of these herbs can be cut fresh with a pair of scissors and added to foods, teas, or used as fragrance. They can also be dried. To dry herbs hold a bunch of stems in your hand no bigger than you can wrap your index finger and thumb around (if your bunch is too large the center may not get adequate air flow and can mold), tie the ends together with a string, hang in a cool, dry place where they will get ventilation. Under the eaves of your porch, on a clothesline strung across your laundry room, wherever you can find the space. I hang my bunches from my pot rack over the island, if my stove were underneath it I wouldn't hang them there because the heat and moisture coming off the stove could ruin the herbs. Let them dry like that for a week or more, until the leaves are crisp and crumble under your fingers. If in doubt about whether they are dry enough, just let them hang longer until there is no doubt. Once they are totally dry you'll want to store them in airtight containers; either plastic bags stored in the freezer or in spice jars in the cabinet. Either way you will save a lot of space by stemming the herbs and giving them a quick grind with a mortar and pestle or spice grinder. you can continue to hang your herbs in their bunches but they will lose flavor faster and can get a build up of dust on them if left for long.
My favorite way to deal with my dried herbs is to throw together some Italian seasoning, one of the spice mixes I use most often. First I get my herbs all prepped for putting in jars or the freezer, then just mix together roughly equal parts rosemary, thyme, oregano, basil, and marjoram. Then store in a glass spice jar labeled Italian Seasoning. If this blend isn't to your taste you can also add in savory, or red pepper flakes if you prefer it a little spicy, some people also add garlic, onion, or parsley. I prefer to keep it a simple blend and add those extras only for certain dishes, or if I have no fresh onion or garlic.
 |
| 20 year old rosemary at Dad's, rhododendron behind. |
Thursday, January 19, 2012
And What To Do With All That Plenty... Pumpkin Muffin Recipe
This blog is intended to not only discuss gardening but to offer recipes and techniques for preserving your harvest. Since it is January and miserably dismal outside I'll take this time to share a recipe that can be done with already preserved pumpkins. While carving pumpkins are edible, they aren't very good to cook with, they can be cured and carved but I recommend Sugar Pie, Rouge Vif de'Tempes (Cinderella) or another eating variety of pumpkin for roasting. Roasting and preserving directions also apply to any hard-rinded winter squash.
There are a few ways to keep pumpkins once they are harvested: one is to cure them. If the skins of the pumpkin are undamaged (scarring is fine, but no fresh scrapes or cuts) you can cure it by letting it sit in a warm, dry area where it won't get damaged. If skins have fresh damage you will have to roast and process them immediately. If you notice blemishes in the skin or mold growth your pumpkin isn't curing properly and needs to be processed into the freezer or canned immediately. Remove any areas that appear to have mold or spoilage. Then follow the process for roasting.
If the skins toughen and the stems dry brown in about 10 days, your pumpkin has safely cured and will keep like this for several months.
Roasting: You can roast your pumpkins directly after harvest, or cure them and roast them at a later date. If you have a big harvest I can pretty much guarantee you will be sick of roasting pumpkins long before you are done, so cure as many as possible. Curing pumpkins also increases their Vitamin A content. Cut off any damaged areas of the fruit, cut it in half or quarters (depending on size) to fit in roasting pan. Scrape out seeds and guts, discard guts; you can either add the seeds to your compost pile, dry them for planting next year, or roast them for eating. Preheat your oven to about 350F. Depending on what you intend to do with your pumpkin it may be worthwhile to butter or season the halves before roasting. For pie, and other sweet making, I like to sprinkle the raw pumpkin with pumpkin pie spice. Then roast in the oven for 1-2 hours or more, depending on the size of the pumpkin, until the meat is tender. Let cool for half an hour, then scrape the meat away from the rind. Use a blender or stick blender to puree the pumpkin meat until smooth. Lastly, place puree in a colander lined with cheesecloth for 15-20 minutes to drain out excess water (this can be done later, such as after defrosting if you choose to freeze the puree). The resulting puree can then be used right away in any pumpkin recipe, about two and a half cups is equivalent to a can of Libby pumpkin puree from the store; or it can be frozen for later use, generally in 3 or 4 cup containers. I have never tried canning pumpkin because I don't have a pressure canner and have a healthy fear of botulism, but I'm sure it's possible.
So that is how to process pumpkins (and other winter squashes). Here is a fabulously delicious recipe for your home grown pumpkin that my family will gobble up before it even cools. I don't remember where the recipe came from so if someone knows my source please let me know so I can give credit where it is due.
Pumpkin Muffins - preheat oven to 350F
1 1/2 cups flour
1 tsp. baking powder
2 cups pumpkin puree
1/3 cup vegetable oil
2 lg. eggs
1 1/4 cups sugar
1/2 tsp. salt
1 tsp. pumpkin pie spice
1/2 tsp. baking soda
1 tsp. cinnamon
Stir together flour, baking powder, salt, spice, baking soda, and cinnamon. In separate bowl, mix puree, oil, eggs, and sugar until well blended. Gently fold together wet and dry ingredients until well moistened. (As with all muffins, stir gently or the muffins will become tough). Scoop into muffin cups about 2/3 full. Bake at 350F 25-30 minutes. Serve warm with butter. Makes 1 dozen.
There are a few ways to keep pumpkins once they are harvested: one is to cure them. If the skins of the pumpkin are undamaged (scarring is fine, but no fresh scrapes or cuts) you can cure it by letting it sit in a warm, dry area where it won't get damaged. If skins have fresh damage you will have to roast and process them immediately. If you notice blemishes in the skin or mold growth your pumpkin isn't curing properly and needs to be processed into the freezer or canned immediately. Remove any areas that appear to have mold or spoilage. Then follow the process for roasting.
If the skins toughen and the stems dry brown in about 10 days, your pumpkin has safely cured and will keep like this for several months.
Roasting: You can roast your pumpkins directly after harvest, or cure them and roast them at a later date. If you have a big harvest I can pretty much guarantee you will be sick of roasting pumpkins long before you are done, so cure as many as possible. Curing pumpkins also increases their Vitamin A content. Cut off any damaged areas of the fruit, cut it in half or quarters (depending on size) to fit in roasting pan. Scrape out seeds and guts, discard guts; you can either add the seeds to your compost pile, dry them for planting next year, or roast them for eating. Preheat your oven to about 350F. Depending on what you intend to do with your pumpkin it may be worthwhile to butter or season the halves before roasting. For pie, and other sweet making, I like to sprinkle the raw pumpkin with pumpkin pie spice. Then roast in the oven for 1-2 hours or more, depending on the size of the pumpkin, until the meat is tender. Let cool for half an hour, then scrape the meat away from the rind. Use a blender or stick blender to puree the pumpkin meat until smooth. Lastly, place puree in a colander lined with cheesecloth for 15-20 minutes to drain out excess water (this can be done later, such as after defrosting if you choose to freeze the puree). The resulting puree can then be used right away in any pumpkin recipe, about two and a half cups is equivalent to a can of Libby pumpkin puree from the store; or it can be frozen for later use, generally in 3 or 4 cup containers. I have never tried canning pumpkin because I don't have a pressure canner and have a healthy fear of botulism, but I'm sure it's possible.
So that is how to process pumpkins (and other winter squashes). Here is a fabulously delicious recipe for your home grown pumpkin that my family will gobble up before it even cools. I don't remember where the recipe came from so if someone knows my source please let me know so I can give credit where it is due.
 |
| Pumpkin muffin, served warm with butter is best. |
Pumpkin Muffins - preheat oven to 350F
1 1/2 cups flour
1 tsp. baking powder
2 cups pumpkin puree
1/3 cup vegetable oil
2 lg. eggs
1 1/4 cups sugar
1/2 tsp. salt
1 tsp. pumpkin pie spice
1/2 tsp. baking soda
1 tsp. cinnamon
Stir together flour, baking powder, salt, spice, baking soda, and cinnamon. In separate bowl, mix puree, oil, eggs, and sugar until well blended. Gently fold together wet and dry ingredients until well moistened. (As with all muffins, stir gently or the muffins will become tough). Scoop into muffin cups about 2/3 full. Bake at 350F 25-30 minutes. Serve warm with butter. Makes 1 dozen.
Subscribe to:
Posts (Atom)